Twig Christmas Wreath Ornament Craft

I don’t know what it is about Christmas but it is my most craftiest time of year. All I want to do is make shirts, gift tags, ornaments, wreaths and pretty much everything else. Today I am sharing one of my favorite Holiday DIY Crafts with you. I’m showing you how to make a Christmas Twig Wreath that will get you right in the holiday spirit!
Crafty Christmas: Twig Christmas Ornaments!
‘Tis the season to be jolly, and what better way to usher in the festive cheer than by indulging in a DIY crafting session! Today, we’re going to journey into nature’s own treasure trove and create a whimsical Christmas ornament made entirely out of twigs. Yes, you heard it right: twigs!
Why twigs?
- Eco-Friendly: With sustainability at the core, using twigs for crafting ensures that we aren’t adding to the commercial clutter, but rather turning to Mother Nature for inspiration.
- Unique: No two twigs are alike, which means each ornament will be distinctive and special.
- Easy & Accessible: A stroll in the park or your backyard is all you need to gather your materials.
This one is is not made for kids but you can certainly let the kids help! My favorite part of crafts is that it allows me to be creative without a screen. It’s can be downright therapeutic to work with your hands to create something beautiful!
This craft is fun because it uses twigs, felt paper and some more fun items. You can use it as decor around the house, and we all know you can never have enough holiday decor am I right?!
Tips:
- Create multiple twig ornaments and give them as sustainable gifts to friends and family.
- Get the kids involved. It’s a fun way to teach them about sustainability and creativity.
- Explore! Add mini bells, sequins, or ribbons to make your tree even more festive.
In a world that’s rapidly moving towards the digital, let’s take a step back this festive season. With just a handful of twigs, a splash of creativity, and a sprinkle of holiday spirit, you can create a memorable ornament that captures the essence of Christmas. Happy crafting and happy holidays!
What are some other fun Christmas crafts to try?
- Grinch Christmas Cricut Craft
- Rae Dunn Inspired Christmas Ornaments | Cricut Craft
- DIY Holiday Craft | Beaded Wire Christmas Tree Ornament
- Snowman & Elf Bookmark Christmas Craft + More Fun Holiday Kid Craft Ideas
- Fun & Easy Disney Frozen DIY Bookmark Craft For Kids
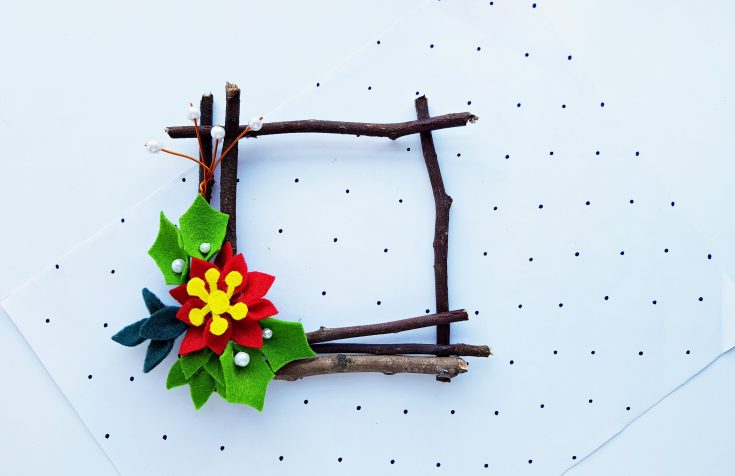
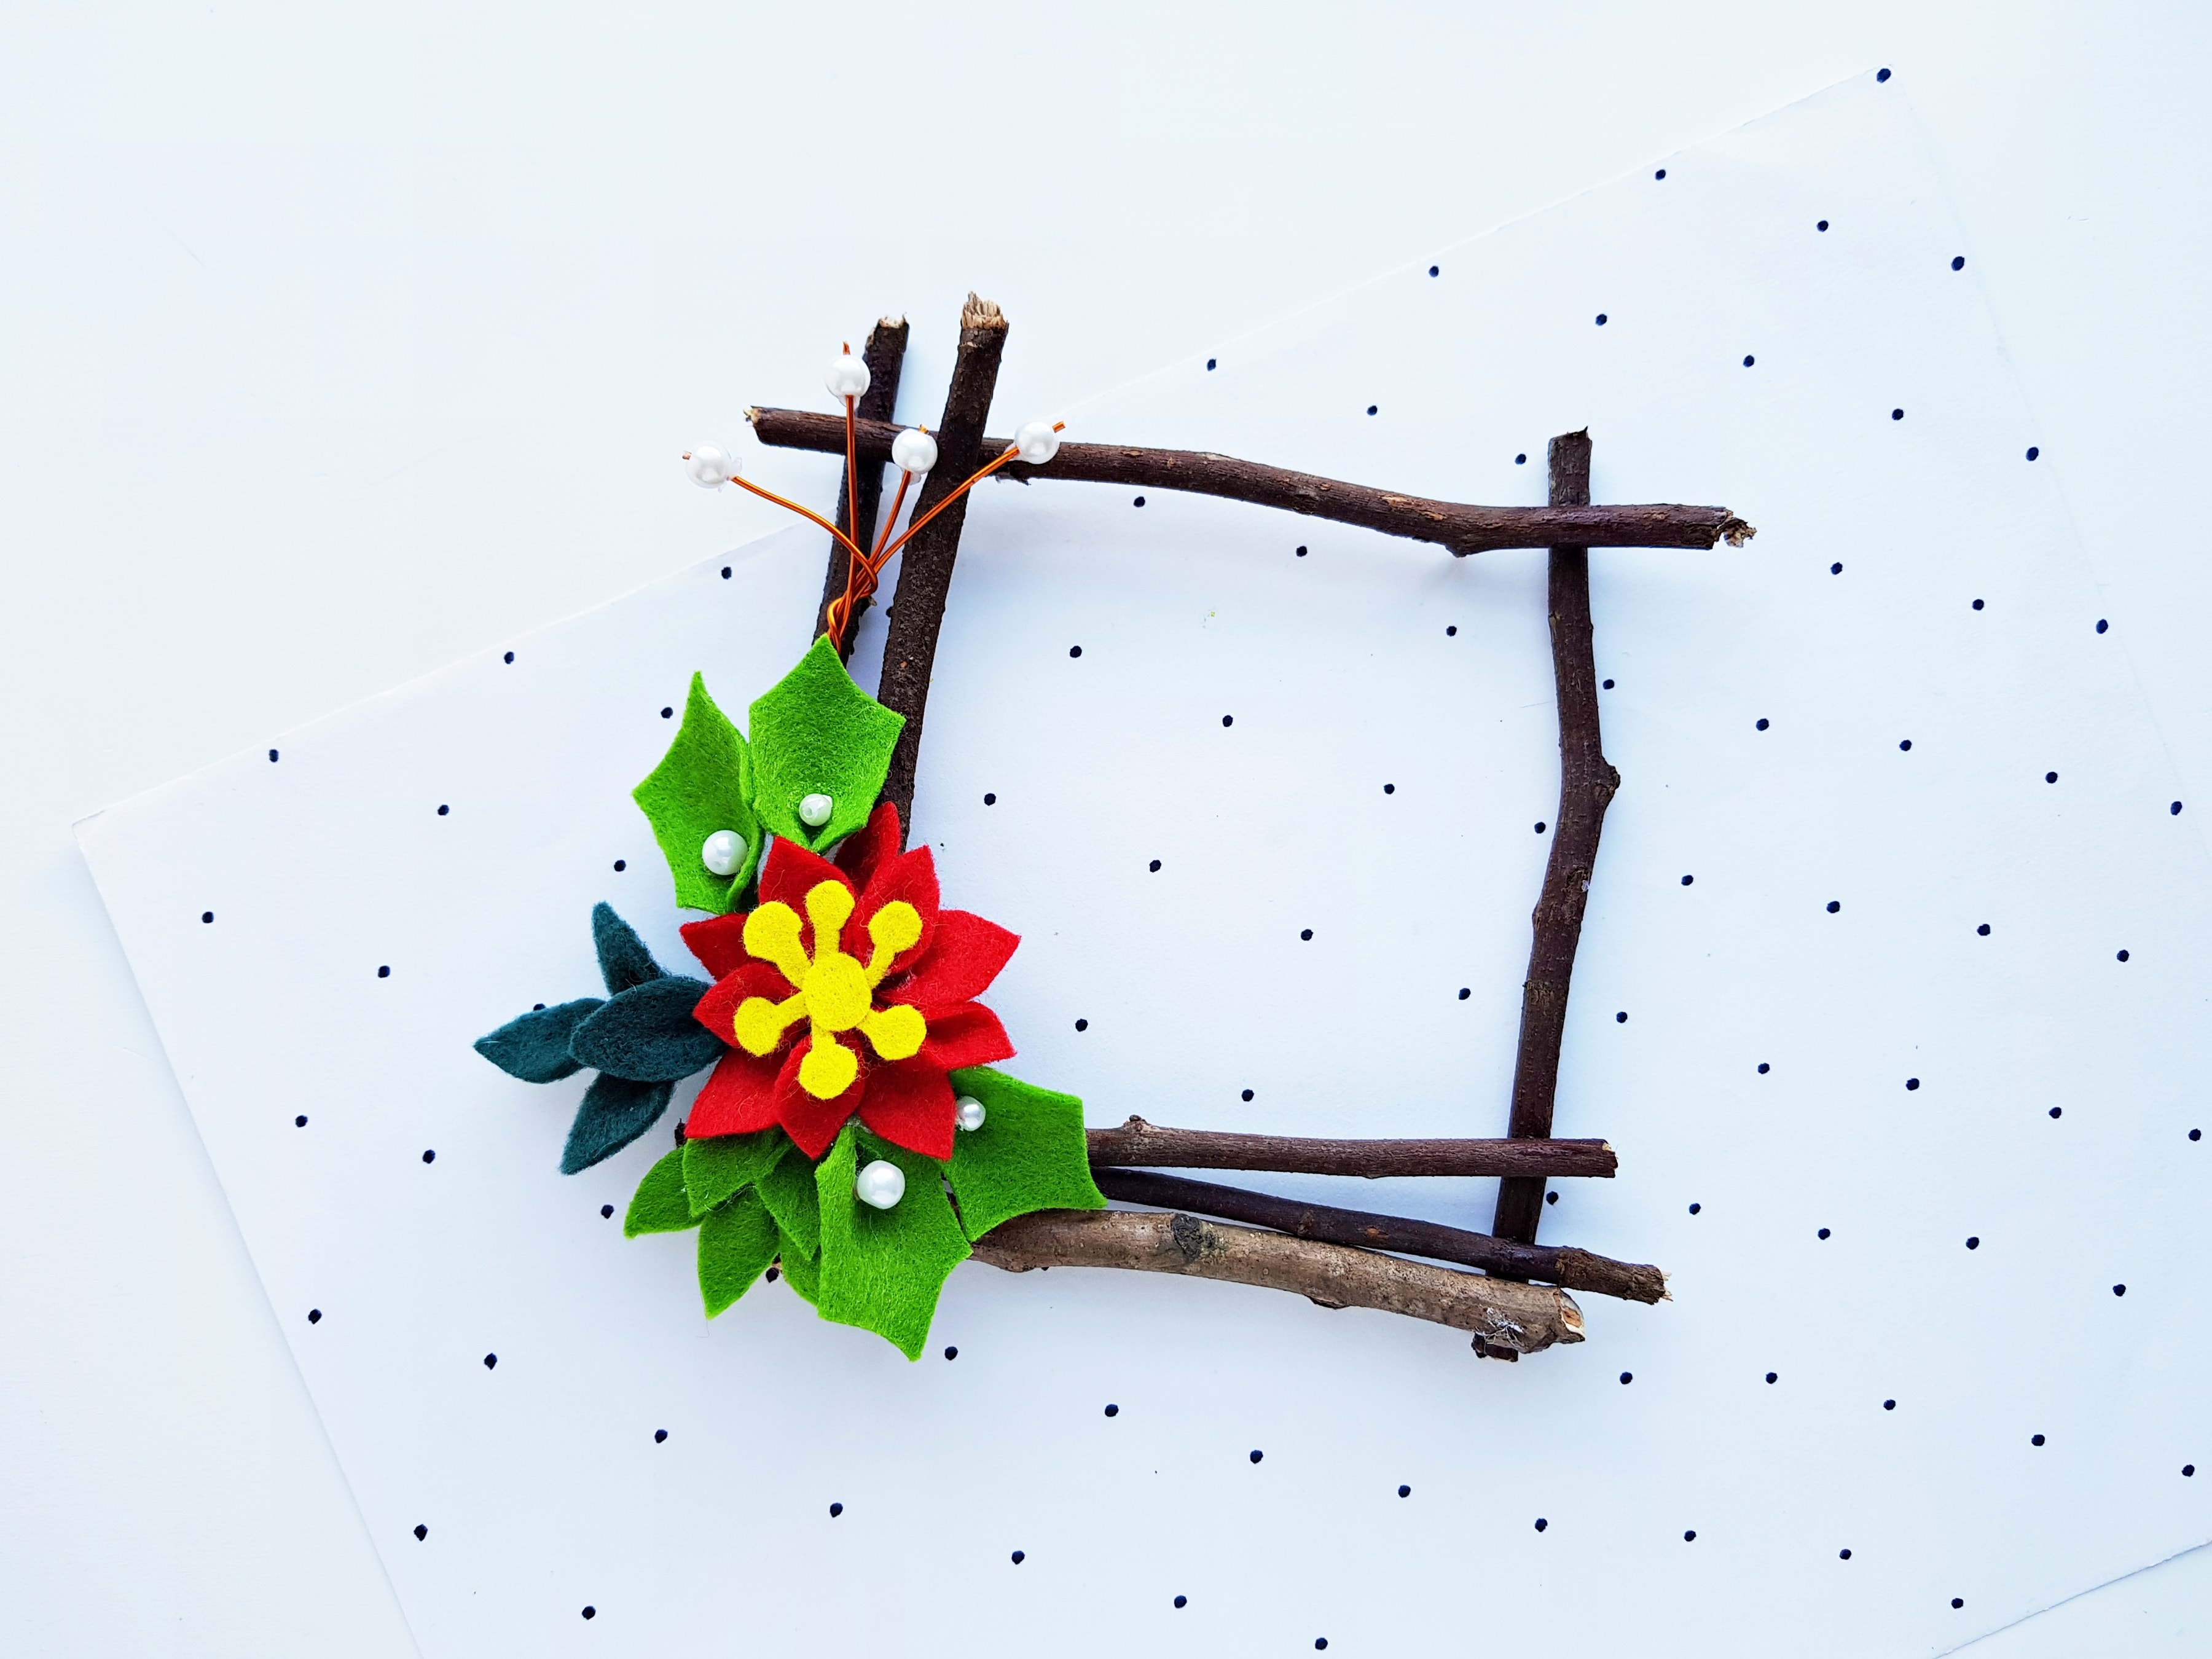
DIY Square Wreath Ornament Christmas Craft
A super cute and fun wreath holiday craft that can be made into an adorable ornament for a Christmas tree.
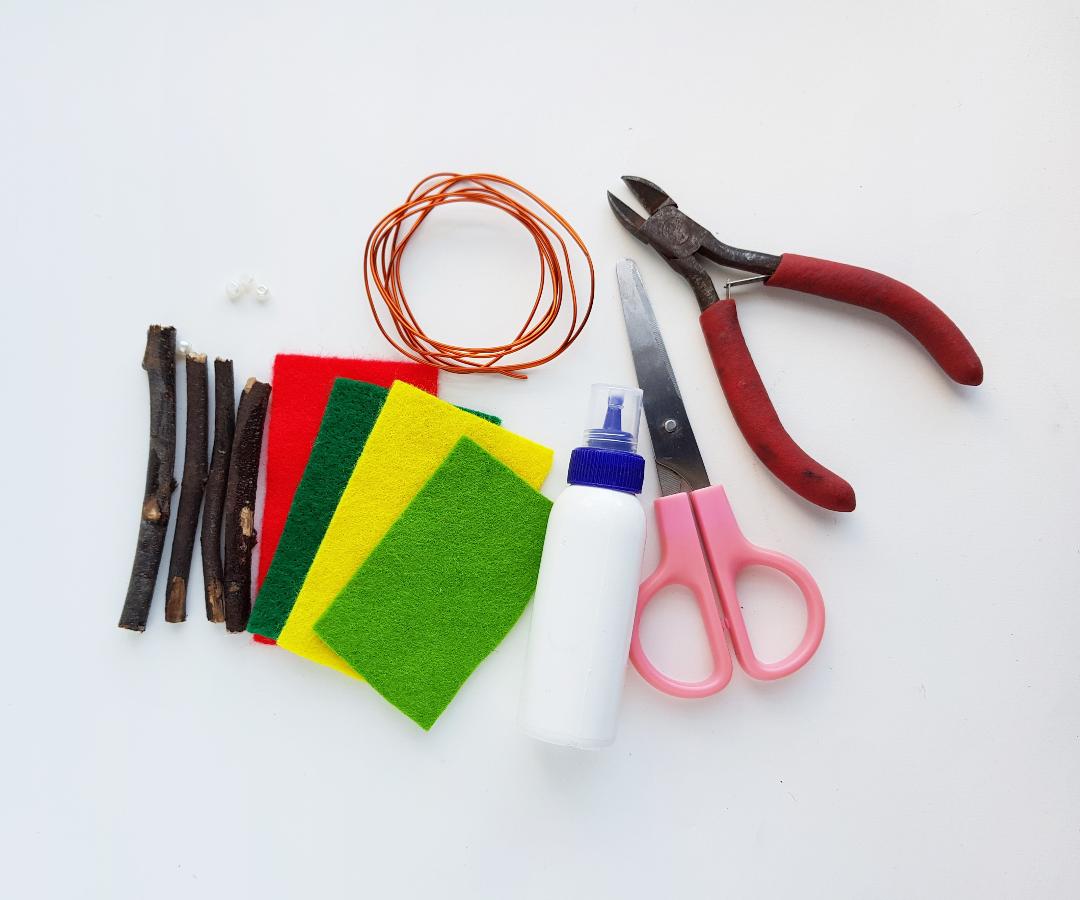
Materials
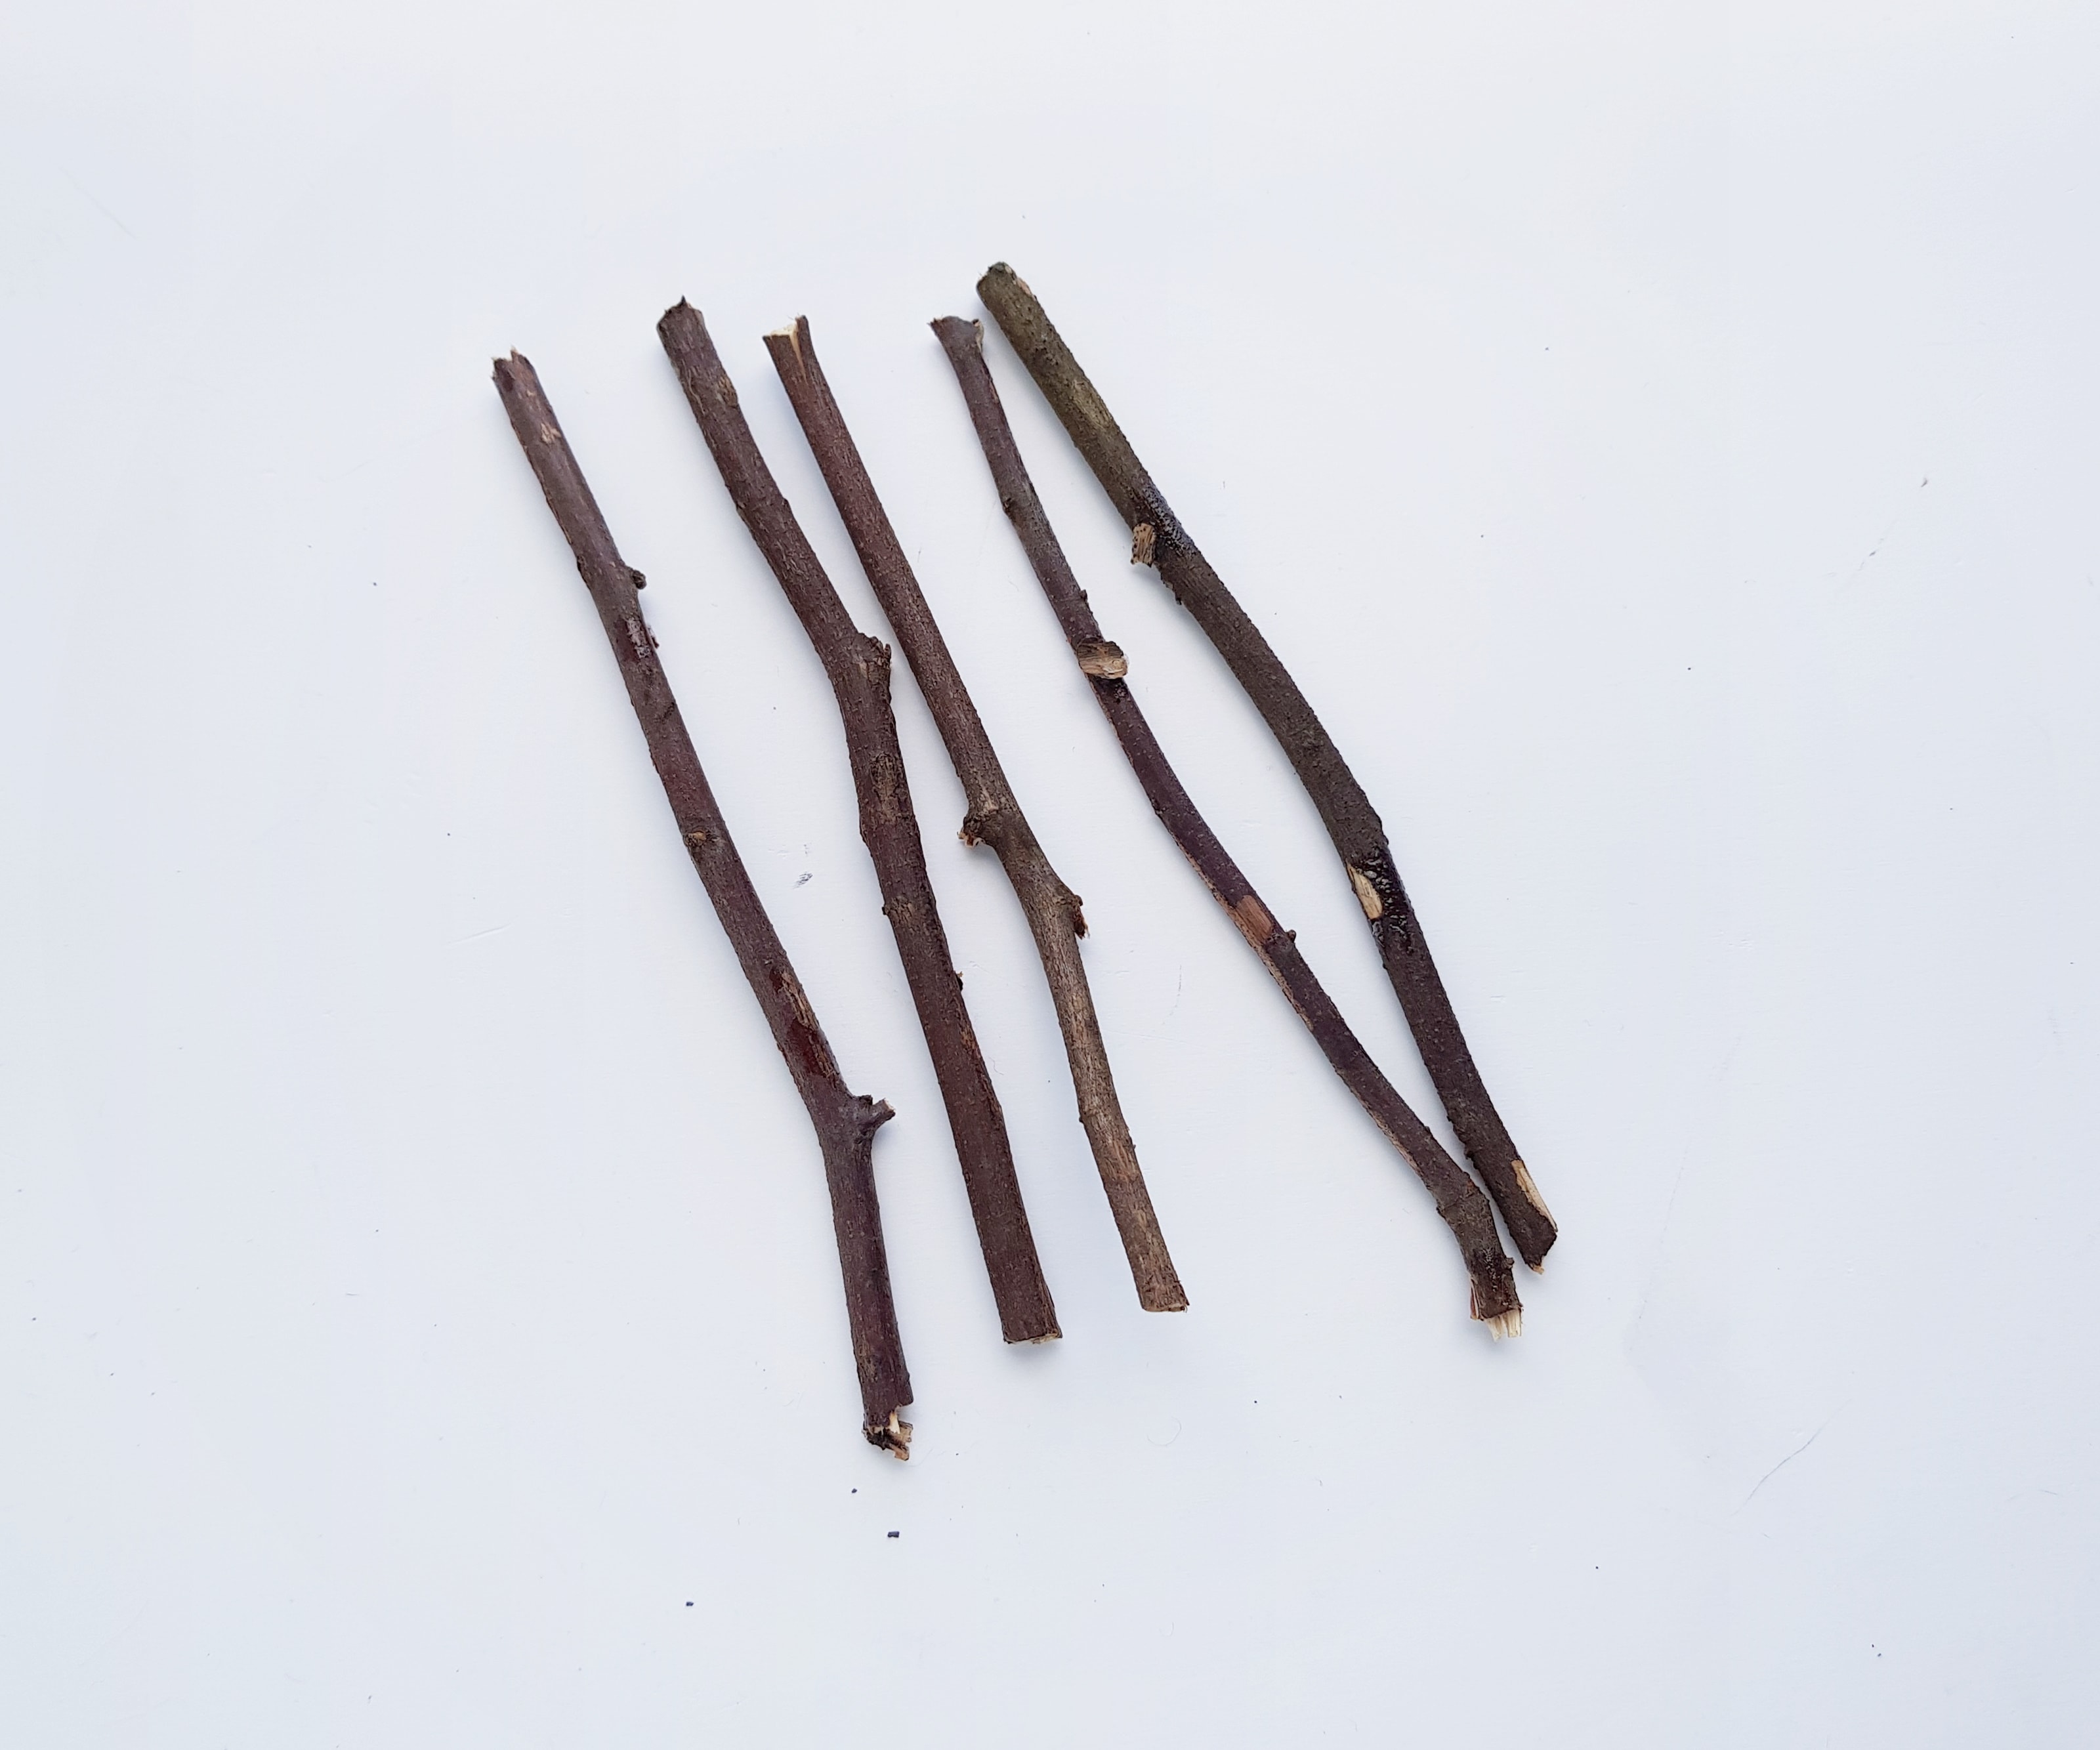
- 1. Dry twigs
- 2. Felt fabric
- 3. Beads
- 4. Craft wire
Tools
- 1. Scissors
- 2. Craft glue
- 3. Cutting pliers
- 4. Pencil
Instructions
Step -1:
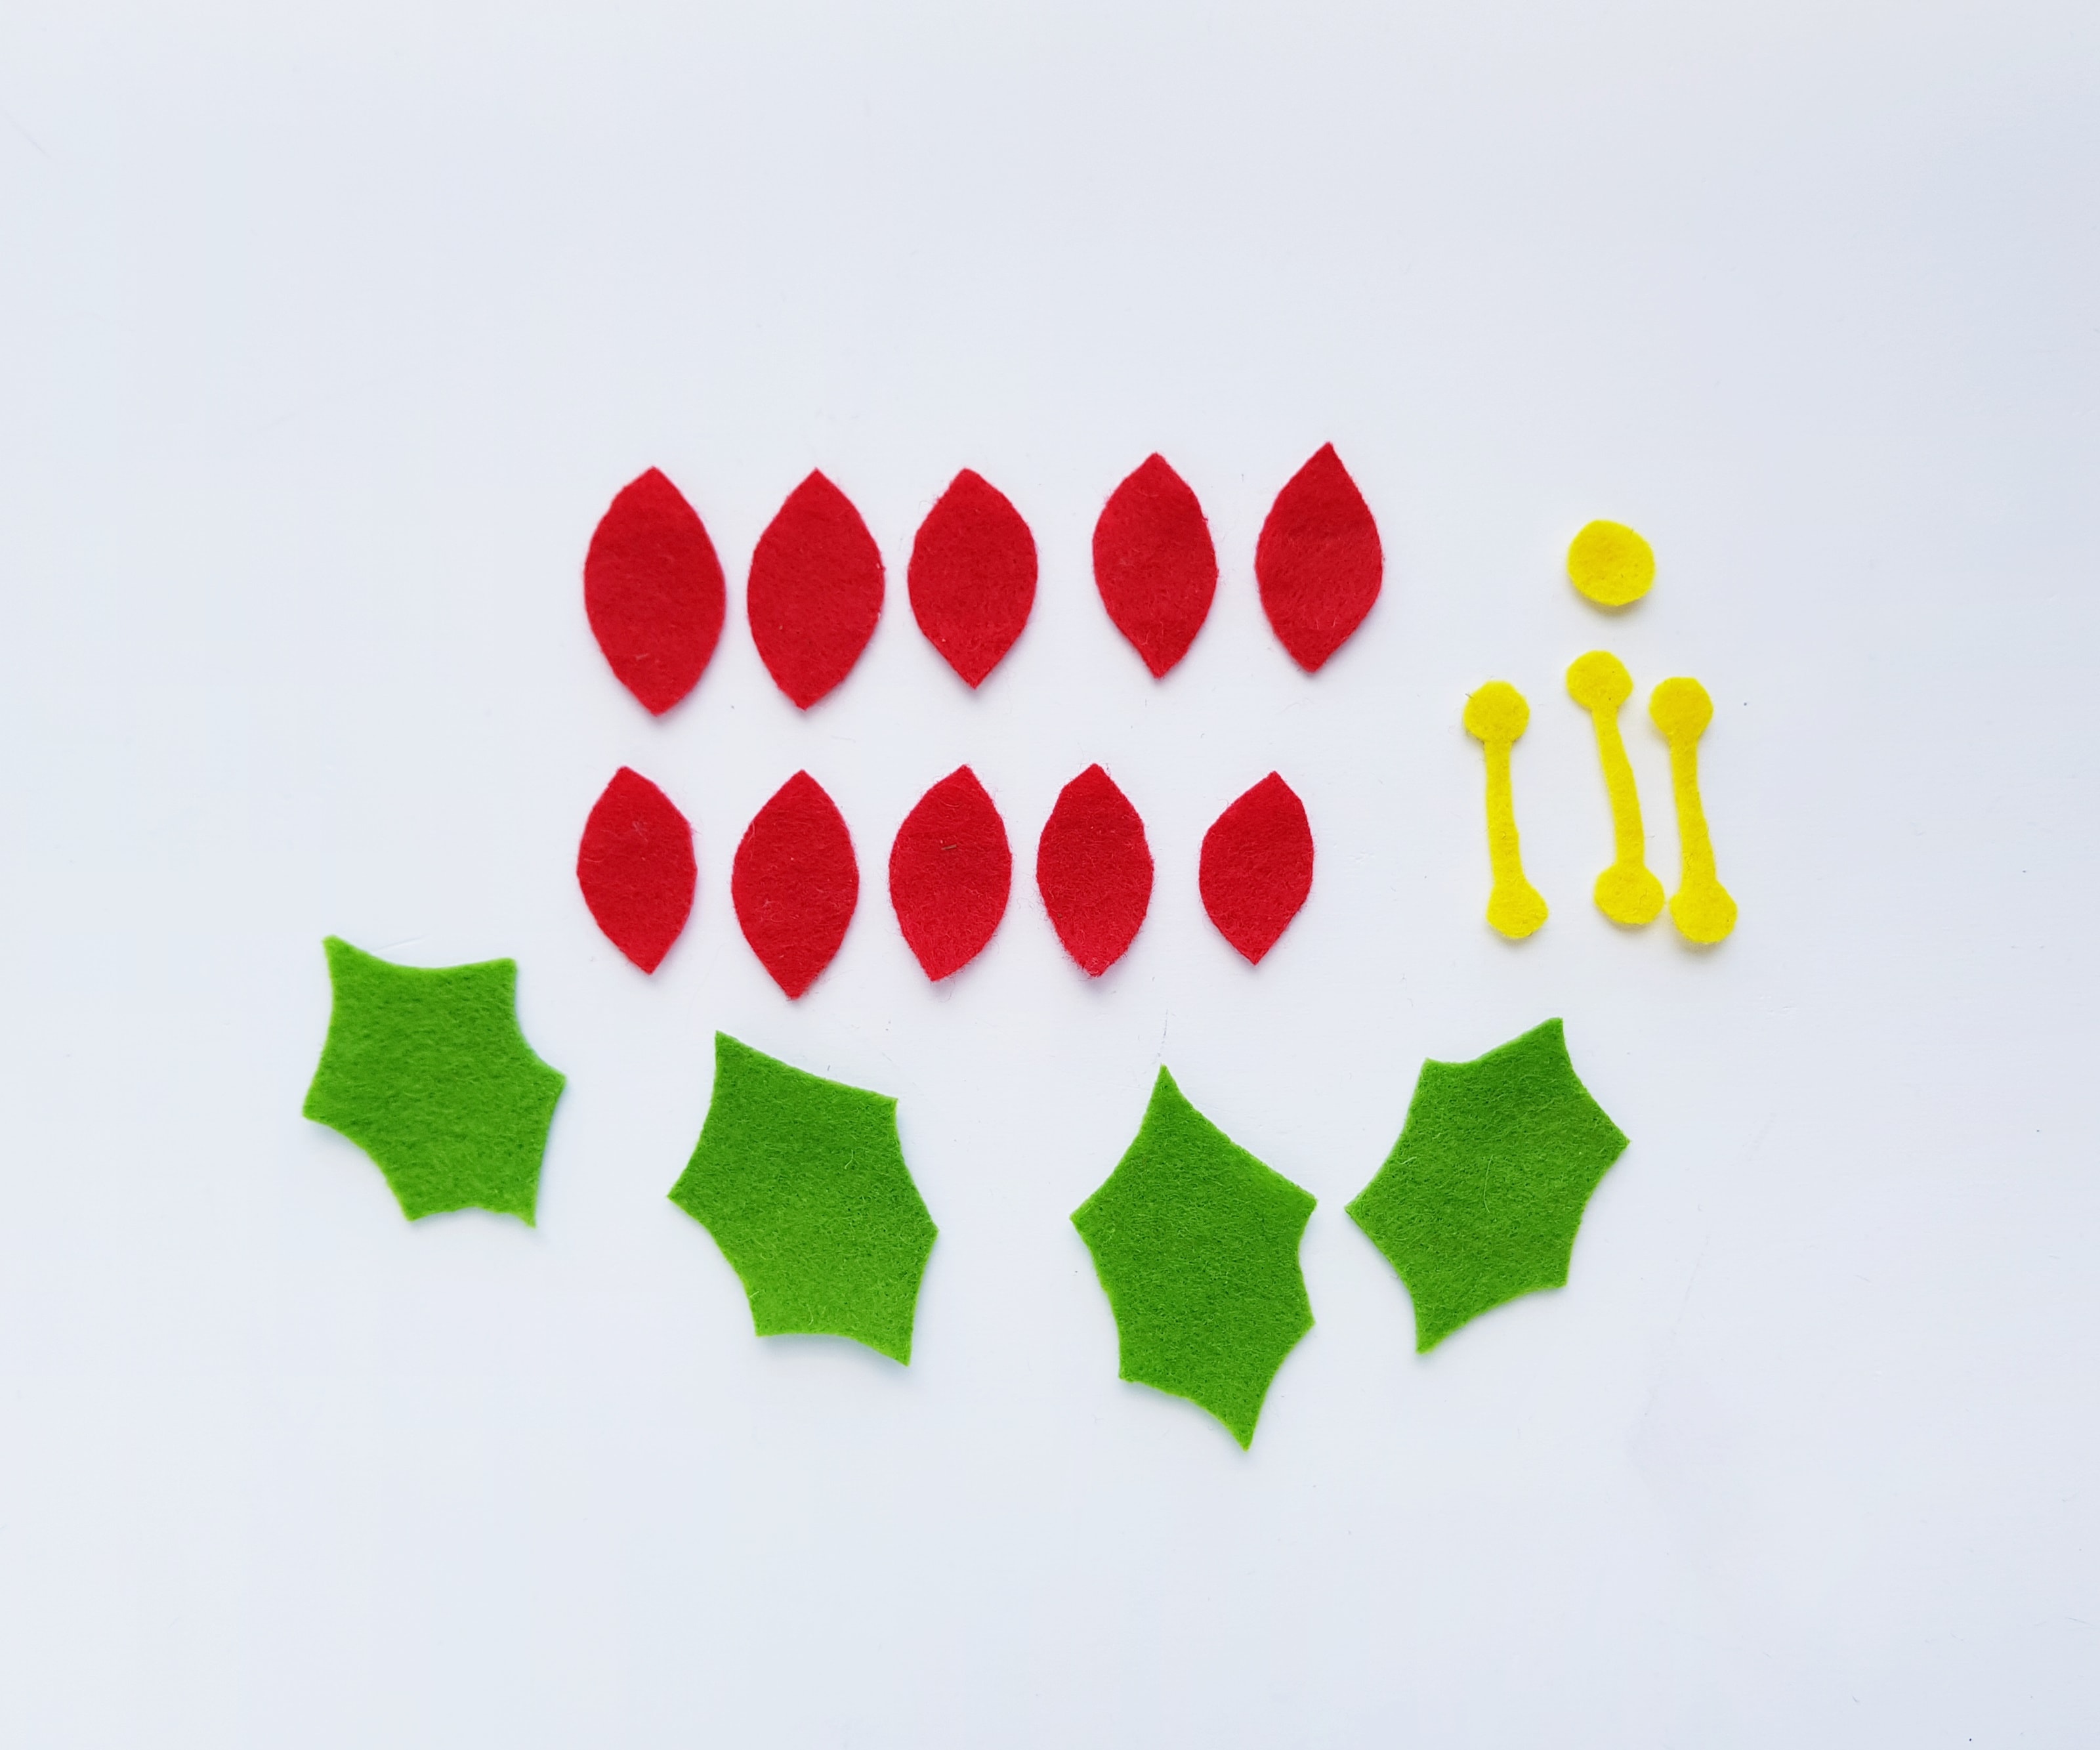
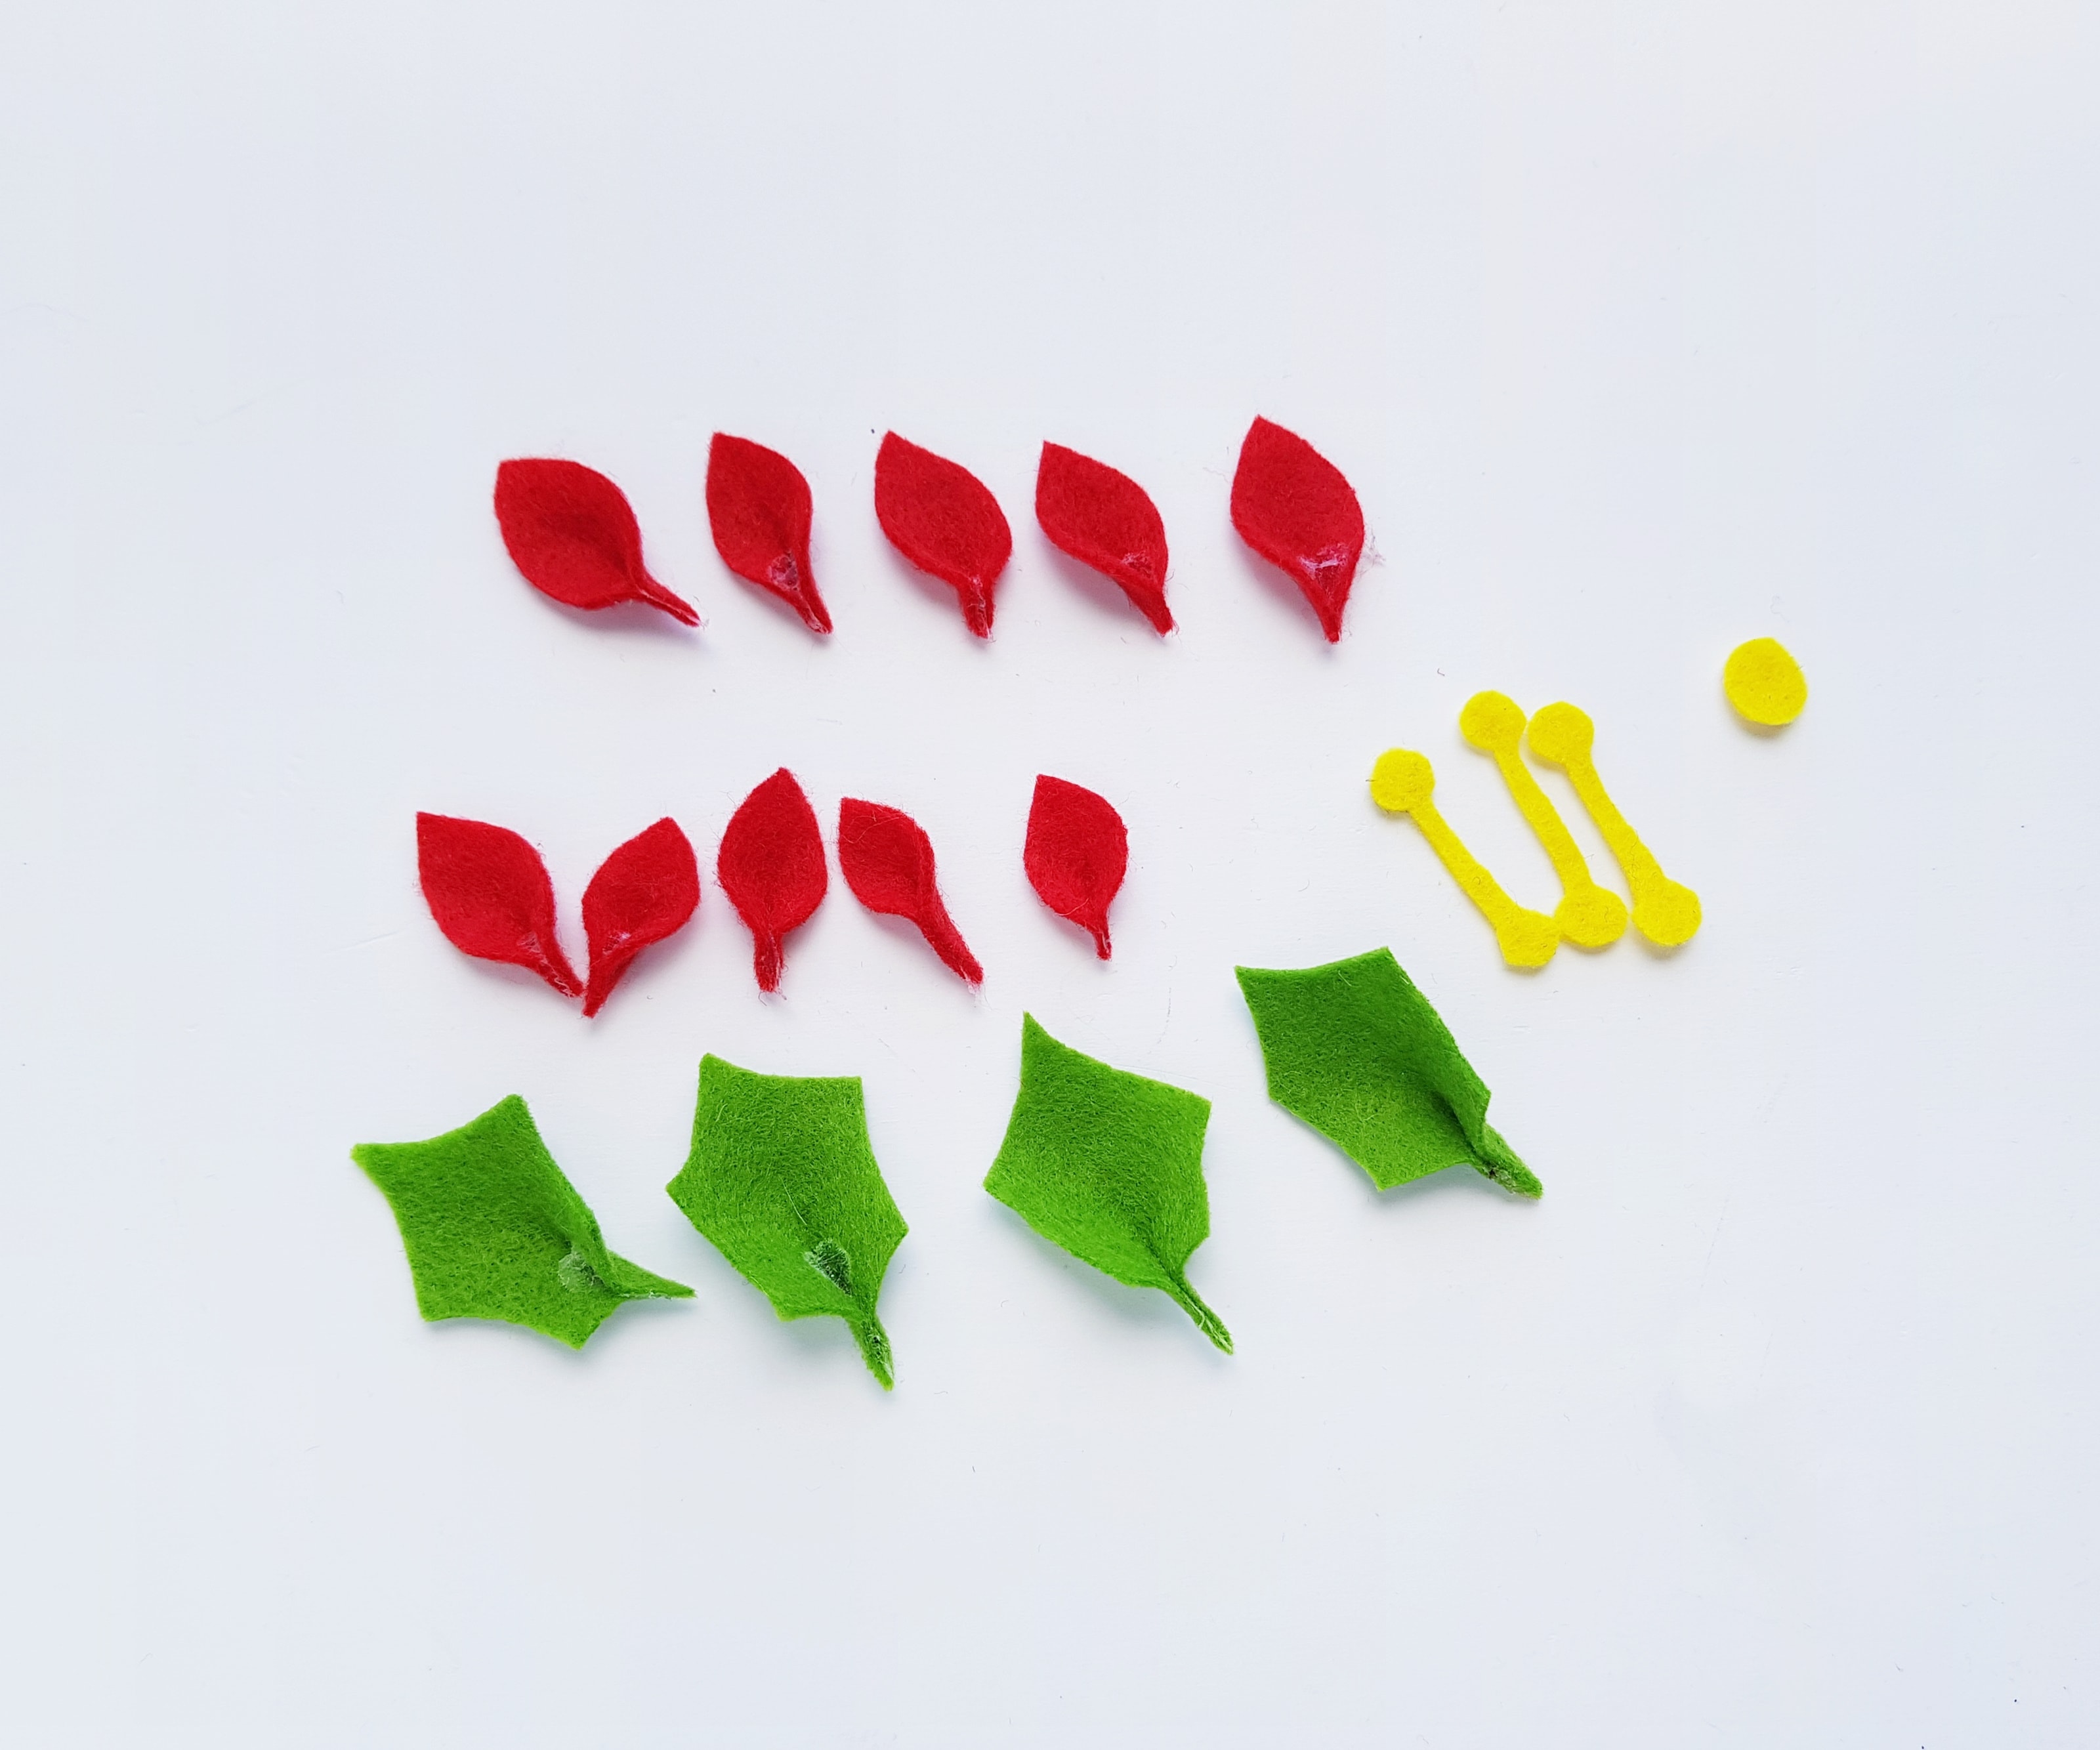
Select red, green and yellow felt fabric for the flower.
Trace and cut out 10 lens shape petals from the red felt.
Trace and cut out leaf patterns from the green felt and a small round shape form yellow felt.
Trace 3 small strips with ball shaped sides on yellow felt and cut them out nicely. The size of the petals and the 3 yellow patterns should be relatively the same and size of the leaves can be the same or larger than the petals.
Step - 2:
Make a thin fold along the middle line of the petals and leaves and glue half way along the middle fold. This gives the petals and leaves a 3d look.
Step - 3:
Cut out a round base from nay colored felt as you want for the flower. 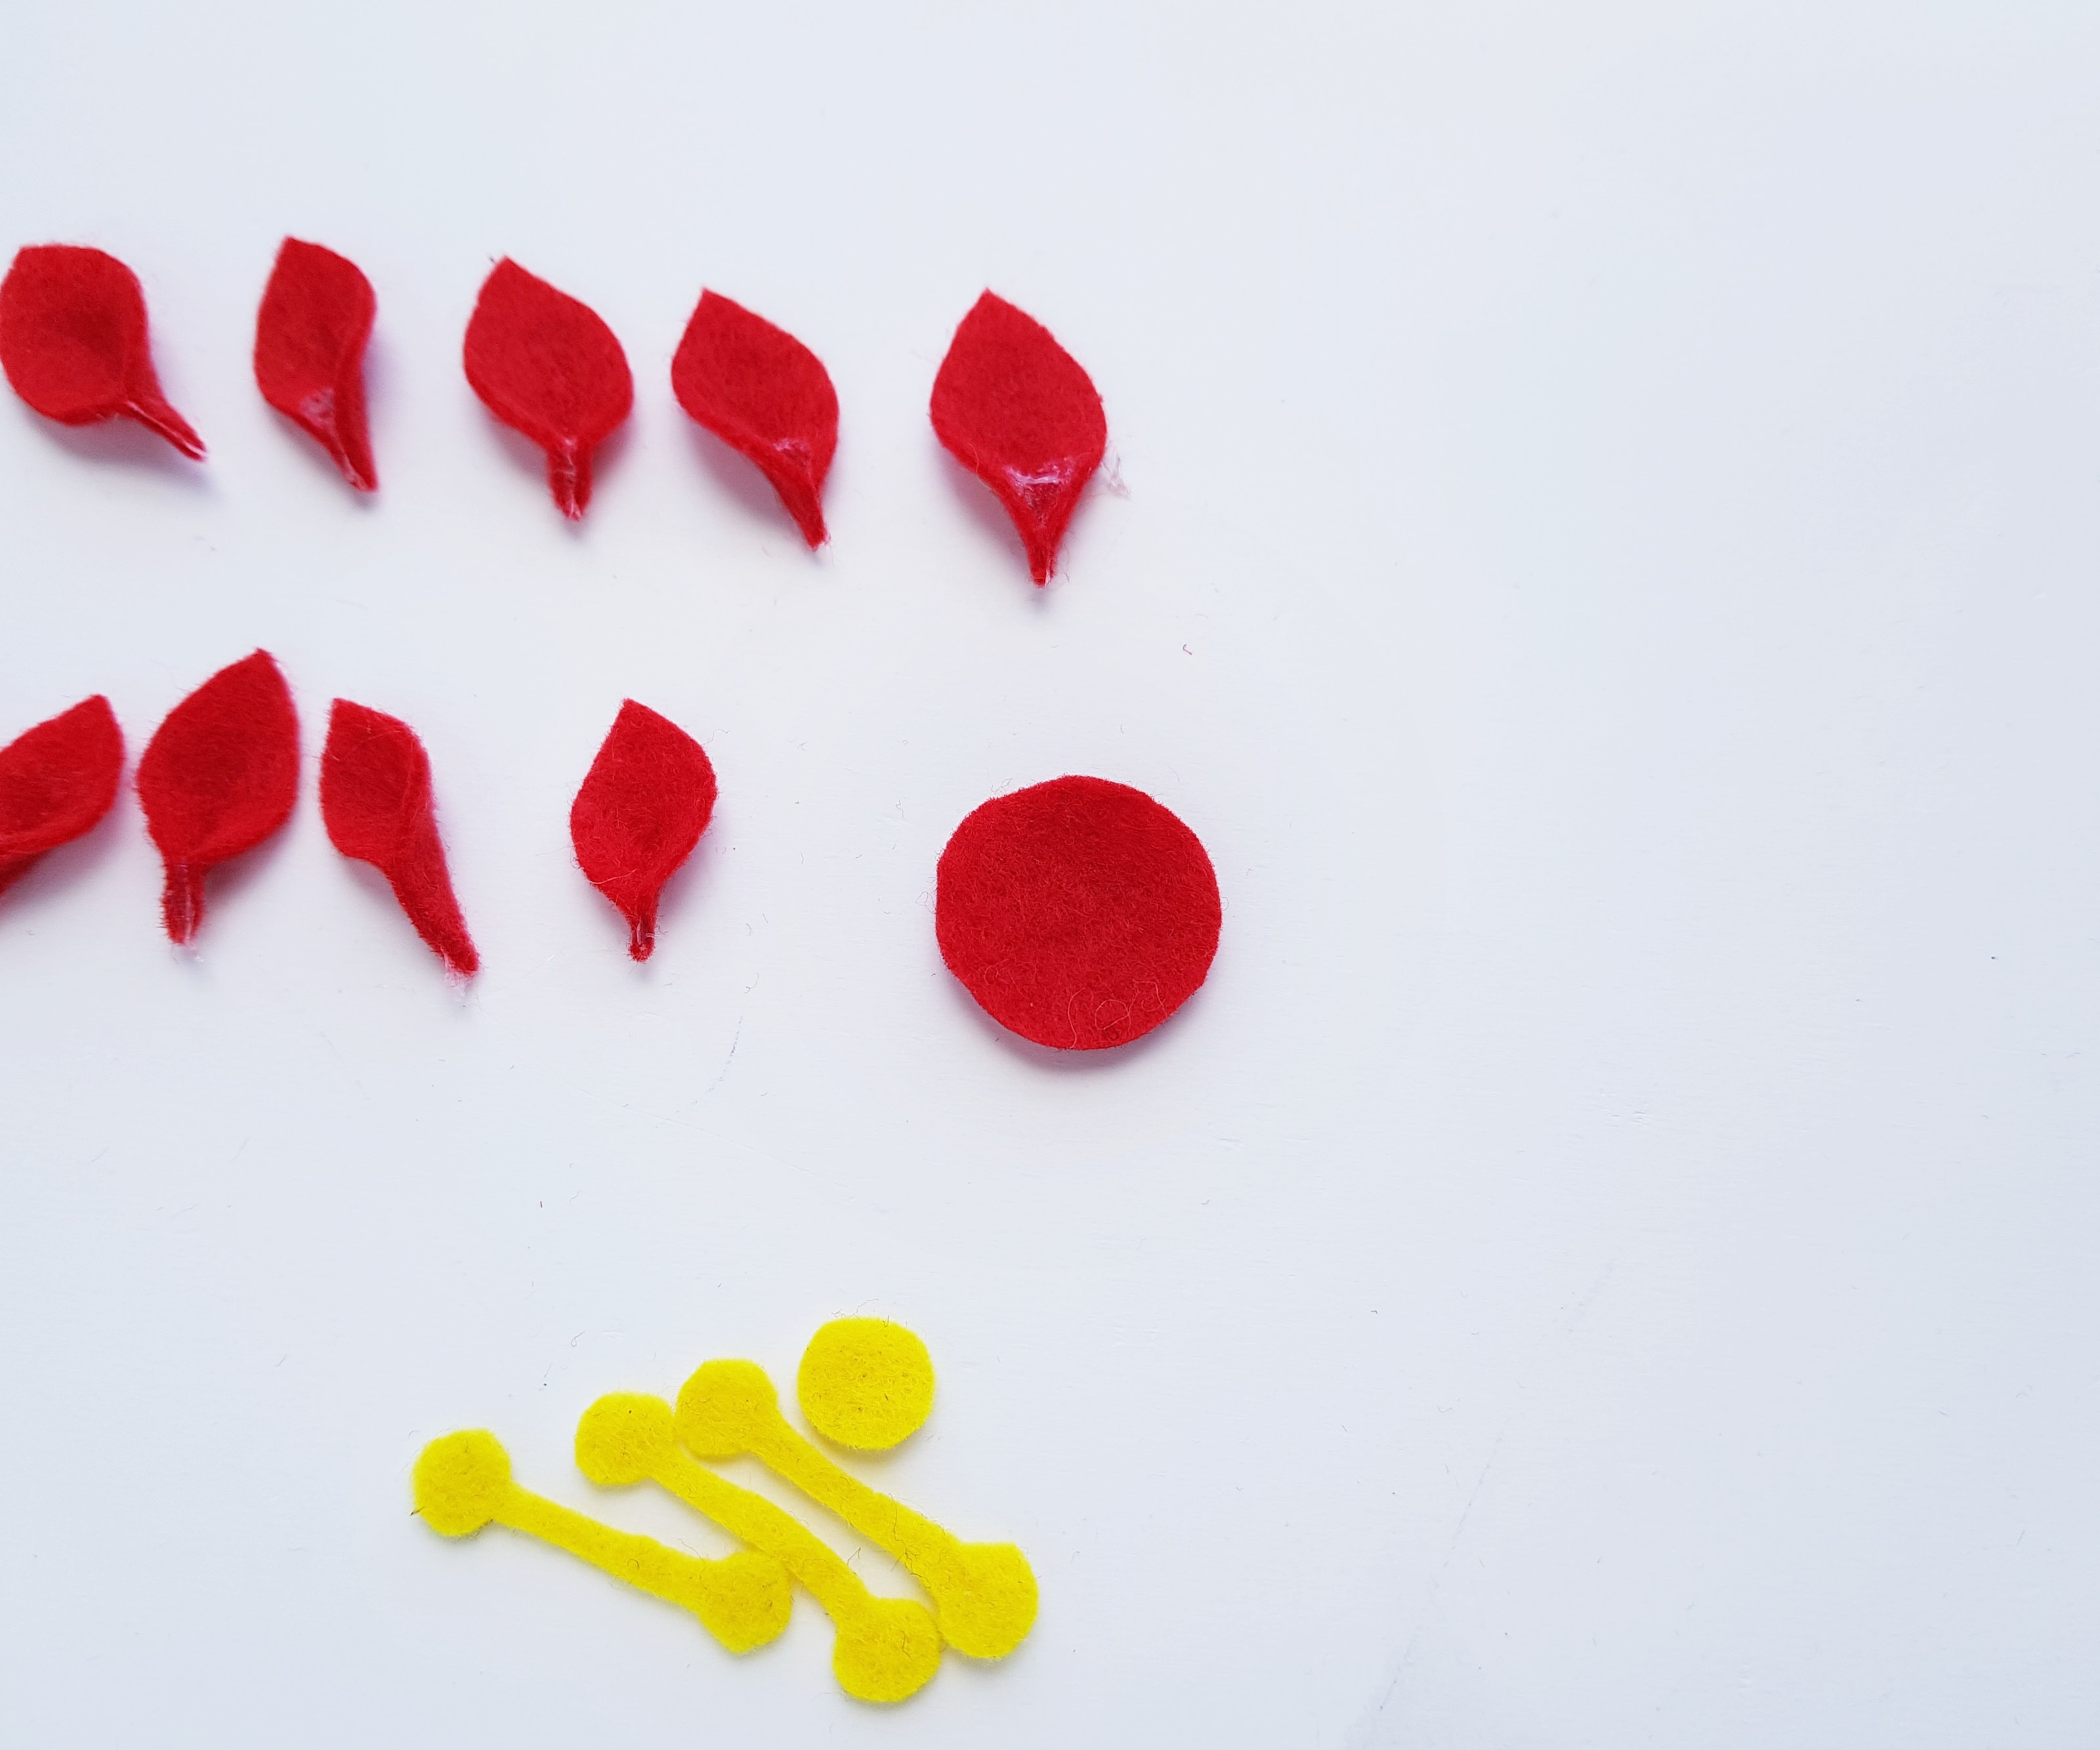
Step - 4:
Attach 5 petals around the outer edge of the base, keeping the open ends of the petals facing outwards.

Step - 5:
Now attach the rest of the petals on the base, inside the previous outer layer of petals; keeping the closed ends of the petals on the center of the base.

Step - 6:
Now attach the 3 yellow patterns on the centre, by placing them criss-cross wise. And then attach the small yellow circle on the centre to complete the flower.

Step - 7:
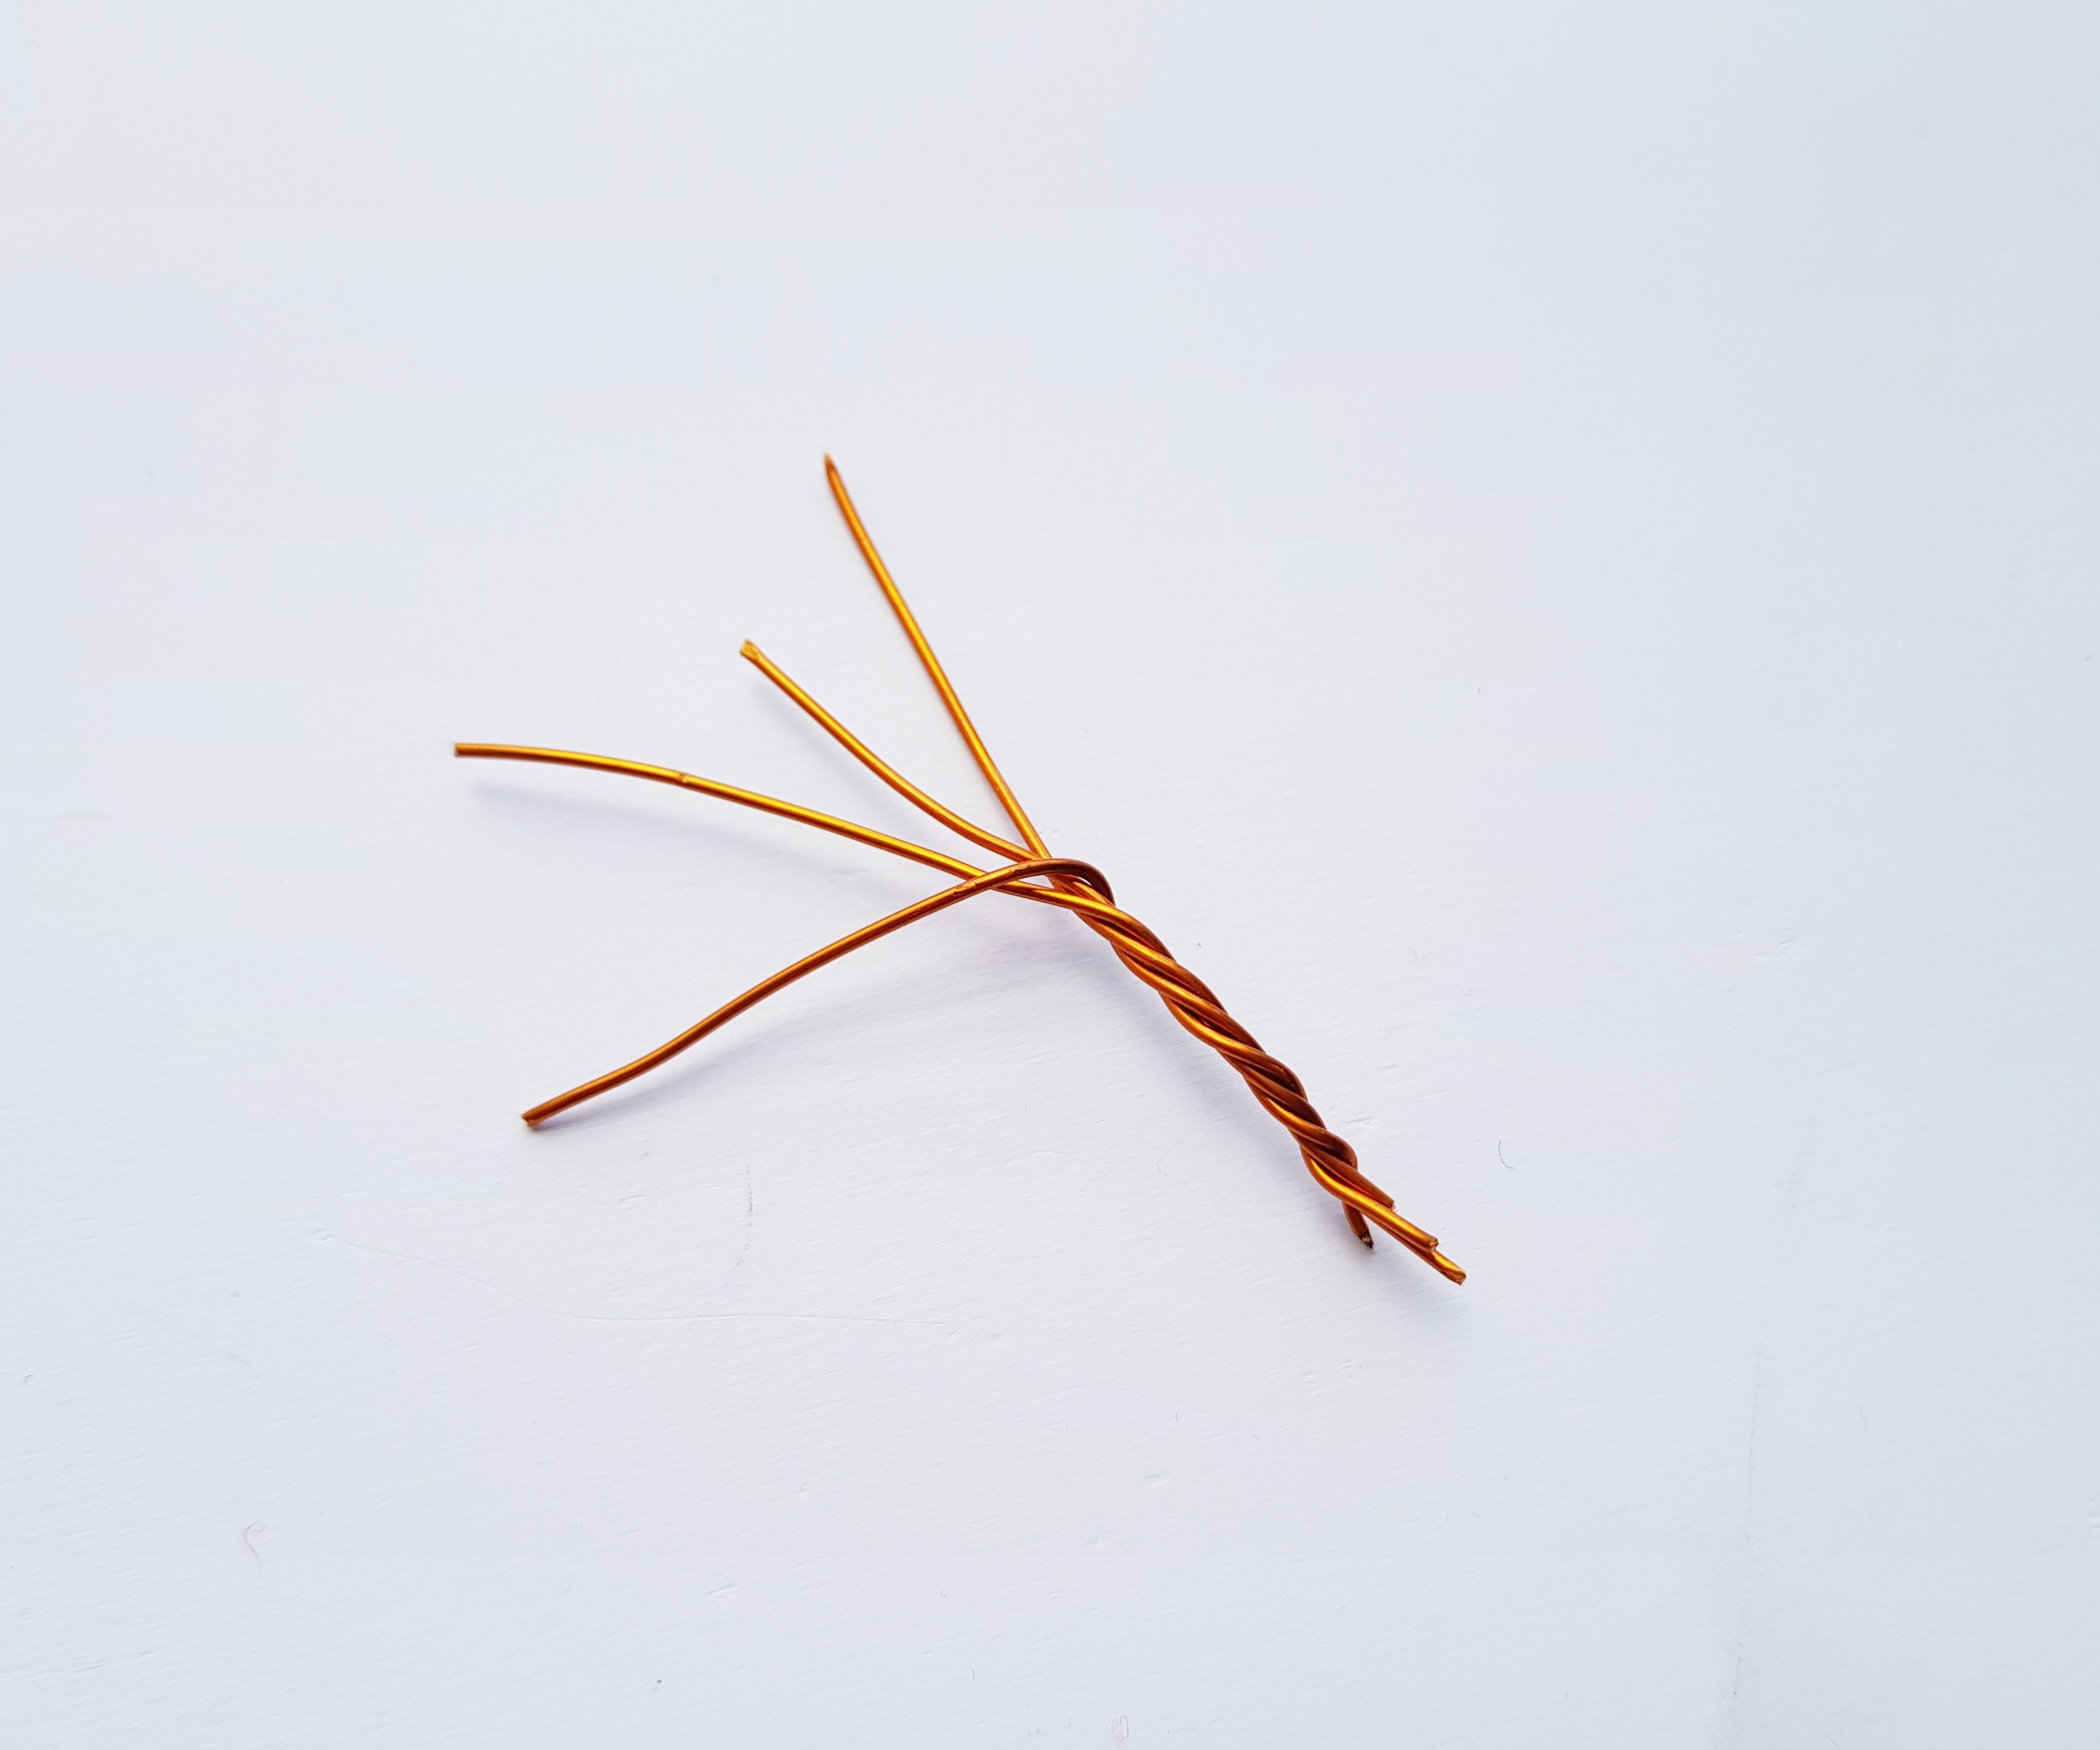
Cut out 4 or more small pieces of wire and twist them all together halfway through their length.
Step - 8:
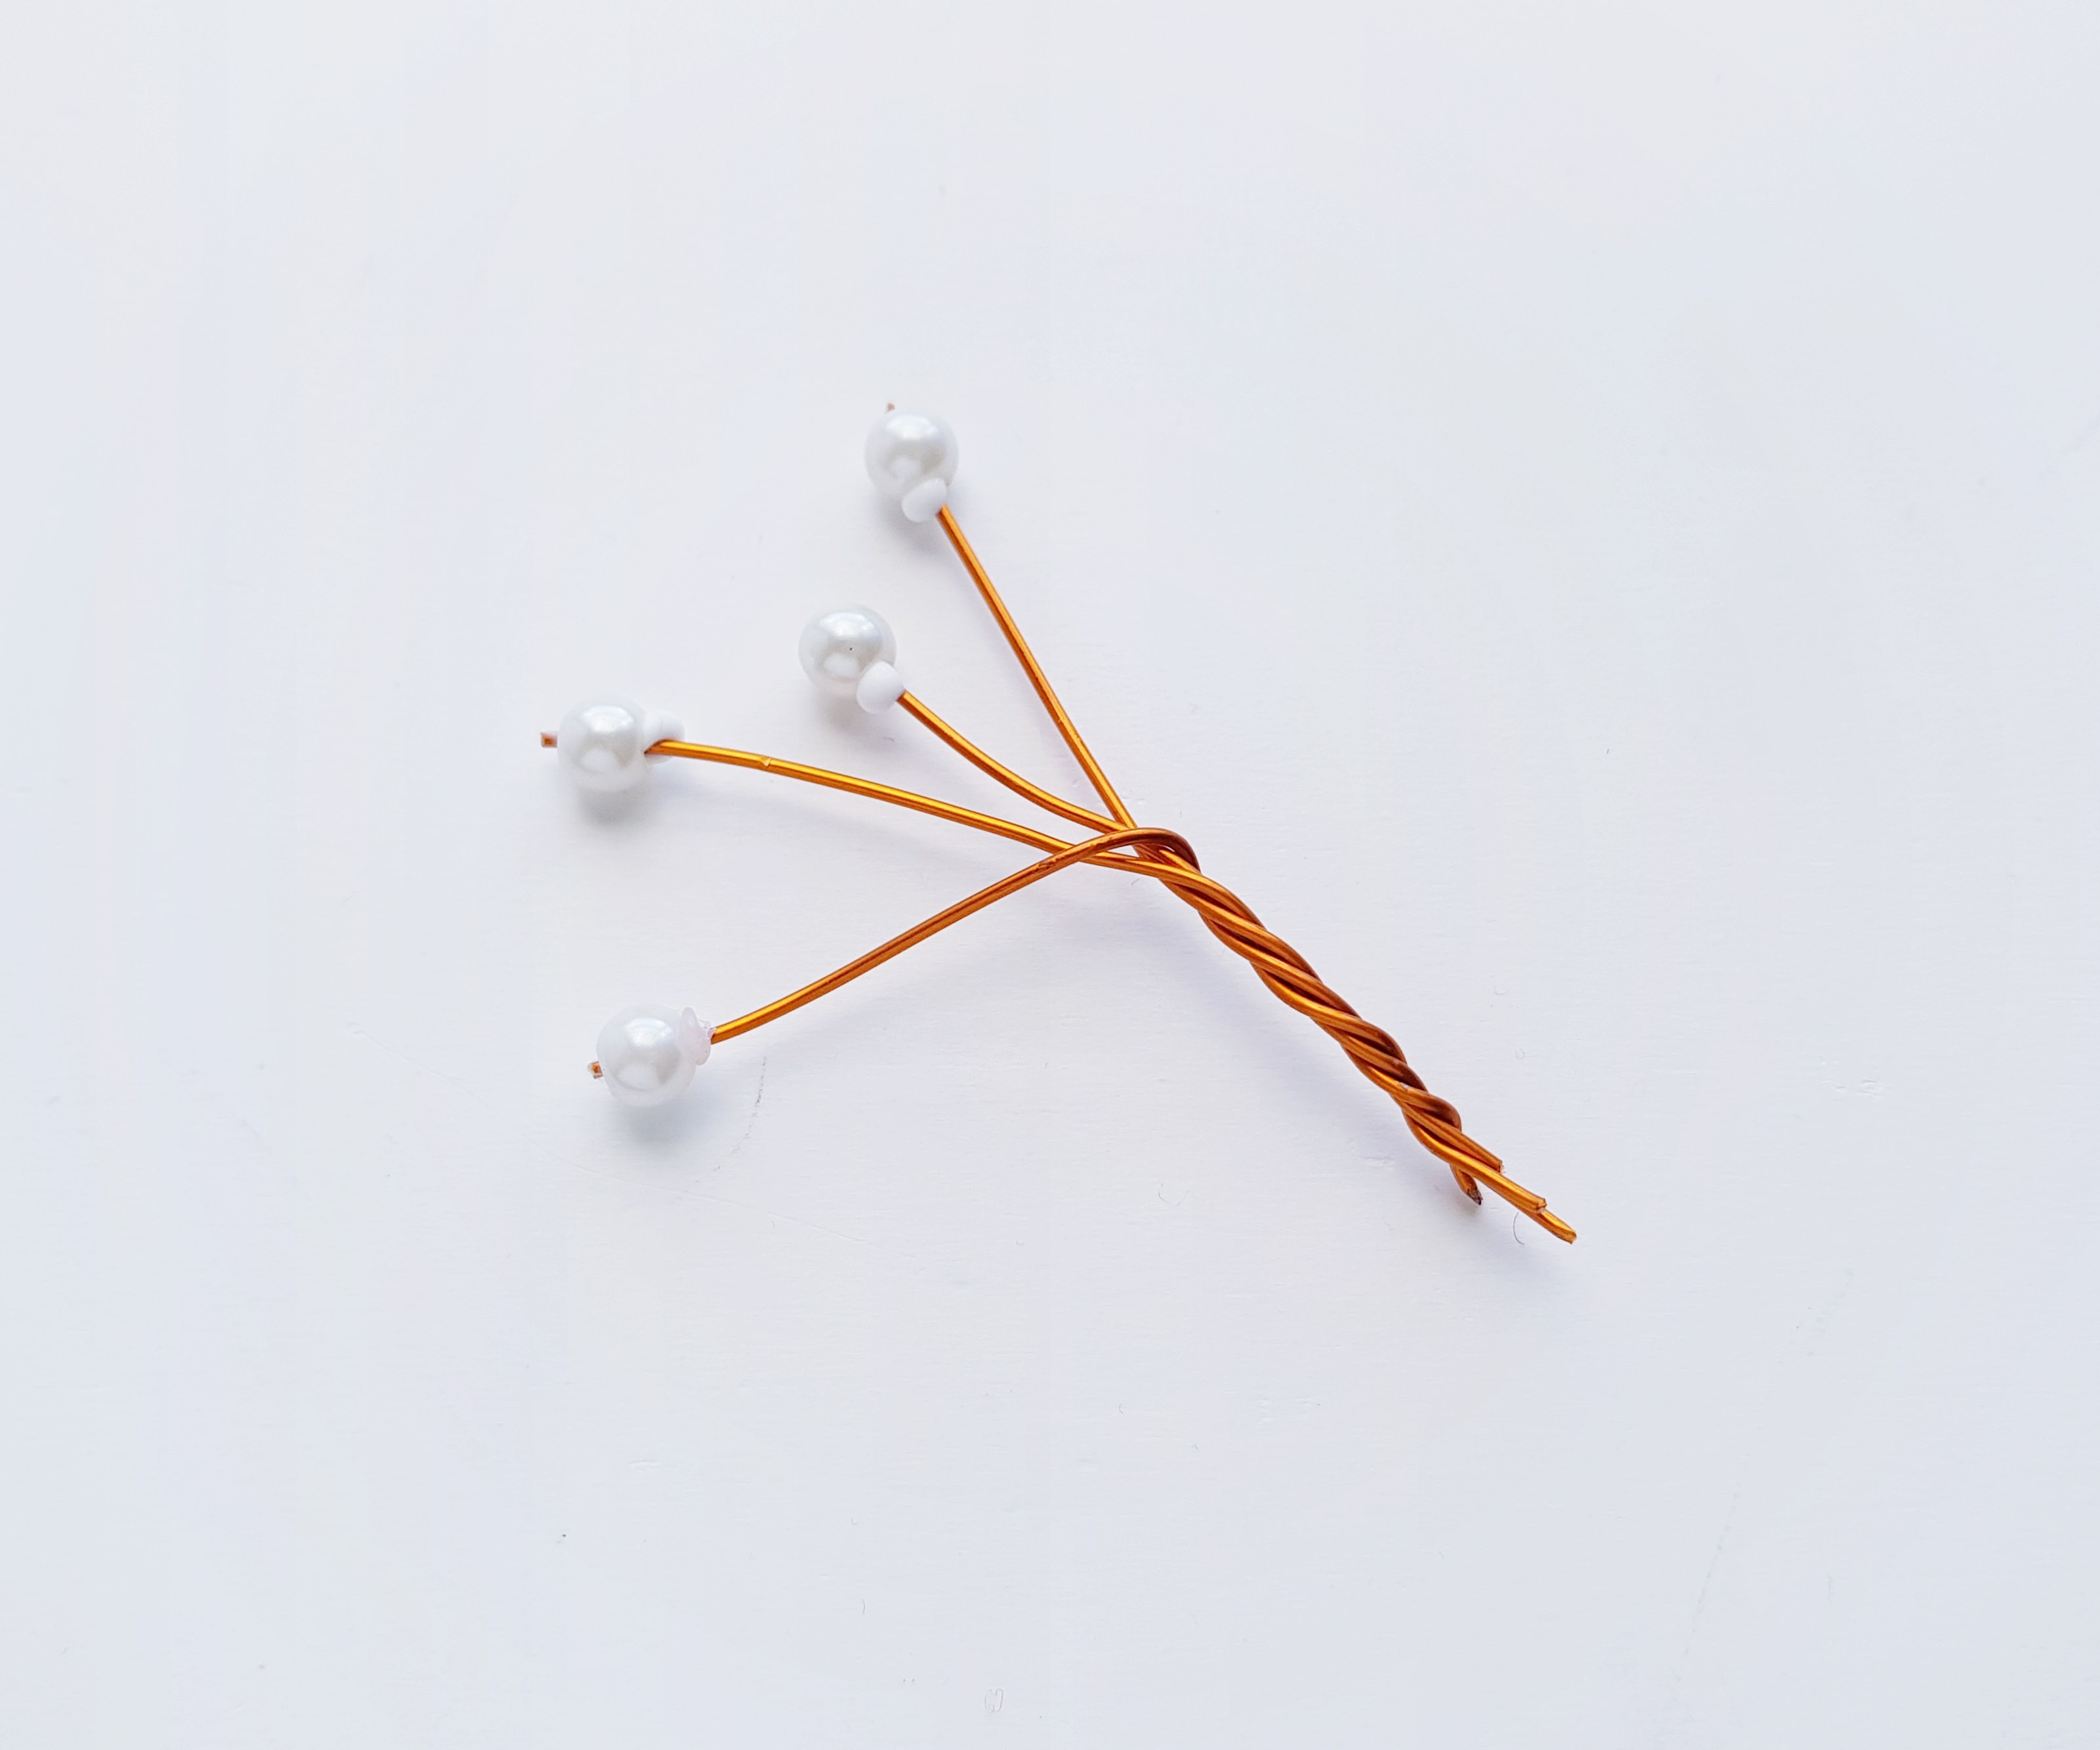
Attach small beads on the edge of each of the wire’s open end.
Step - 9:
Determine the size of the wreath and cut out dry twigs accordingly.
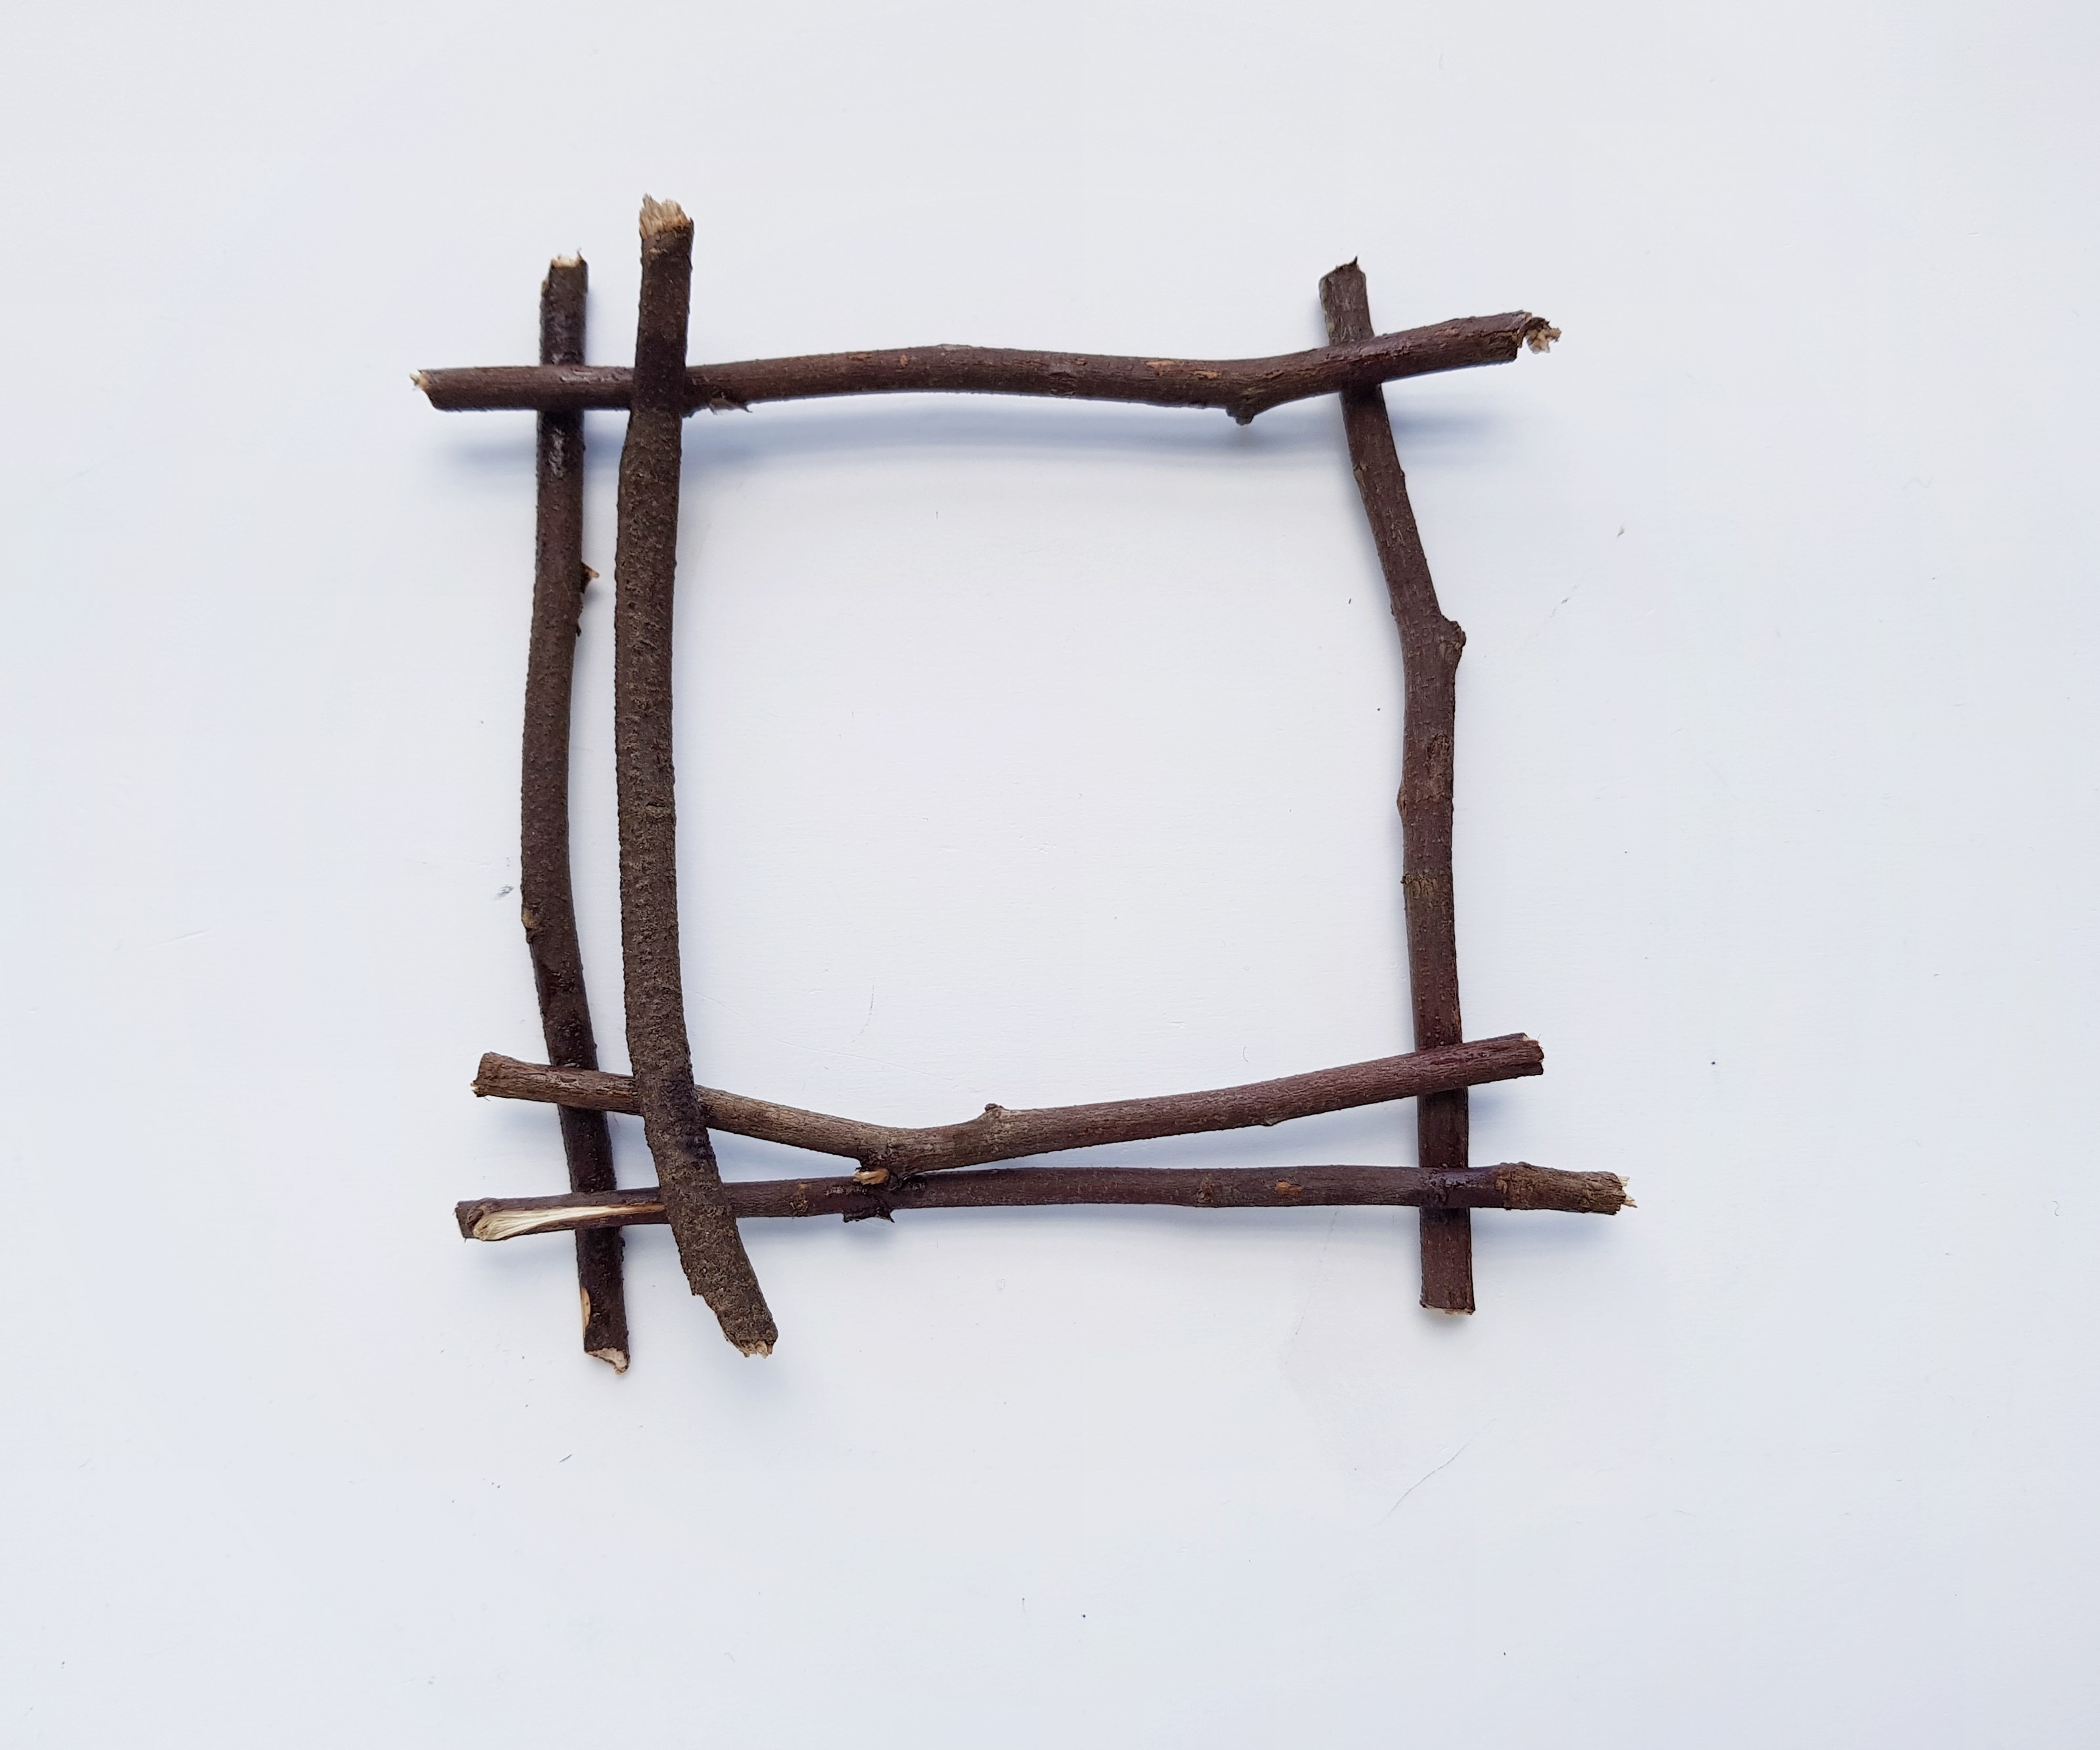
Step - 10:
Attach the dry twigs together on 4 sides to form a square wreath pattern. You can attach more than 1 twig on each side.
Step - 11:
Grab the beaded wire and the felt wire and the square twig frame.
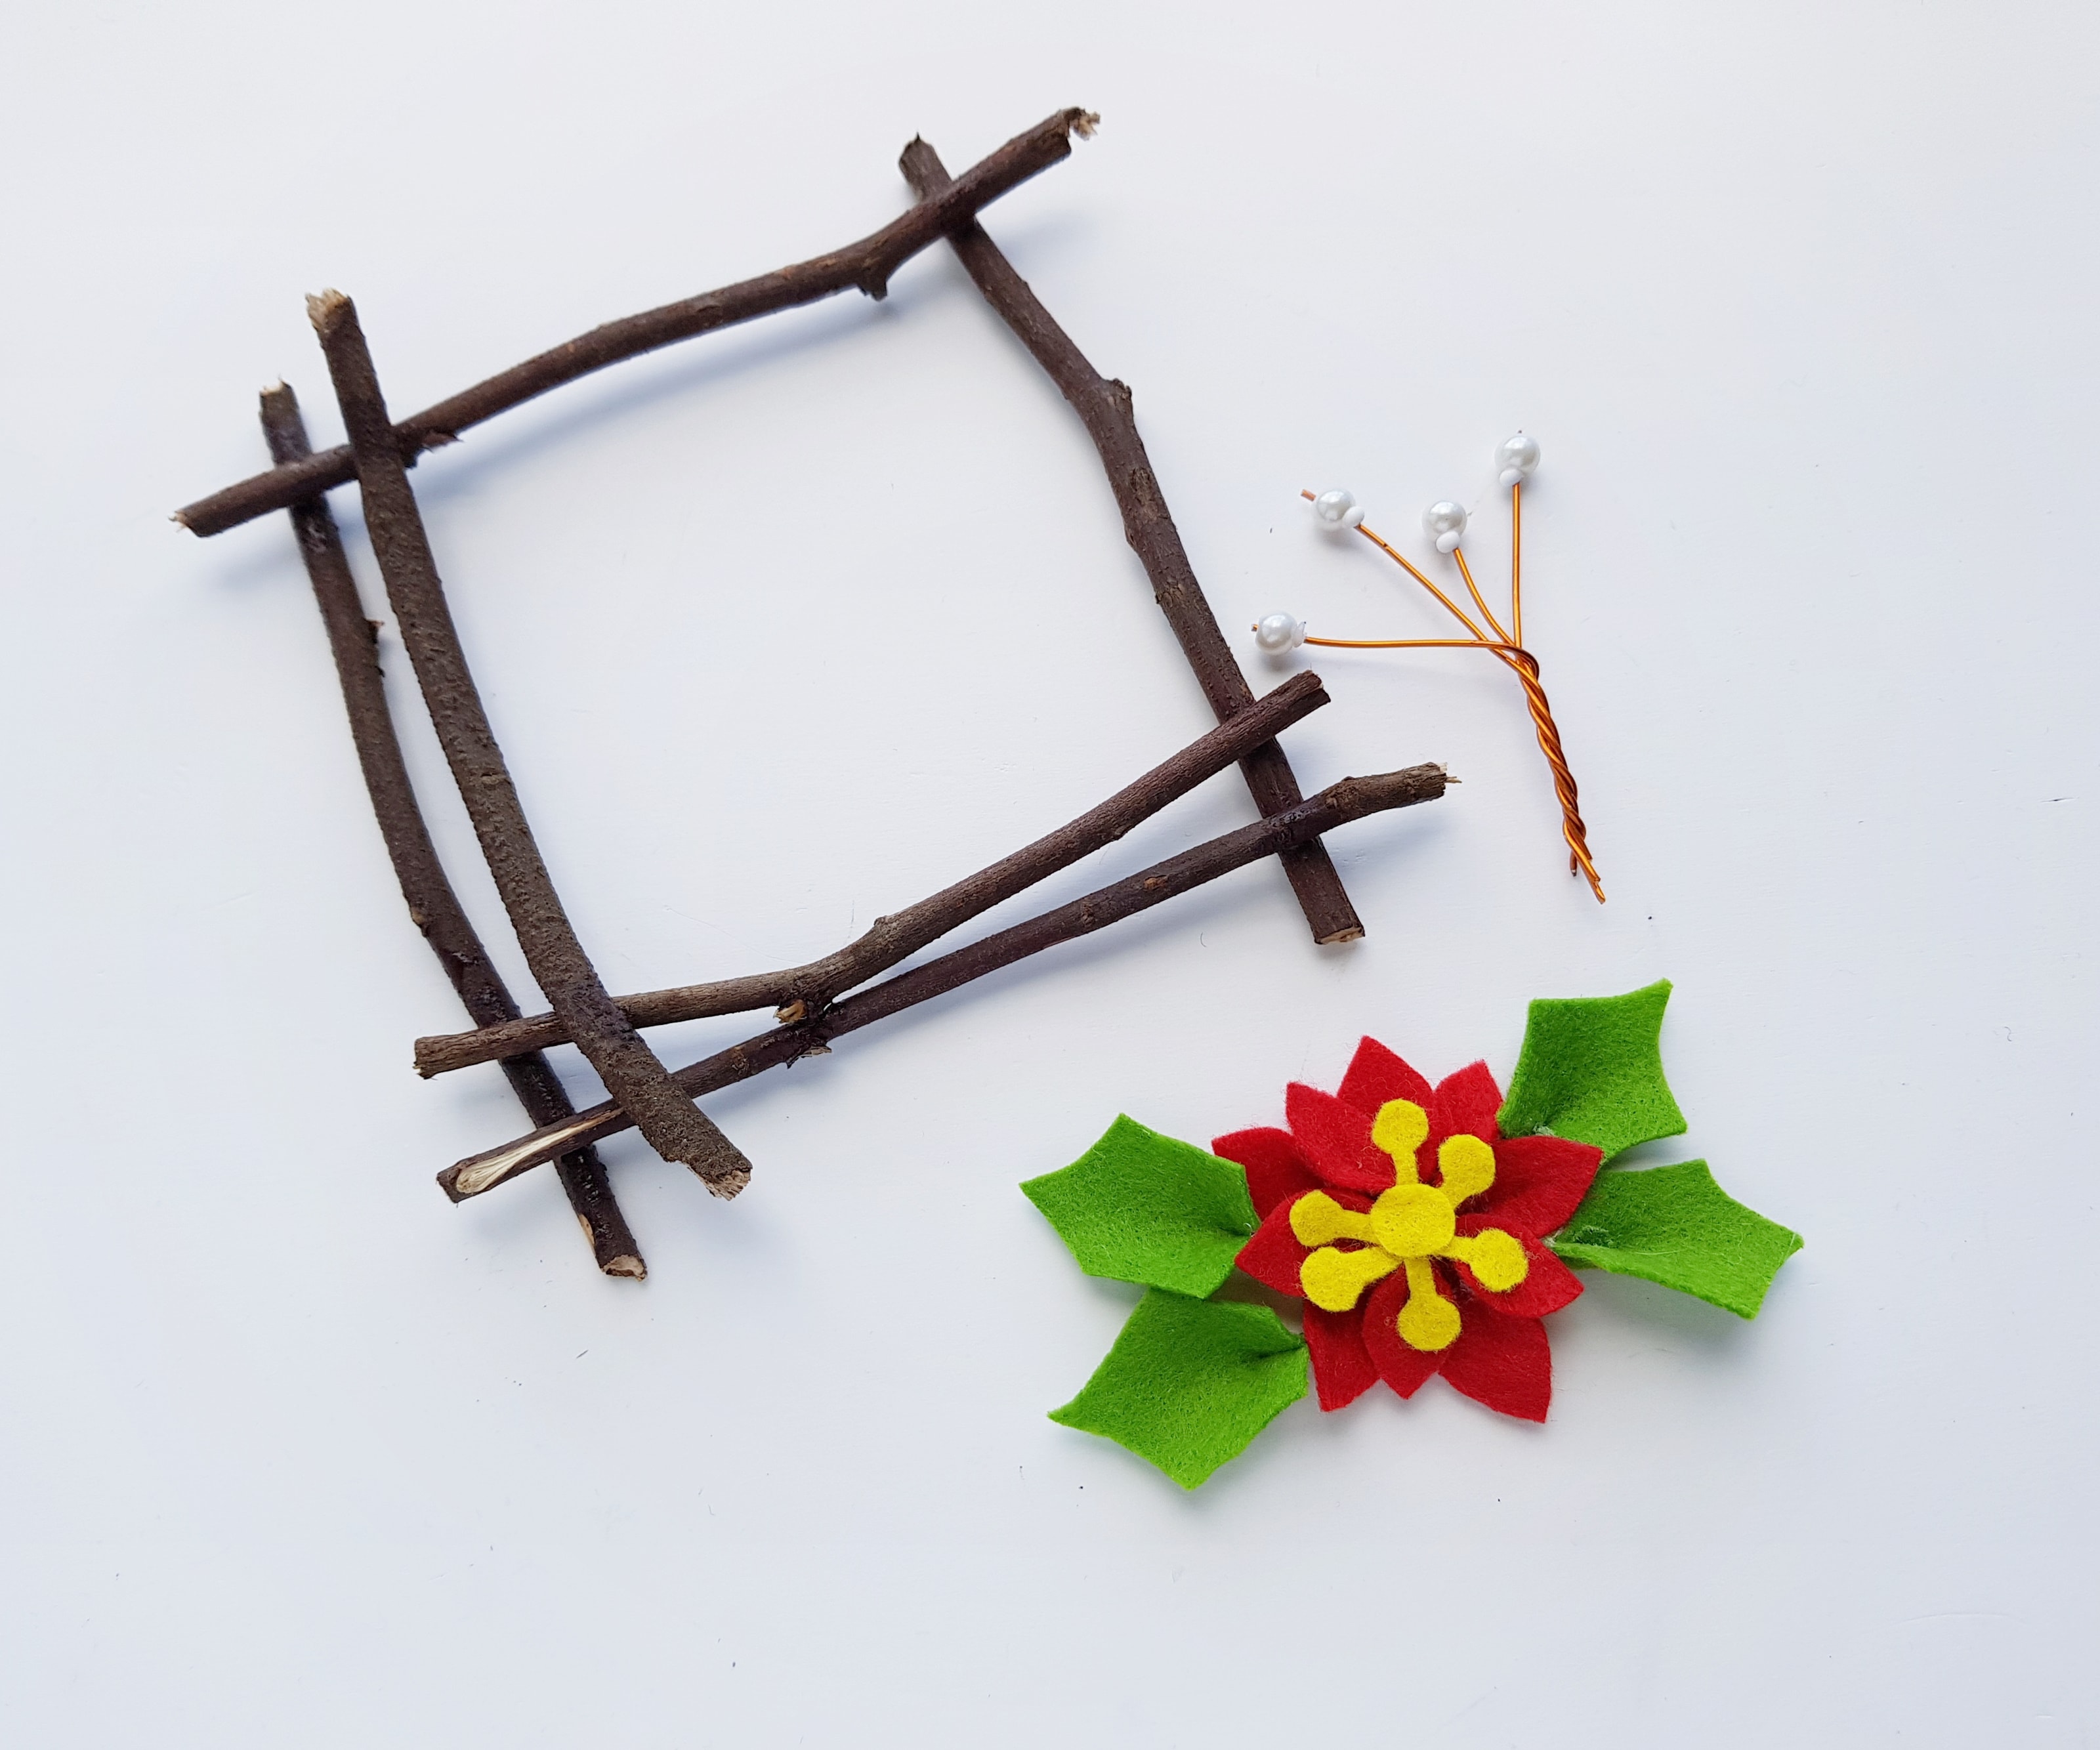
Step - 12:
Attach the felt flower on the twig frame. Also attach the felt leaves around the flower. Attach the beaded wire as well.
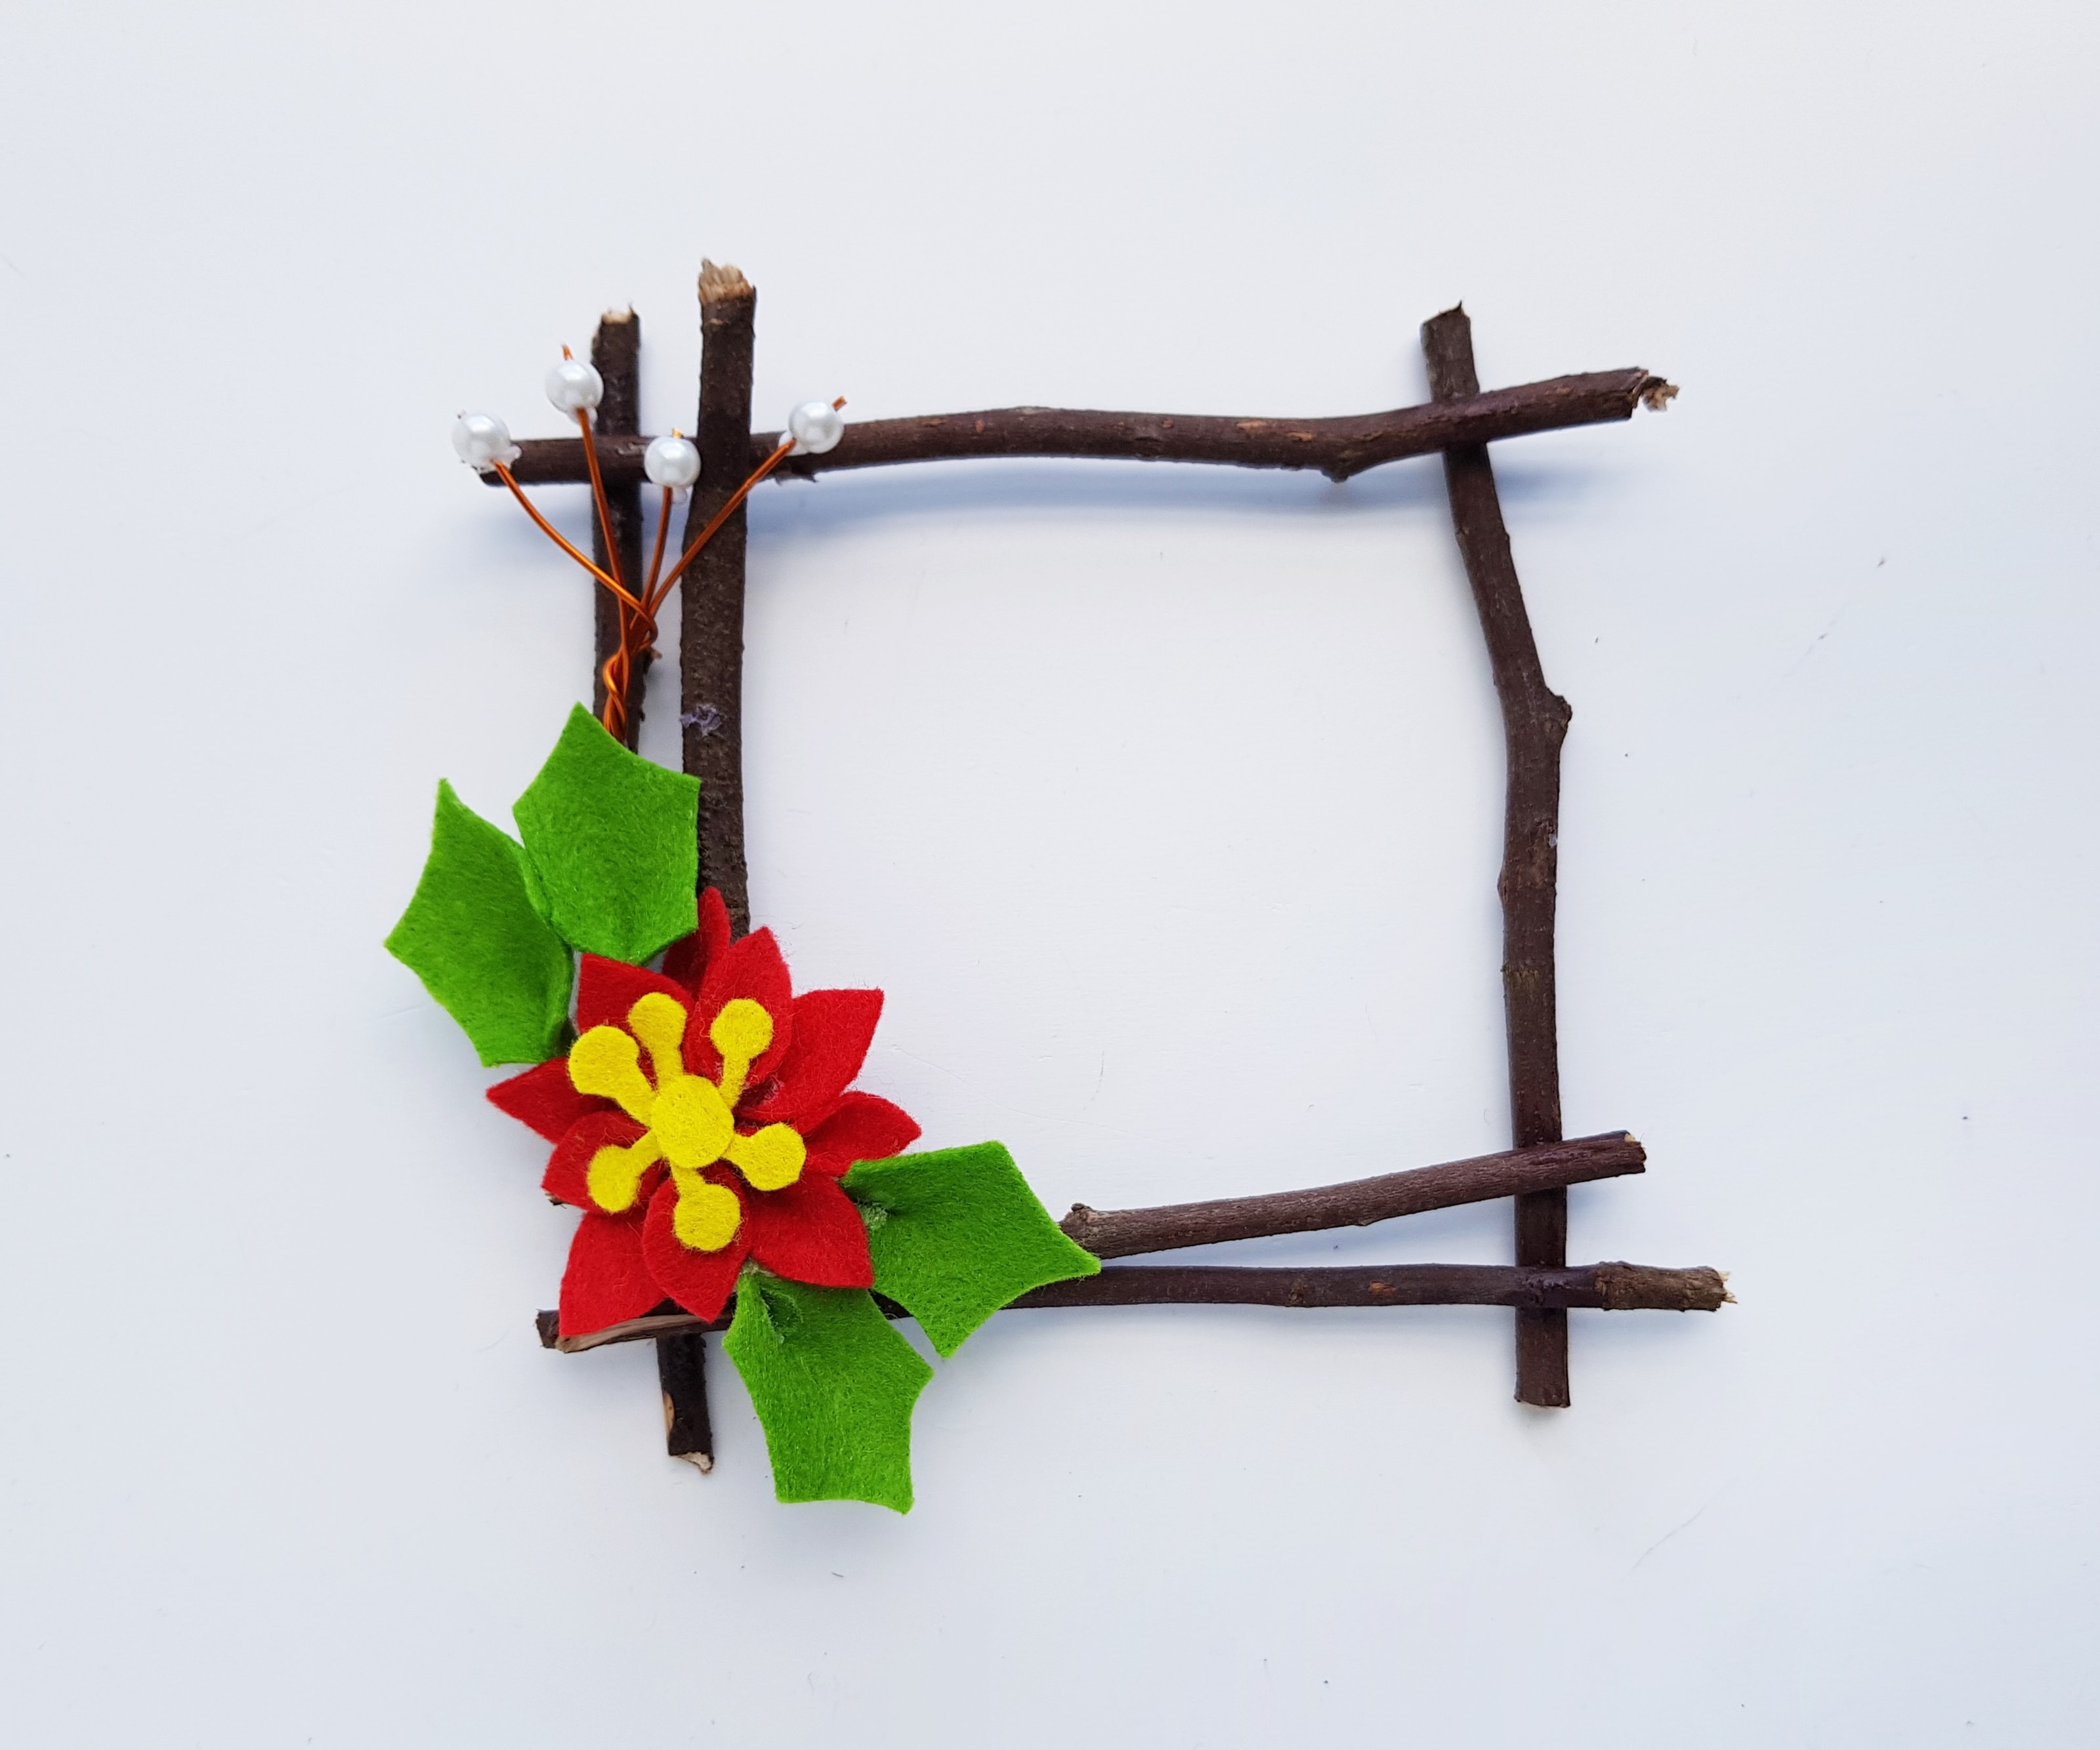
Step - 13:
Attach beads and more leaves to the frame if you want to. Attach a hanging mechanism on the back side to make a beautiful ornament.
Do you love to make Holiday DIY Crafts this time of year?
For more Christmas fun, check out:
Super Cute Hallmark Christmas Movie Bingo Game For The Holidays
8 Awesome DIY Gift Basket Ideas + Free Printable Christmas Gift Tags
Festive Christmas Tree Cupcakes + Tips For Planning A Holiday Party
Easy Christmas Snickerdoodle Cookies + Fun Family Christmas Traditions
Follow my Christmas Pinterest Board for inspiration!
Hi! I’m Nellie. I am an entrepreneur, a busy mama of 3 and a wife to my high school sweetheart. I have been sharing content for over 12 years about how to cook easy recipes, workout tips and free printables that make life a little bit easier. I have been featured in places like Yahoo, Buzzfeed, What To Expect, Mediavine, Niche Pursuits, HuffPost, BabyCenter, Mom 2.0, Mommy Nearest, Parade, Care.com, and more!
Get comfortable and be sure to come hang out with me on social. Don’t forget to grab your free fitness journal before you go!