How To Create Snowman and Elf Bookmark Christmas Crafts
If you are looking for a fun craft to make with the kids this holiday season check out these Snowman and Elf Bookmark Christmas crafts!
The Joy of Crafting with Kids During the Christmas Season
The holiday season is a time of warmth, joy, and togetherness. What better way to celebrate than engaging in creative activities that not only build holiday cheer but also create meaningful memories? Crafting with kids during the Christmas season is an experience like no other. Whether it’s the soft glow of twinkling fairy lights, the aroma of gingerbread cookies filling the air, or the sounds of carolers singing, the ambience is perfect for igniting the imagination.
Kids bring an extra dose of enchantment to the whole process. Their eyes light up at the sight of colorful materials, their laughter echoes as they dive into their projects, and their imagination soars as they create miniature pieces of art. Crafting with them isn’t just about making something pretty; it’s an act of bonding, a lesson in creativity, and a great exercise in hand-eye coordination and fine motor skills. Above all, it gives them a sense of accomplishment and pride when they see their creations taking shape.
 DIY Snowman Bookmarks: An Adorable Reading Companion
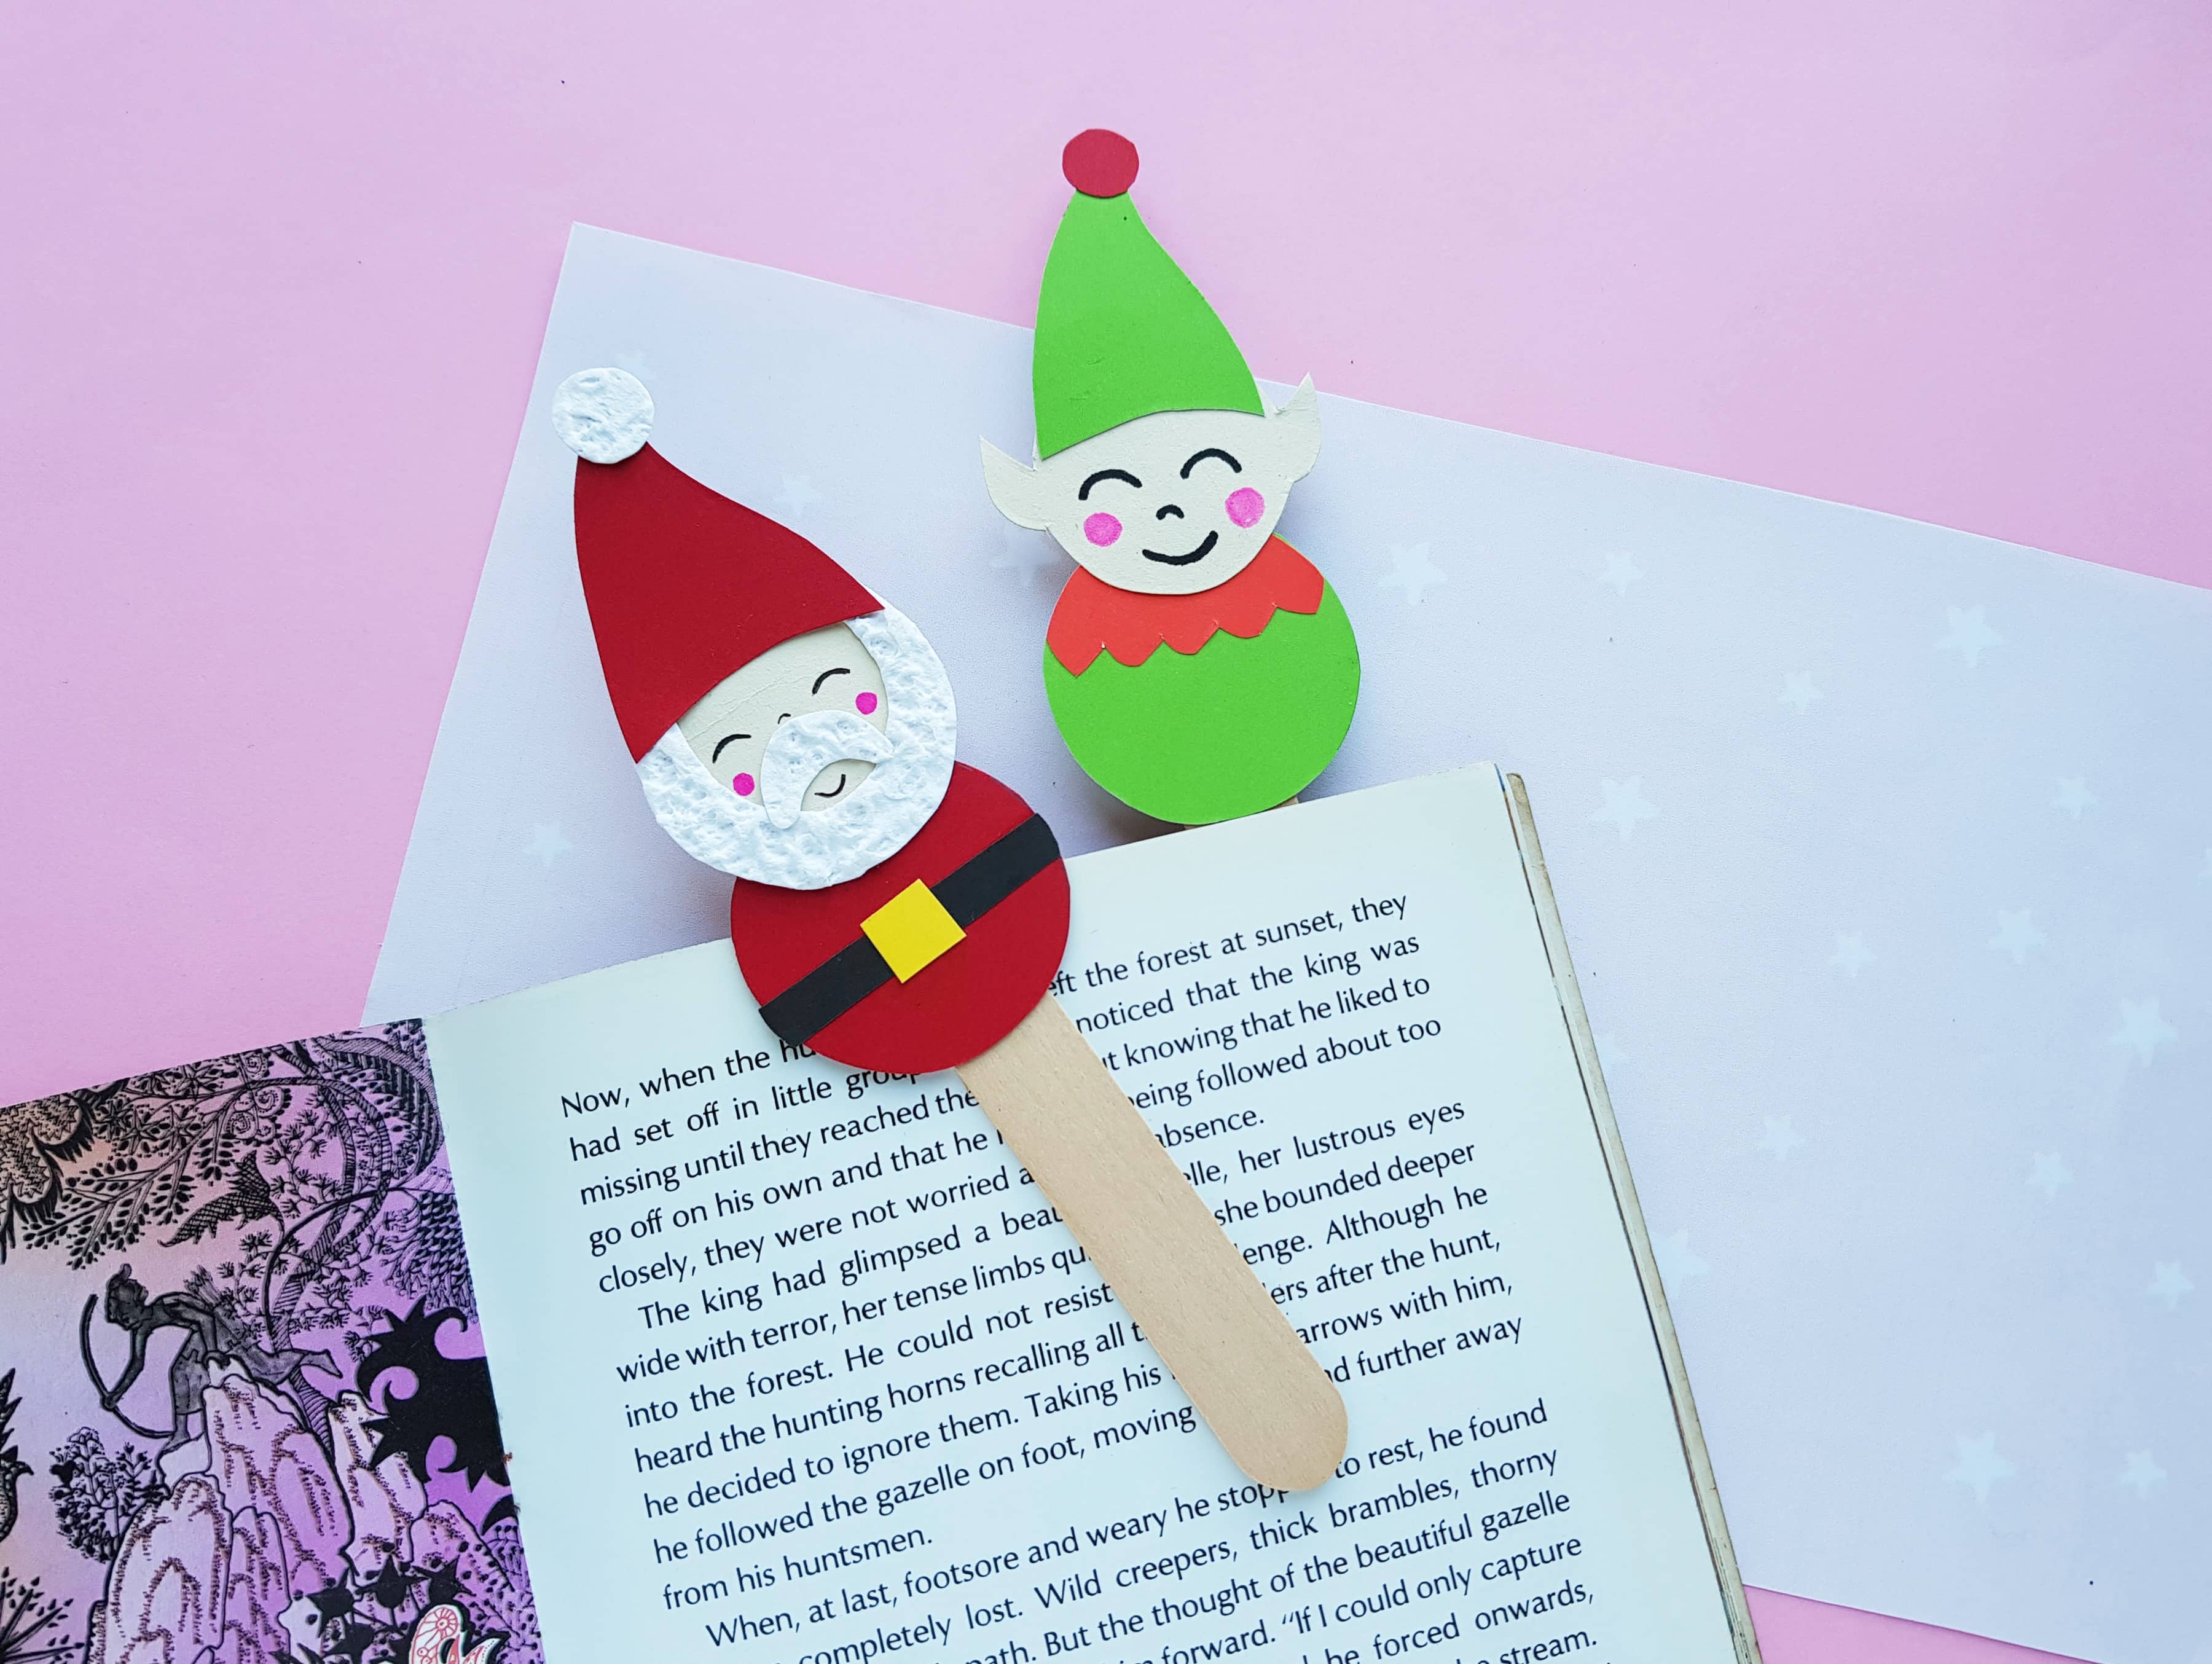
One of the easiest and most delightful crafts to tackle is DIY bookmarks. Let’s consider snowman bookmarks, which are not only functional but also absolutely adorable. Imagine a tiny snowman peeping up from the pages of your favorite holiday storybook; it adds a dash of Christmas spirit to the whole reading experience.
To make a snowman bookmark, you’ll need simple materials like craft paper, markers, glue, and scissors. Cut out a basic snowman shape from white craft paper and then let the kids loose with markers. They can add a cute face, buttons, and perhaps a little scarf. Even better, use pieces of felt or small fabric scraps to add textural elements like a tiny hat or earmuffs.
The best part is that each snowman can be unique. Some could be classic with black top hats and carrot noses, while others could be more whimsical with rainbow scarves or glittery buttons. After the decorating phase, simply glue the snowman onto a larger piece of paper or cardboard to make it sturdy, cut it out, and voila! Your snowman bookmark is ready to snugly fit into a book, marking where you left off in the most festive way possible.
Elf Bookmark Christmas Craft: A Pinch of Whimsy for Your Reading List
If you prefer something with a pinch of whimsy and a dash of mischief, elf bookmarks are the perfect option. Elves are iconic figures during the Christmas season and encapsulate the playful spirit that fills the air. The making process is similar to the snowman bookmarks, but with a few creative tweaks.
Start by cutting out an elf shape from green craft paper. You can make it as simple or as intricate as you’d like. Younger kids might enjoy simpler shapes, while older ones can add more details like pointy ears and little boots. Decorate your elf with markers, adding in facial features and clothes. Don’t forget the characteristic pointy hat! For added fun, use other materials like cotton balls to mimic fluffy elf collars or even small jingle bells to give it that extra Christmas sparkle.
Once the elves are decorated to everyone’s satisfaction, glue them onto sturdy paper or cardboard, trim around the shapes, and you have yourselves a magical army of elf bookmarks! These whimsical creatures will not only keep your place in your book but also add a joyful spirit to your reading adventure.
The Lasting Impact of Holiday Crafting
As the holiday season progresses and the year comes to an end, these bookmarks can serve as a cherished reminder of the quality time spent together. They might even become a part of your family’s Christmas traditions, treasured keepsakes that make an appearance year after year. Crafting during Christmas isn’t just a way to keep kids entertained; it’s a gateway to making lifelong memories, fostering creativity, and experiencing the genuine joy of making something with your own two hands. So this holiday season, gather around the crafting table and let the festive creativity flow!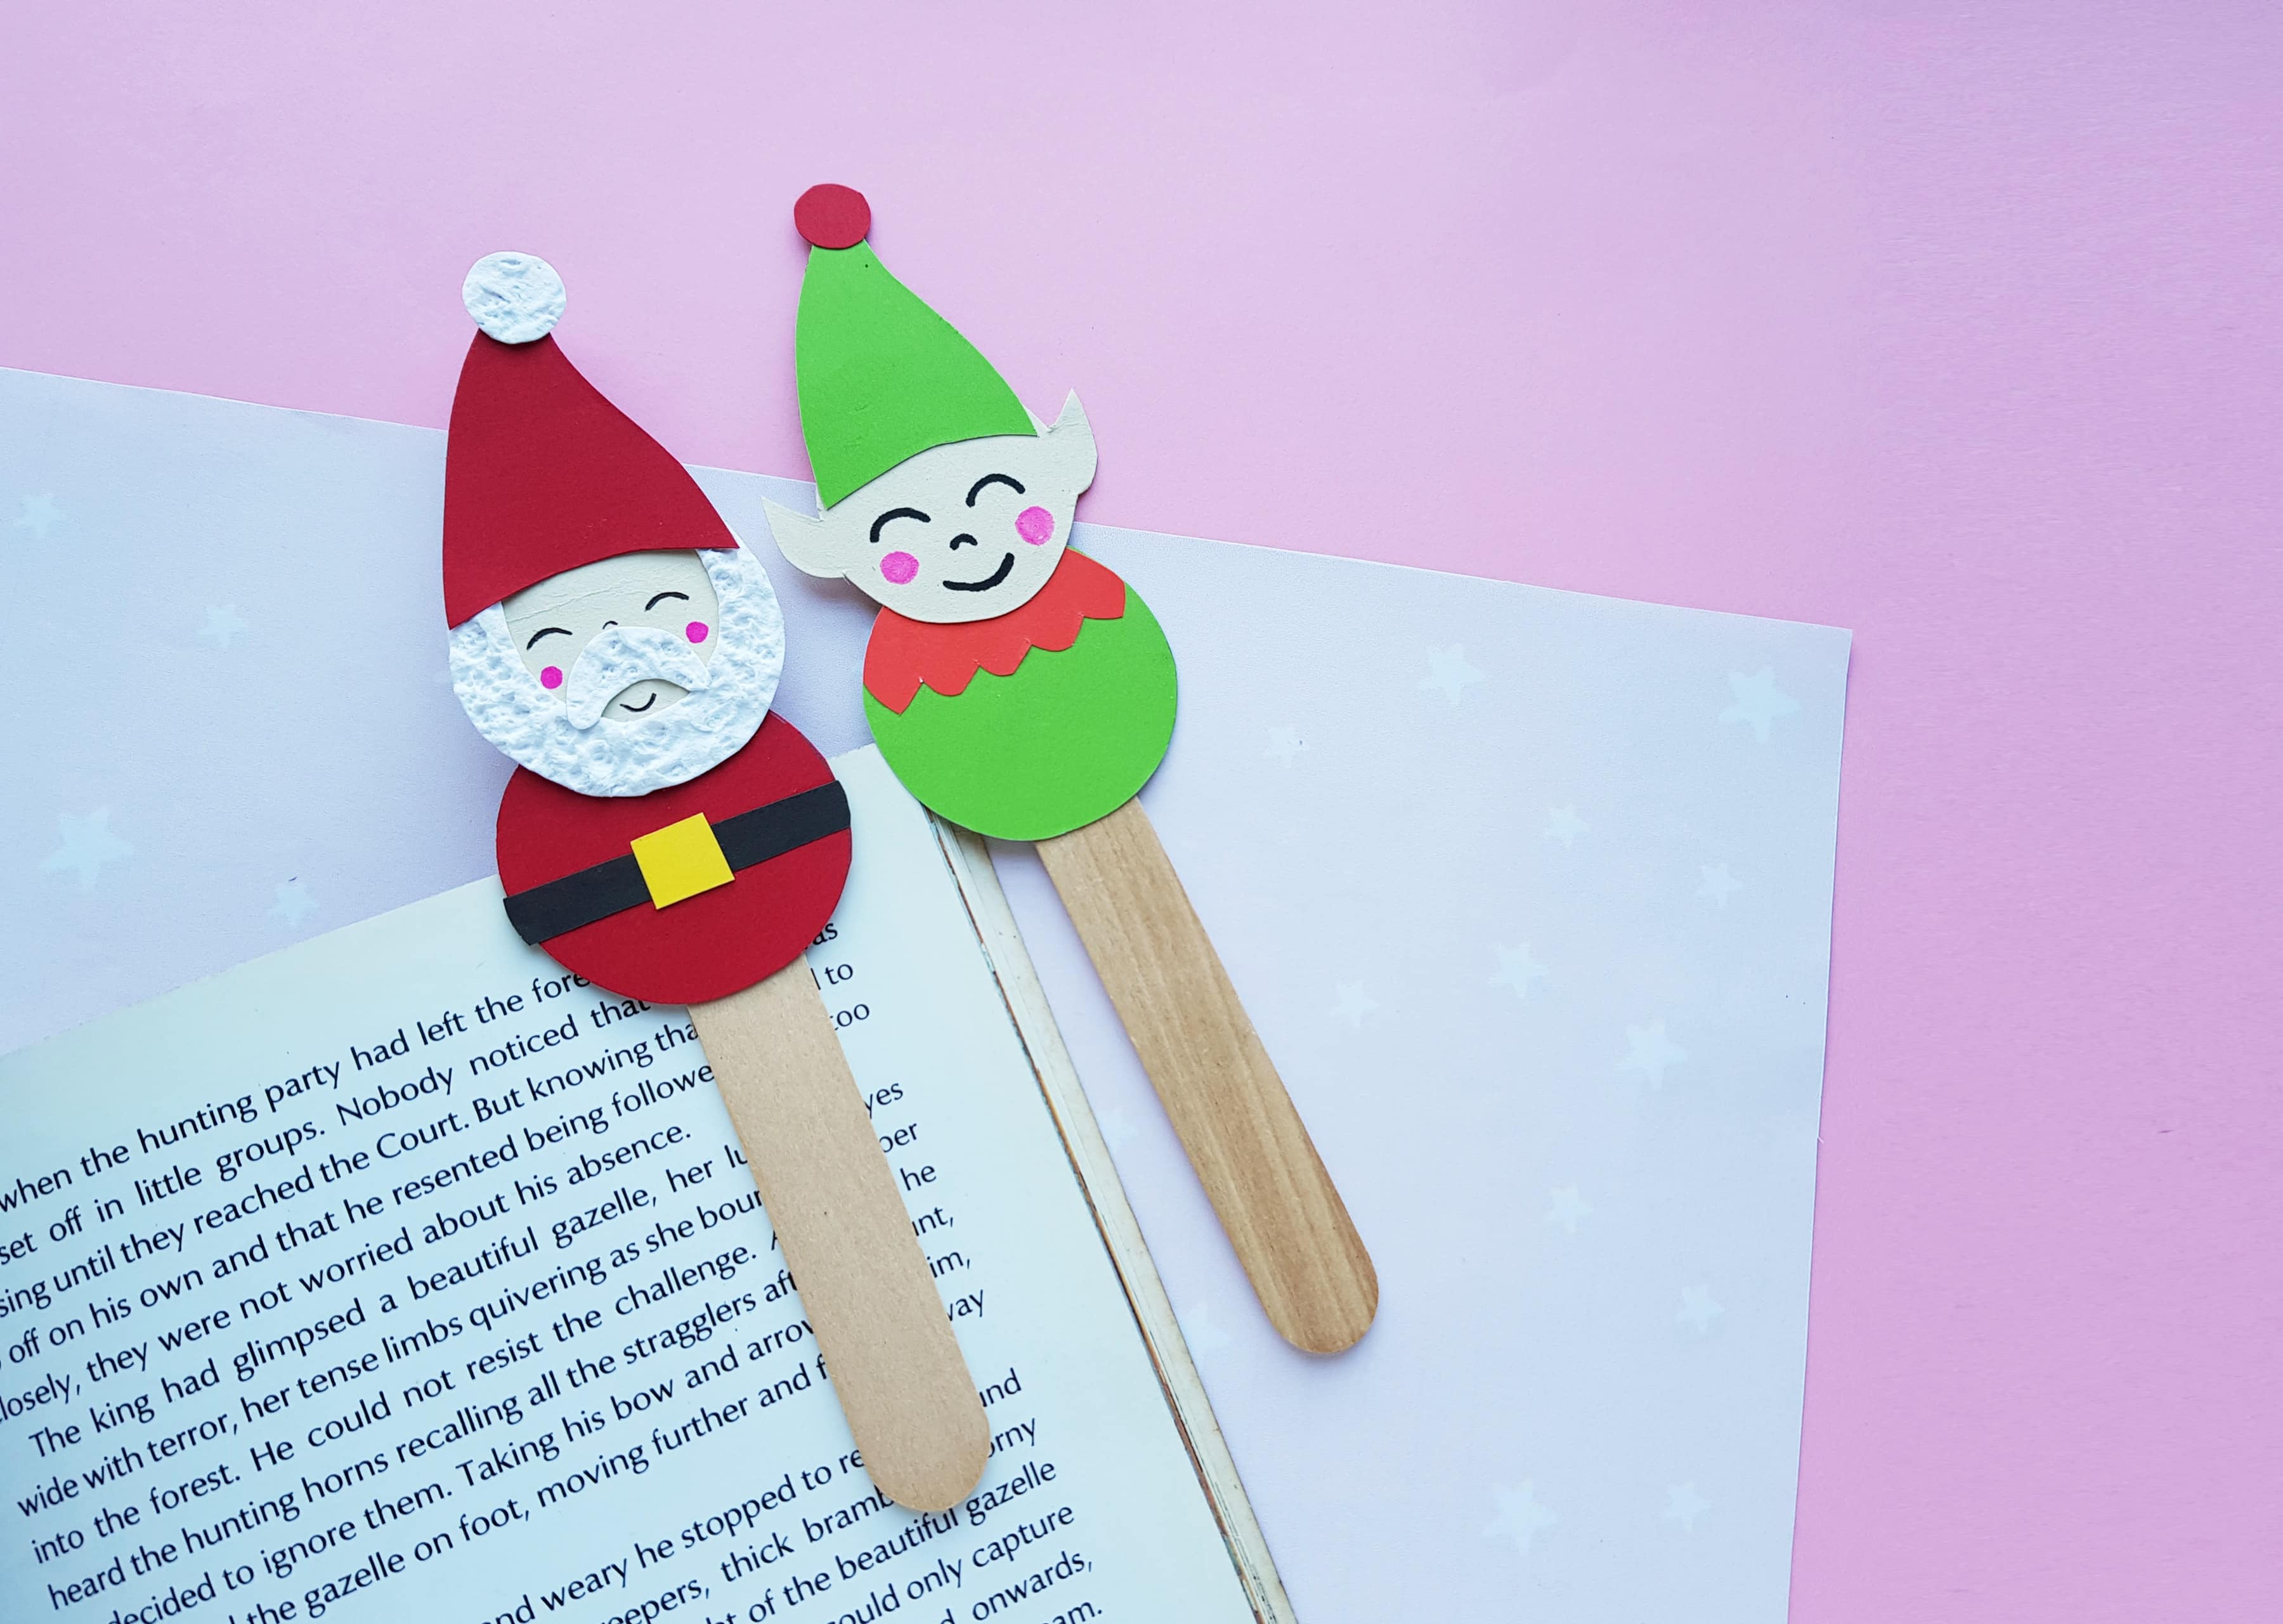
If you are looking for more fun Christmas crafts to make be sure to check out:
- DIY Holiday Craft – Beaded Wire Christmas Tree Ornament
- Fun & Easy Disney Frozen DIY Bookmark Craft For Kids
- Twig Christmas Wreath Ornament Craft
- Easy DIY Furry Grinch Ornaments For Christmas
- Grinch Christmas Cricut Craft
Snowman & Elf Bookmark Christmas Craft
Materials
- Colored cardstock papers
Tools
- Pencil
- Scissors
- Craft glue
- Black gel pen
Instructions
Step -1:
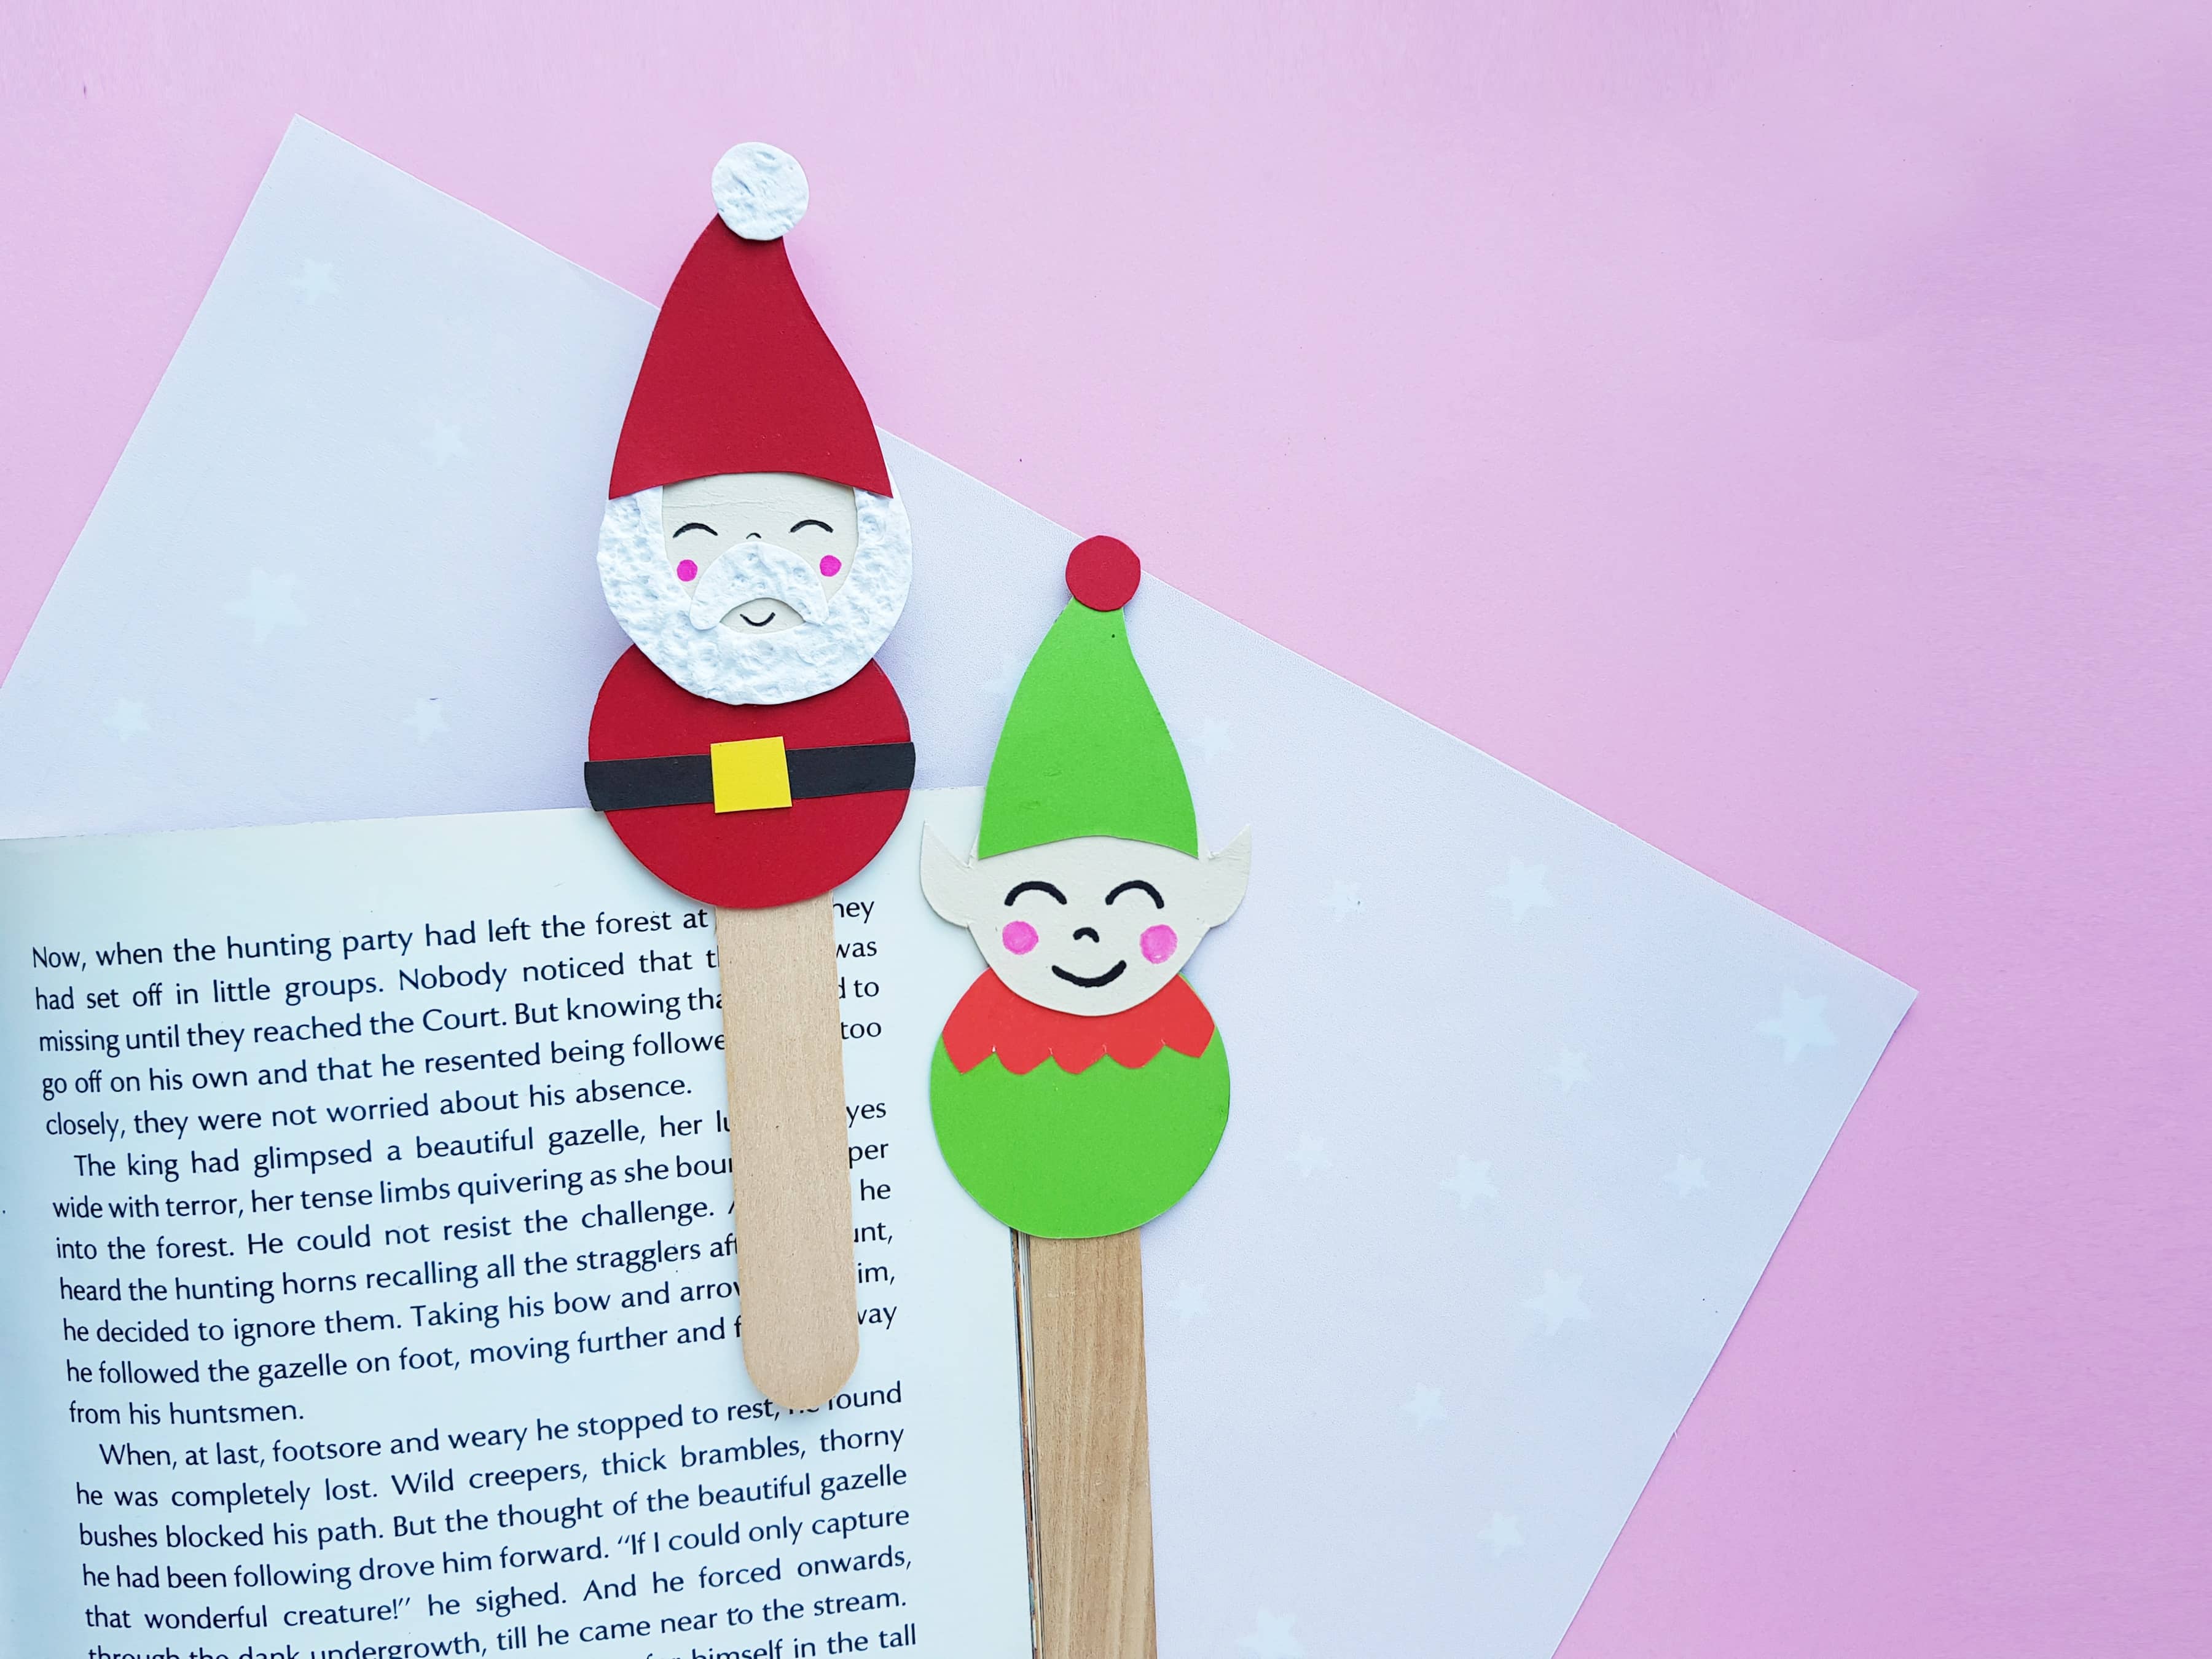
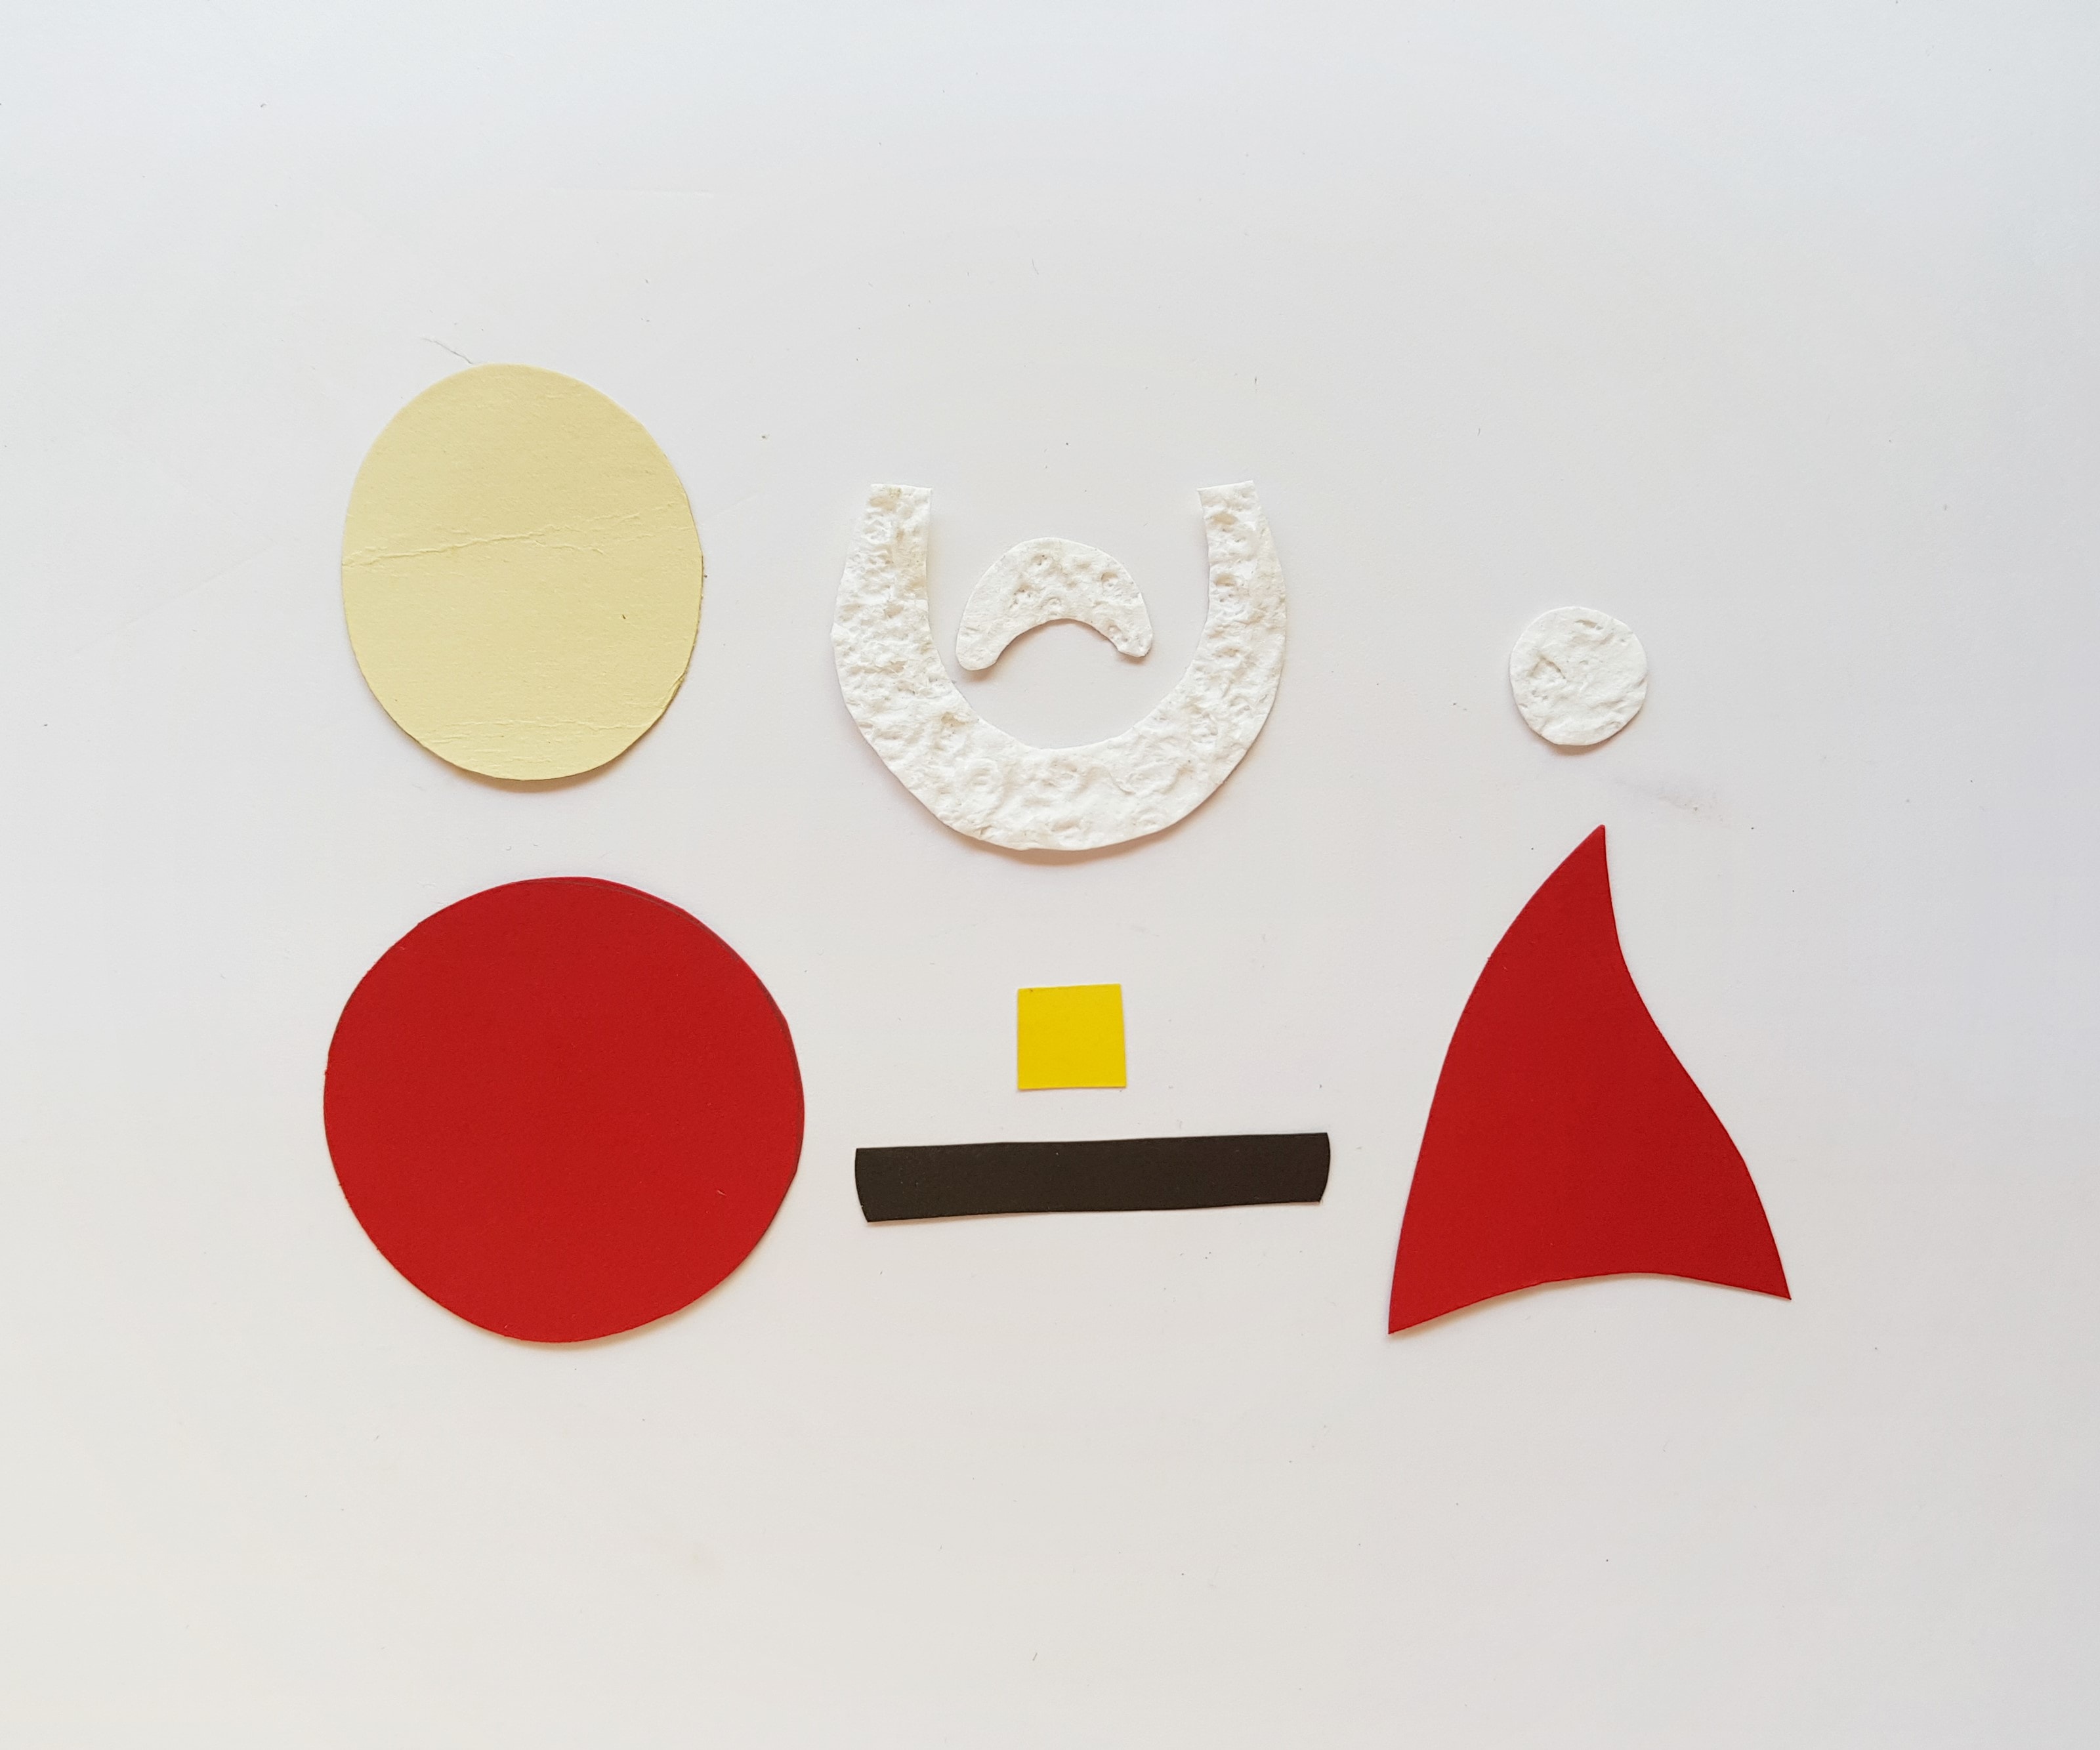
The template includes patterns for – Santa Clause and elf. Printout the patterns and select colored cardstock papers for each craft. Let’s start with the Santa Clause bookmark craft.
Trace the hat and big circle on a red colored card stock; trace the beard, moustache and small circle on a white card stock paper (I’m using a white embossed paper); trace the oval shape on cream colored card stock paper; trace the strip on black colored card stock paper and the small circle on yellow colored card stock paper.
Cut out the traced patterns nicely.
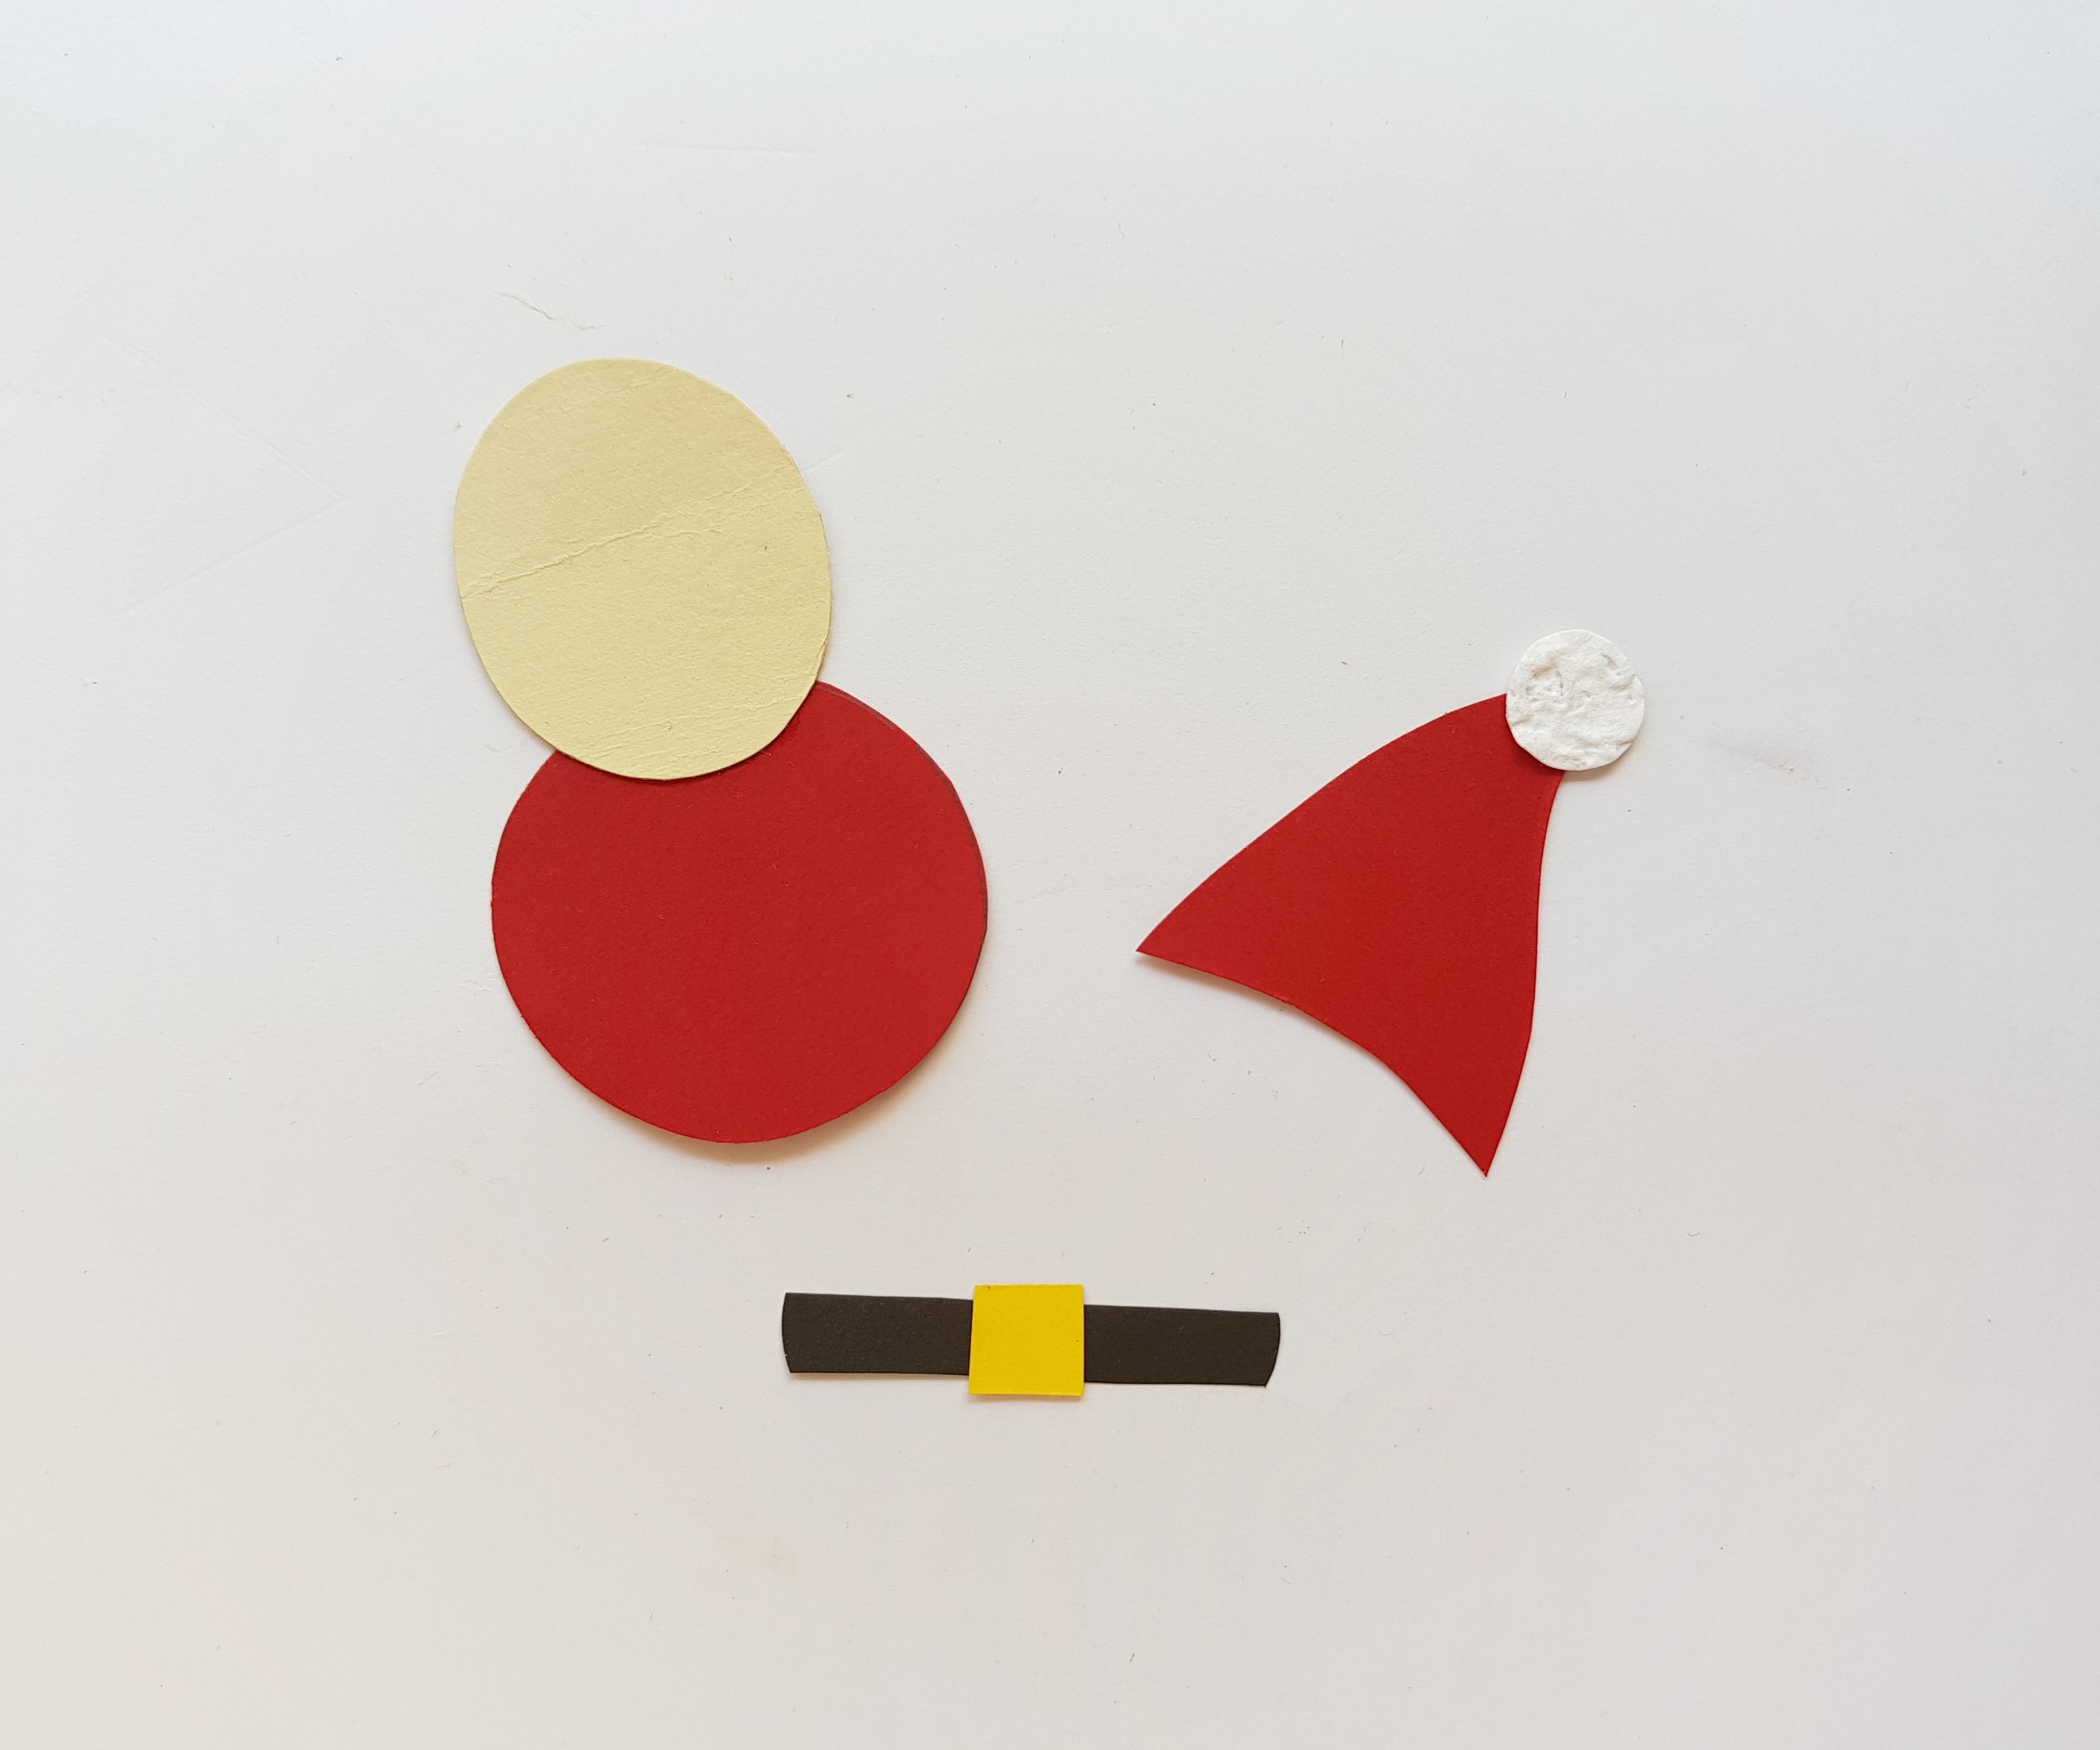
Step -2:
Stick the small yellow square in the middle of the black strip. Stick the small white circle on the tip of the red hat; and stick the oval shaped cutout with the big red circle by overlapping about a cm on the side.
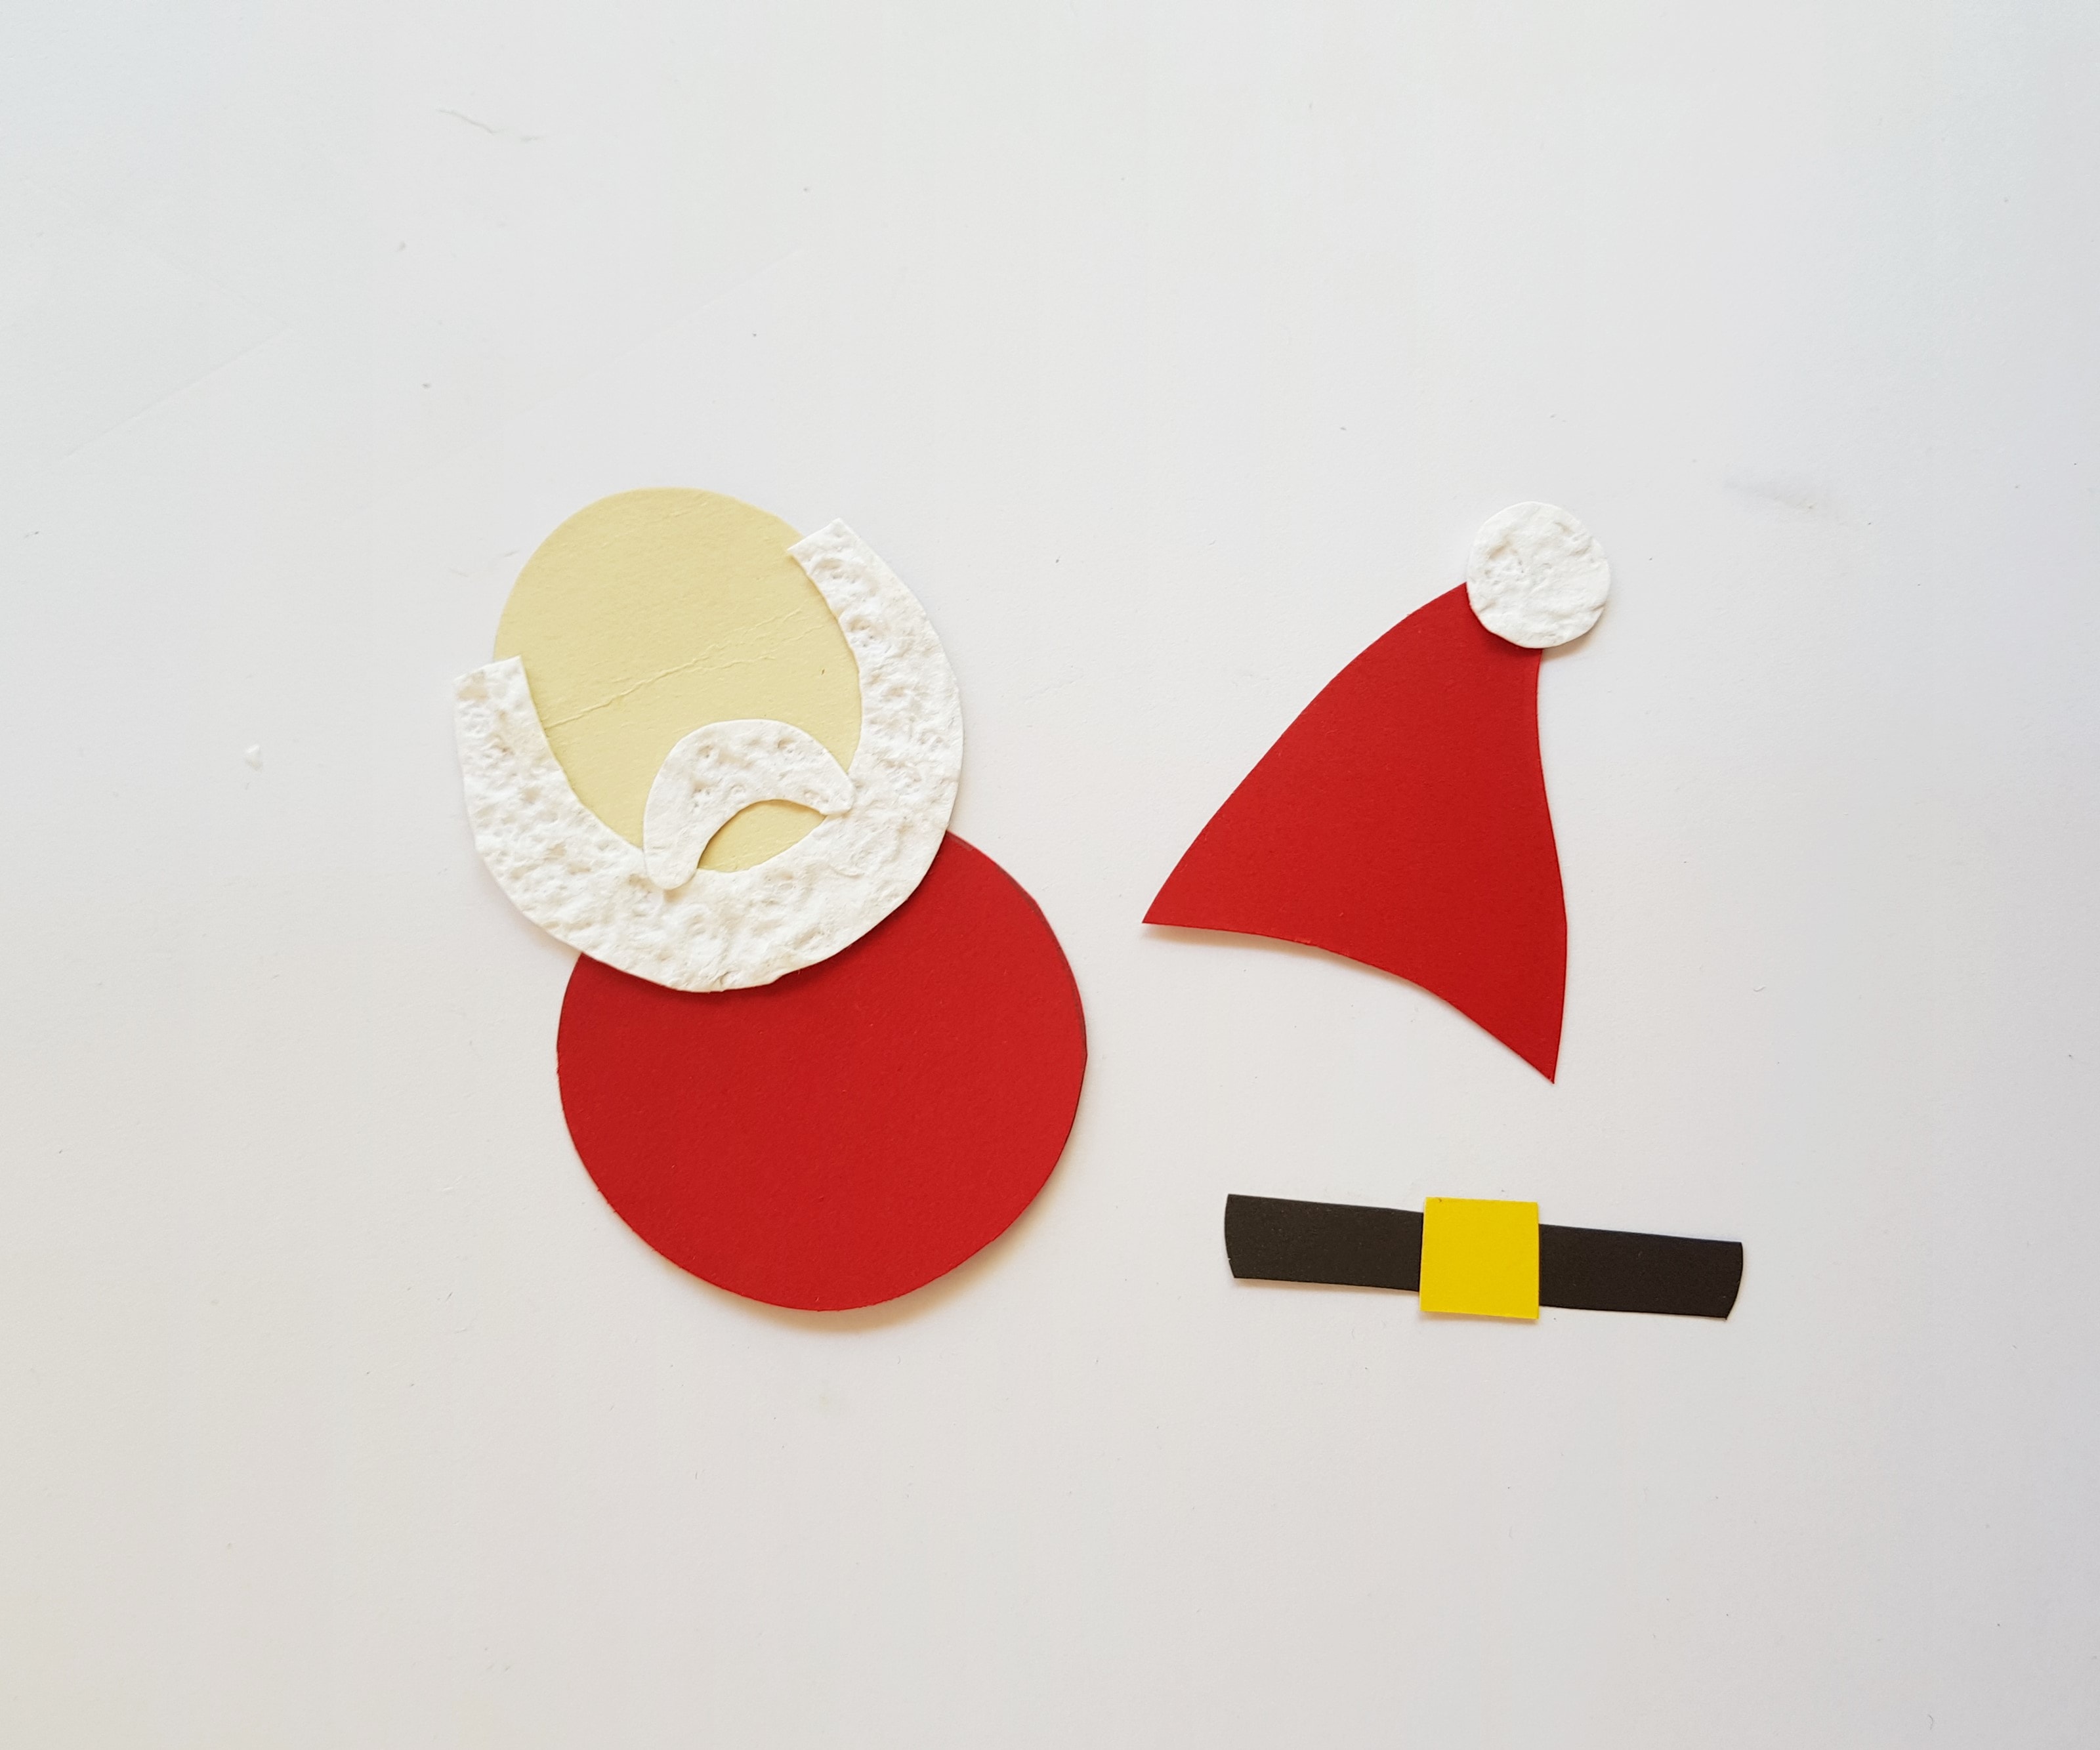
Step - 3:
Stick the beard and the moustache on the oval shaped part (this is the head of the Santa Clause).
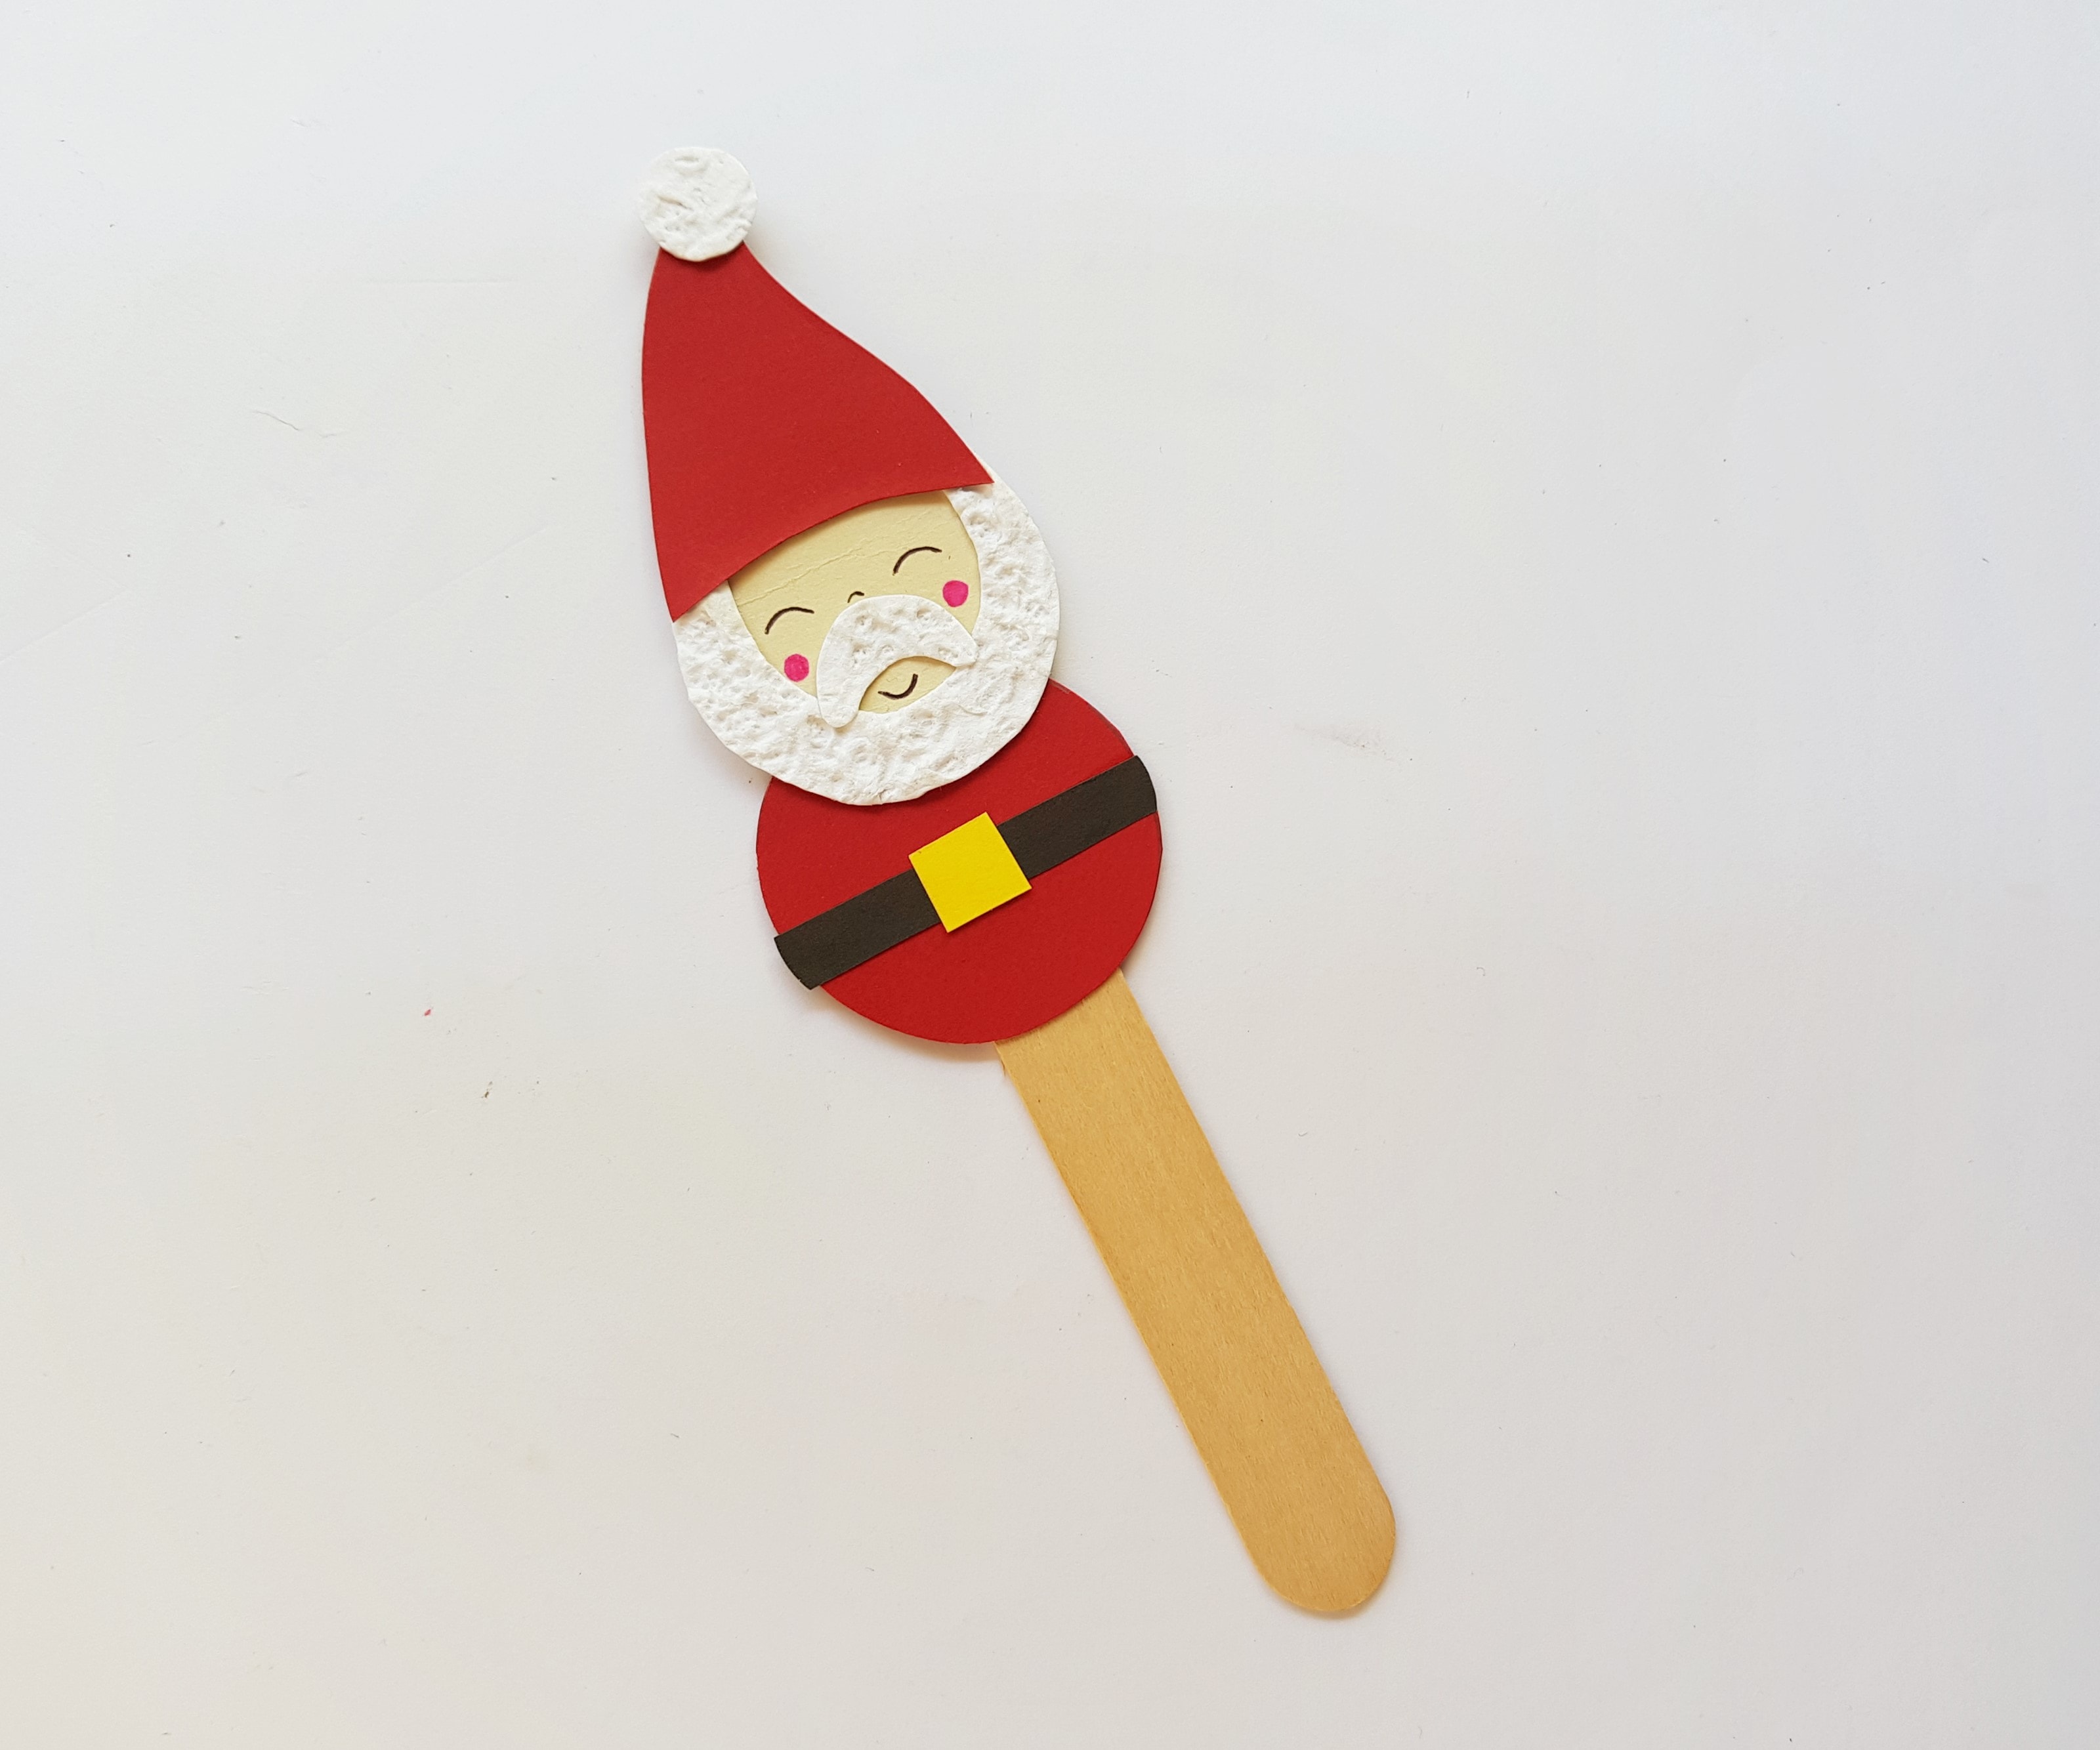
Step - 4:
Attach the black strip (the belt) along the middle part of the big red circle and attach the hat on the top side of the head.

Step - 5:
Use a black gel pen to trace the eyes, nose and mouth of the Santa Clause. You can also draw 2 small blushes on the cheeks using pink highlighter pen.
Step - 6:
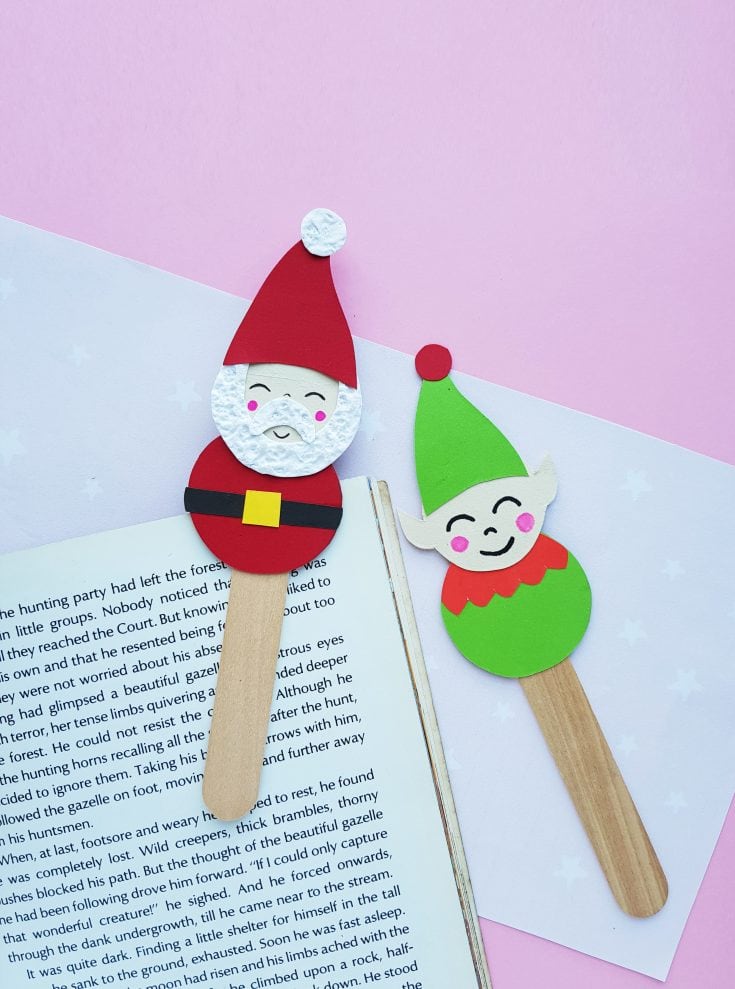
Attach the Santa paper craft on a popsicle stick to complete the bookmark craft.

Notes
A super cute and fun way to keep track of your reading with these holiday snowman and elf themed bookmarks!
Are you going to make this Christmas Bookmark craft?
Hi! I’m Nellie. I am an entrepreneur, a busy mama of 3 and a wife to my high school sweetheart. I have been sharing content for over 12 years about how to cook easy recipes, workout tips and free printables that make life a little bit easier. I have been featured in places like Yahoo, Buzzfeed, What To Expect, Mediavine, Niche Pursuits, HuffPost, BabyCenter, Mom 2.0, Mommy Nearest, Parade, Care.com, and more!
Get comfortable and be sure to come hang out with me on social. Don’t forget to grab your free fitness journal before you go!