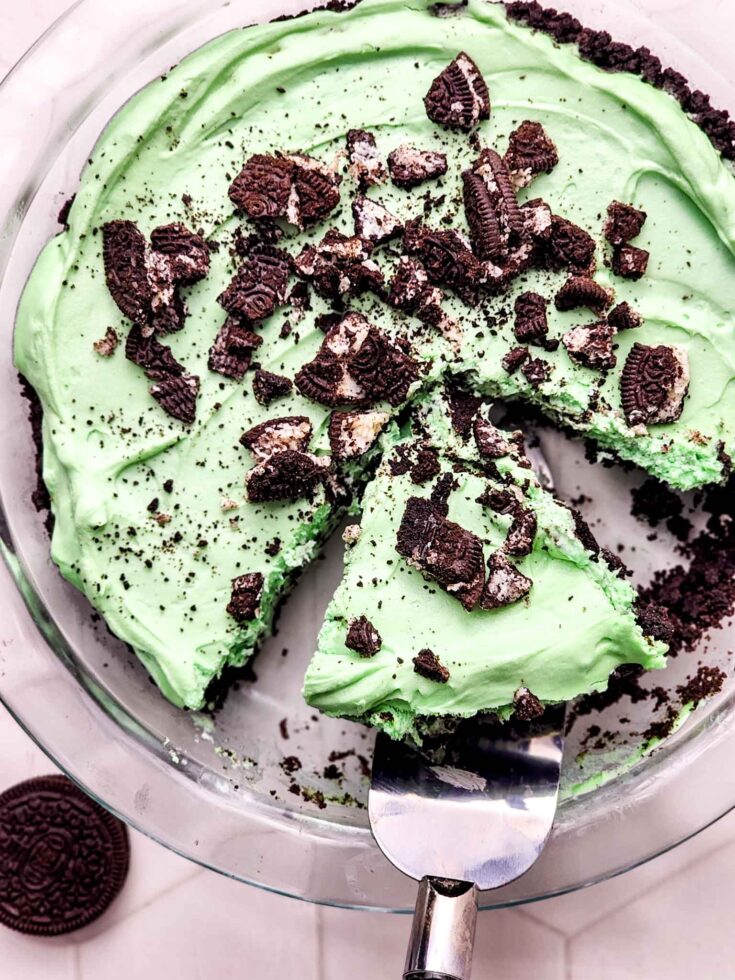
St. Patrick’s Day No Bake Oreo Mint Pie
Oreo Mint Pie
St. Patrick’s Day is one of those holidays my kids take completely seriously. Not the history — the green. Everything has to be green. The outfits, the food, the drinks, the dessert. Especially the dessert.
I started making this pie because I needed something that looked festive without requiring me to actually bake anything the day before a school event. An Oreo crust pressed into a dish, a mint cheesecake filling folded together with whipped cream, refrigerated overnight, and you wake up to something that looks like it took real effort. That deep green color, the Oreo crumbles on top, the way it slices cleanly when it’s fully set — it genuinely looks like a project and it genuinely isn’t one.
The mint and chocolate combination does all the heavy lifting here. Oreo crust on the bottom, creamy cool mint filling in the middle, more crushed Oreos on top for texture. Every bite has all three. Make it the night before, pull it out when you need it, done. This is the St. Patrick’s Day dessert I come back to every year because it works every single time.


Oreo Mint Pie Ingredients
Oreo Crust
25 Oreos, crushed (about 2½ cups of crumbs)
6 tablespoons unsalted butter, melted
Mint Cheesecake Filling
8 oz cream cheese, softened to room temperature
¾ cup powdered sugar
1 teaspoon vanilla extract
½–1 teaspoon peppermint extract (start with ½, taste, add more to preference — 1 tsp is bold and minty, which is the goal)
3–5 drops green gel food coloring, adjusted to desired shade (gel only — liquid food coloring will thin the filling)
1 cup heavy whipping cream
Topping
1 cup Oreos, roughly chopped or crushed
Instructions:
Here’s How You Make It
The night before — or at least 6 hours before you need it — start with the crust.
Crush your 25 Oreos into fine crumbs. A food processor is fastest. If you don’t have one, put the cookies in a sealed zip-lock bag and go at them with a rolling pin until no large chunks remain — the kids are extremely good at this part and will volunteer enthusiastically. Add the melted butter and stir until every crumb is coated. It should look like wet dark sand and hold together when you press a bit between your fingers.
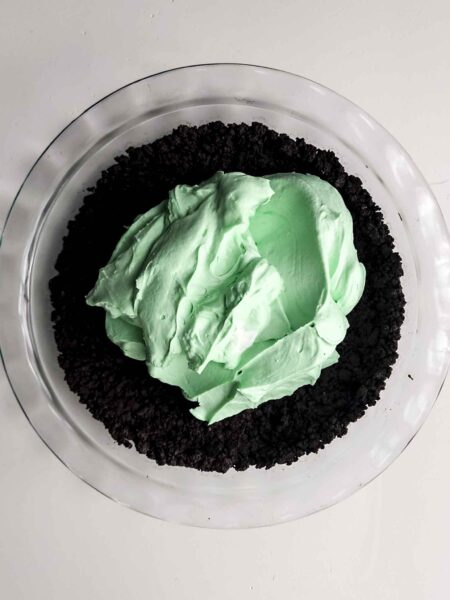
Pour it into your 9-inch pie dish and press it in firmly — across the bottom and up the sides. Use the flat bottom of a measuring cup or a glass to really pack it down. The harder you press now, the cleaner it slices later. Then cover it with plastic wrap and refrigerate for at least 30 minutes while you make the filling. That’s it. No oven. The crust will firm up completely in the refrigerator. If you’d prefer a sturdier crust that holds a sharper edge when sliced, you can bake it at 350°F for 8 minutes and let it cool completely before filling — both versions work, the no-bake is just easier and truly oven-free.
While the crust chills, make the filling. Your cream cheese needs to be genuinely room temperature — not slightly cool from the fridge, actually soft. If you press your finger into it and it gives easily with no resistance, you’re good. If it’s still firm, microwave in 10-second intervals until soft. Cold cream cheese will not blend smooth and lumps will not fix themselves during chilling.
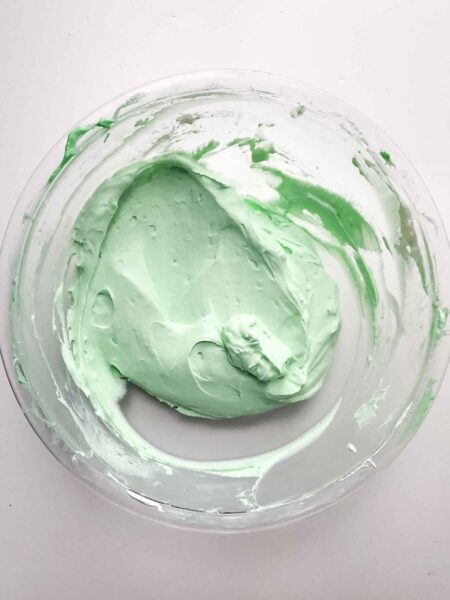
Beat the cream cheese with a hand mixer until completely smooth, about a minute. Add the powdered sugar and beat again. It’ll loosen slightly — that’s normal. Now add the vanilla, peppermint extract starting with ½ teaspoon, and your green gel food coloring. Start with 3 drops of gel and blend. Taste the mint level and adjust. Look at the color — it will lighten significantly when the whipped cream goes in, so make it darker at this stage than you want the finished pie to be. Aim for deep emerald now, you’ll land on bright mint green. Blend until completely smooth and combined.
Now the step that matters most: whip your heavy cream in a completely separate clean bowl on high speed until stiff peaks form. Stiff peaks — the cream holds its shape when you lift the beaters and doesn’t flop over. This takes about 3–4 minutes. Don’t stop at soft peaks or the filling won’t set properly.
Scoop the whipped cream into the cream cheese bowl and fold them together with a rubber spatula. Not stir — fold. Scoop from the bottom, bring it up and over, rotate, repeat. You’re keeping air in the filling which is what makes the texture light and mousse-like instead of dense. Stop the moment no white streaks remain.
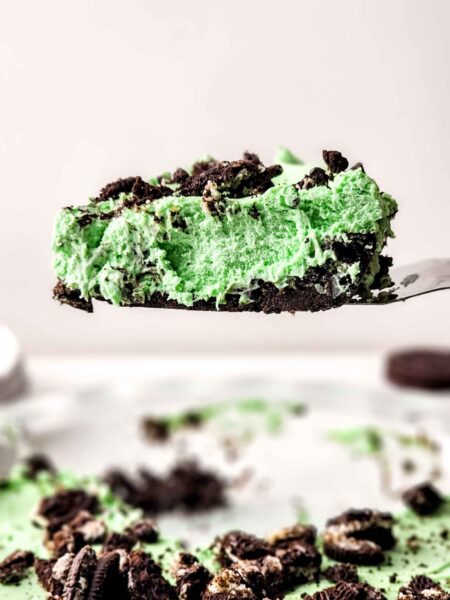
Pour the filling into your chilled crust, spread it to the edges, and scatter the chopped Oreos over the top. Cover with plastic wrap — tent it so the wrap doesn’t touch the filling surface — and refrigerate for at least 6 hours. Overnight is better and honestly easier. You wake up and it’s done.
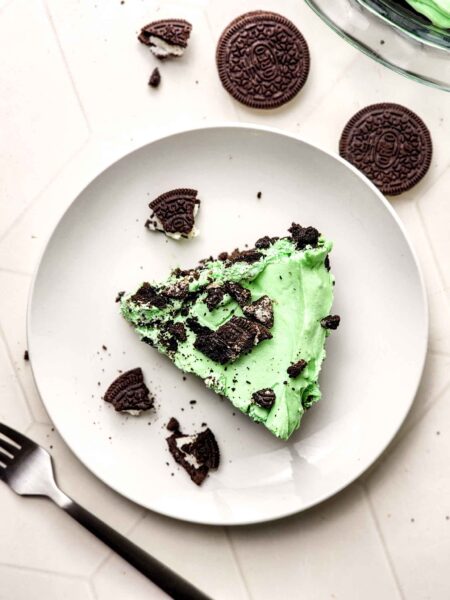
When you’re ready to serve, run a sharp knife under hot water, wipe it dry, and slice cleanly. Wipe between cuts. Serve cold.
Why You Whip The Cream Separately
Most people expect a no-bake cheesecake filling to be dense and heavy — the kind that sits in your stomach like a brick. This one isn’t, and the reason is Step 2 of the filling process.
You whip the heavy cream to stiff peaks in a completely separate bowl before it ever touches the cream cheese mixture. Then you fold — not stir, not beat — the two together. What you’re doing is trapping air into the filling. The whipped cream is essentially a foam and when you fold it gently into the cream cheese base, that air stays suspended throughout the filling. The result is something much closer to a mint chocolate mousse than a dense cheesecake slab. Light, creamy, cool — the texture is what makes this pie worth making over a simpler version.
If you skipped the separate whipping and just added cream to the cream cheese and mixed everything together, you’d get a heavier, denser filling that tastes fine but doesn’t have the same lift. The extra bowl is worth it.
Frequently Asked Questions
Three possible causes. First: the cream wasn’t whipped to stiff peaks — soft or medium peaks don’t have enough structure to firm up the filling during chilling. Second: the pie wasn’t chilled long enough — 6 hours is the minimum, the center takes longer to set than the top. Third: liquid food coloring was used instead of gel — liquid adds water to the filling which can prevent it from setting properly. If your pie is still soft after 6 hours, give it another 2 hours or move it to the freezer for 30 minutes before slicing.
Cold cream cheese. This is almost always the answer. Cream cheese that isn’t fully softened to room temperature will not blend smooth, and no amount of mixing will dissolve the lumps once they’ve formed. Make sure your cream cheese is genuinely soft before starting — press your finger into it and it should give easily with zero resistance. If you realize too late, you can try beating the lumpy mixture longer on high speed, but prevention is the only reliable fix.
Yes, with a texture trade-off. Cool Whip is pre-whipped and stabilized so it’s slightly denser and sweeter than freshly whipped heavy cream. The filling will still set and taste good, but the mousse-like lightness won’t be quite the same. If using Cool Whip, use one 8 oz tub and fold it in directly — no whipping needed. Skip the additional powdered sugar or reduce it by 2 tablespoons since Cool Whip is already sweetened.
Yes — it amplifies the mint flavor throughout the whole pie, which some people love and some find overwhelming. If you like mint-forward desserts, go for it. If you want the chocolate to balance the mint more evenly, stick with regular Oreos for the crust and let the peppermint extract do the flavoring work in the filling.
Not recommended. Liquid food coloring contains water which can thin the filling and interfere with how it sets. It also takes a much larger quantity to achieve the same color saturation, which compounds the thinning problem. Gel food coloring is concentrated — 3 to 5 drops delivers deep, vibrant color with no added liquid. Find it in the baking aisle near cake decorating supplies. Wilton and AmeriColor are both widely available.
Yes. Press the crust mixture into the bottoms of a muffin tin lined with cupcake liners — about 1½ tablespoons per cup. Chill 20 minutes, then fill each cup with the mint mixture to just below the rim. Top with crushed Oreos and refrigerate at least 4 hours. Makes approximately 12 individual portions that are easy to serve at a party without slicing.
Up to 3 days refrigerated. Day 1 and 2 are the best — the crust stays crisp and the filling is perfectly set. By day 3 the crust begins to soften slightly from the filling moisture, which some people actually prefer. Beyond 3 days, freeze it. Wrap tightly in plastic wrap then foil and freeze for up to 2 months. Thaw overnight in the refrigerator — not at room temperature.
Tips For The Best Oreo Mint Pie
Cream cheese temperature is everything. If your cream cheese is even slightly cold it will not blend smooth no matter how long you mix it. You’ll end up with tiny white lumps suspended in the filling that won’t dissolve during chilling. Take it out of the refrigerator at least an hour before you start. If you forget, the 10-second microwave intervals work but watch it closely — you want soft, not melted.
Gel food coloring only. Liquid food coloring has water in it, which thins the filling and can prevent it from setting properly. Gel coloring is highly concentrated — a few drops deliver intense color without adding any liquid. Find it in the baking aisle near the cake decorating supplies. Wilton and AmeriColor are both widely available.
Go darker green than you think. The whipped cream you fold in is white and it lightens the whole filling by about 30–40%. Whatever shade you mix into the cream cheese base, the finished pie will be noticeably paler. If you want a vivid mint green in the final pie, aim for a deep emerald in the cream cheese mixture before the cream goes in.
Don’t rush the chill. Six hours is the minimum. If you cut into this pie at the 4-hour mark it will likely be too soft to hold a clean slice. The filling needs full time to firm up through the whole depth of the pie — the top sets faster than the center. Overnight in the refrigerator is the most reliable path to a cleanly sliced pie.
Fold, don’t stir. Once the whipped cream goes into the cream cheese mixture, put down the mixer. Folding with a spatula keeps the air in the whipped cream, which is what gives the filling its light texture. Stirring or beating at this stage deflates it and you’ll end up with a denser result.
For clean slices: Run your knife under hot water and wipe dry between every cut. Cold filling and a warm dry blade make the difference between a clean slice and a messy one.
Make-Ahead Note
This pie is built to be made ahead and it’s actually better for it. The filling sets more firmly and the flavors develop more fully after a full night in the refrigerator. Make it the evening before St. Patrick’s Day, cover it, and it’s ready to pull out and slice whenever you need it. No last-minute prep, no rushing, no hoping it set in time. It’s the kind of dessert that rewards you for planning ahead.
It keeps covered in the refrigerator for up to 3 days — the crust stays crisp through day 2 and begins to soften slightly by day 3, which some people actually prefer. To freeze: wrap the whole pie tightly in plastic wrap, then a layer of foil, and freeze for up to 2 months. Thaw overnight in the refrigerator — do not thaw at room temperature or the filling can weep and get watery.

If you make this for St. Patrick’s Day I want to see it — tag me on Instagram or drop a comment below. Did you go full mint Oreo crust? Add extra peppermint? Make the individual muffin tin version for a party? This is one of those recipes where everyone puts their own spin on it and I love seeing what that looks like in other people’s kitchens.
And if your family is anything like mine and the green is the most important part — it holds up. That color stays vivid through the full chill time, right through to the last slice. Which in our house is never very long after the first one.
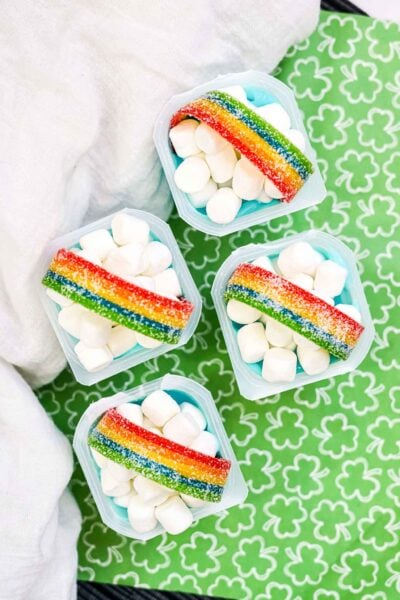
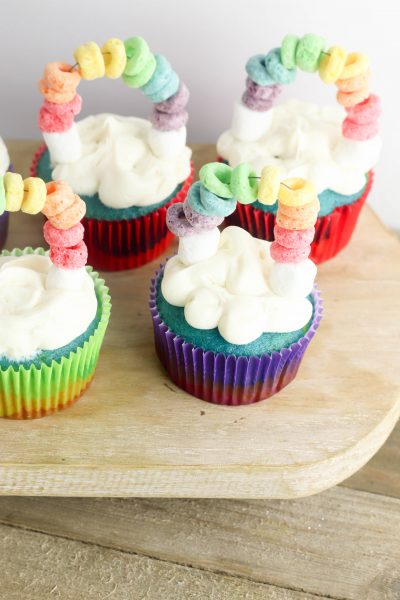
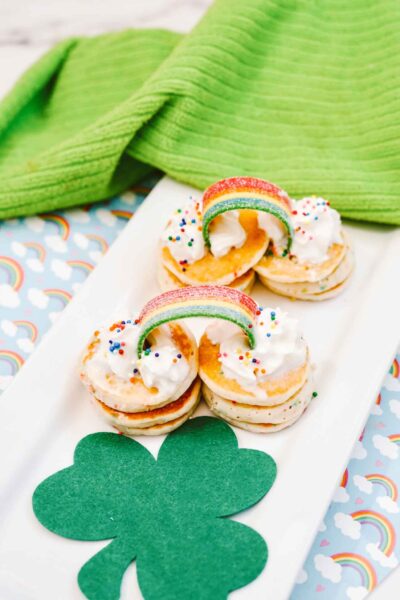
Here are some more amazing St. Patrick’s Day desserts to try:

Easy Oreo Mint Pie
This no-bake Oreo Mint Pie combines a crunchy Oreo crust with a creamy mint filling, topped with Oreo chunks for the ultimate dessert delight. It's a refreshing, minty treat that's perfect for any occasion.
Ingredients
- Ingredients
- Oreo Crust
- 25 Oreos, crushed (about 2½ cups of crumbs)
- 6 tablespoons unsalted butter, melted
- Mint Cheesecake Filling
- 8 oz cream cheese, softened to room temperature
- ¾ cup powdered sugar
- 1 teaspoon vanilla extract
- ½–1 teaspoon peppermint extract (start with ½, taste, add more to preference — 1 tsp is bold and minty, which is the goal)
- 3–5 drops green gel food coloring, adjusted to desired shade (gel only — liquid food coloring will thin the filling)
- 1 cup heavy whipping cream
- Topping
- 1 cup Oreos, roughly chopped or crushed
Instructions
Step 1 — Make the crust.Crush the Oreos into fine crumbs — a food processor works fastest, or seal them in a zip-lock bag and roll with a rolling pin until no large pieces remain. Add the melted butter and stir until every crumb is coated and the mixture looks like wet sand.
Pour the mixture into a 9-inch pie dish. Use the bottom of a flat measuring cup or glass to press it firmly and evenly across the bottom and up the sides. Press hard — the more compacted the crust, the cleaner it will slice later.
No-bake method: Cover with plastic wrap and refrigerate for at least 30 minutes until firm before adding the filling. This is the true no-bake version.
Bake method: If you prefer a sturdier crust that holds its shape even more firmly when sliced, bake at 350°F for 8 minutes, then cool completely before adding the filling. Either method works — the no-bake version is slightly more crumbly when sliced, the baked version holds a cleaner edge.
Step 2 — Make the cream cheese base.Your cream cheese needs to be fully softened — not slightly cool from the fridge, actually room temperature. Cold cream cheese won't blend smooth and you'll get lumps in your filling that no amount of mixing will fix. If you forgot to take it out ahead of time, unwrap it and microwave in 10-second bursts until soft but not melted.
Beat the cream cheese with a hand mixer until completely smooth, about 1 minute. Add the powdered sugar and beat again until creamy and lump-free. The mixture will loosen slightly when the sugar goes in — that's normal.
Add the vanilla extract, peppermint extract, and green gel food coloring. Start with ½ teaspoon of peppermint and 3 drops of gel. Blend until fully combined and smooth. Taste the mint level — if you want it stronger, add more extract a few drops at a time. For the color: go darker green than you think you want. It will lighten noticeably when the whipped cream is folded in. Aim for a deep emerald at this stage and you'll land on a bright mint green in the finished pie.
Step 3 — Whip the cream.In a completely separate clean bowl — and this matters, any trace of grease will prevent the cream from whipping properly — add the heavy whipping cream. Beat on high speed with a hand mixer until stiff peaks form, about 3–4 minutes. Stiff peaks means when you lift the beaters straight up, the cream holds its shape and doesn't flop over. Don't stop at soft peaks or your filling won't set firmly.
Step 4 — Fold together.Transfer the whipped cream into the cream cheese bowl. Using a rubber spatula, fold the two together — scoop from the bottom of the bowl, bring it up and over, rotate the bowl, repeat. Work gently and deliberately. You're not stirring — you're folding to keep as much air in the whipped cream as possible. Stop when no white streaks remain and the filling is one uniform color throughout.
Step 5 — Fill and chill.Pour the filling into the prepared crust and spread it evenly with a spatula right to the edges. Scatter the chopped Oreos generously over the top — press them in just slightly so they adhere to the surface.
Cover with plastic wrap — make sure it doesn't touch the filling surface or it will pull the top layer when you remove it. Refrigerate for at least 6 hours. Overnight is better. The filling needs full time to set or it will be too soft to slice cleanly.
Step 6 — Slice and serve.Run a sharp knife under hot water, wipe it dry, and make each cut in one clean motion. Wipe the knife between slices for the cleanest edges. Serve cold straight from the refrigerator — this pie softens quickly at room temperature.
Nutrition Information
Yield
10Serving Size
1Amount Per Serving Calories 536Total Fat 35gSaturated Fat 18gTrans Fat 0gUnsaturated Fat 15gCholesterol 68mgSodium 313mgCarbohydrates 53gFiber 2gSugar 34gProtein 5g

Before you go, Grab Your Free Printable Recipe Kit!
Keep track of all your favorite recipes and ingredients with this free printable book!
Hi! I’m Nellie. I am an entrepreneur, a busy mama of 3 and a wife to my high school sweetheart. I have been sharing content for over 12 years about how to cook easy recipes, workout tips and free printables that make life a little bit easier. I have been featured in places like Yahoo, Buzzfeed, What To Expect, Mediavine, Niche Pursuits, HuffPost, BabyCenter, Mom 2.0, Mommy Nearest, Parade, Care.com, and more!
Get comfortable and be sure to come hang out with me on social. Don’t forget to grab your free fitness journal before you go!