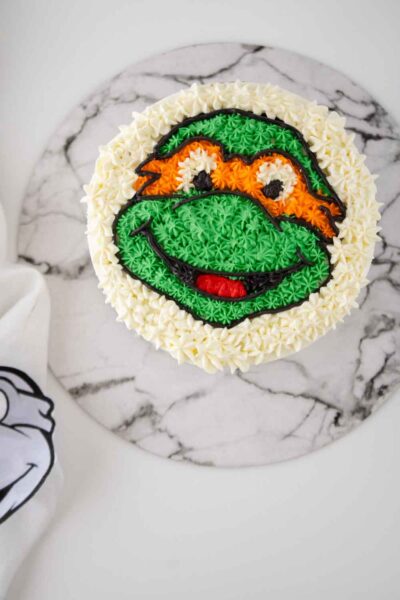
Ninja Turtle Birthday Cake Tutorial
Find your inner Turtle Power with this Teenage Mutant Ninja Turtles (TMNT) birthday cake. This recipe has a two-tier vanilla and chocolate cake, artistically designed to delight any TMNT fan. It’s an exciting and gorgeous tribute to everyone’s favorite pizza-loving, sewer-dwelling superheroes that is perfect for a 5th birthday or TMNT-themed party.

Instructions for template:
Google photos of the character you want. (or use the template used in this recipe)
Copy the photo.
Open up Power point and paste the photo in a blank document
Insert – Shape – Circle
Make the circle the size of the top of the cake (6 inch, 8 inch, etc)
Remove the “fill”
Expand or decrease the photo of the character to fit inside of the circle
Send the character “backward” or “to the back”
Print the character in greyscale or color
This Teenage Mutant Ninja Turtles Cake is the ultimate party showstopper! Whether your little one is a die-hard fan of Leo, Donnie, Raph, or Mikey, this cake is a fun and easy way to bring their favorite heroes in a half shell to life. With bright gel colors and simple decorating techniques, you’ll have a cake that’s totally tubular—no sewer experience required!
Frequently Asked Questions
Not at all! You can get creative with what you have at home—like using a plastic sandwich bag as a piping bag or even a butter knife for spreading the frosting. It’s all about having fun!
Yes! Store-bought frosting works perfectly for this cake. Just make sure you have enough, especially if you’re layering cakes or doing multiple colors.
Nope! You can choose your favorite turtle to spotlight on the cake or go all out and feature all four! The gel colors make it easy to customize based on your theme.
Any cake flavor will do, but a firmer cake like vanilla or chocolate holds up best for decorating, especially if you’re doing multiple layers.
What ingredients do you need for this teenage mutant ninja turtle birthday cake?
Prebaked Cake
Frosting
Gel Colors (Green, Brown, Black, Orange, Red)
How Do You Make this teenage mutant ninja turtles cake?

Crumb coat the cake and set it in the freezer for at least 30 mins
Remove from fridge and using a tooth pick trace the outline of the template
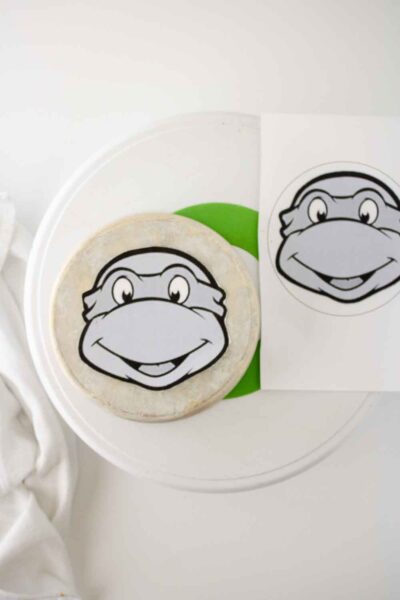
Trace the inside of the template with the toothpick as well (this will outline face on the cake)
Remove the template and place cake back in the freezer while making colors

Dye buttercream your chosen colors:
Green = ½ cup buttercream
Black = 1-2 heaping table spoons
Mask Color = 1-2 heaping table spoon
Red = 1 tbsp spoon
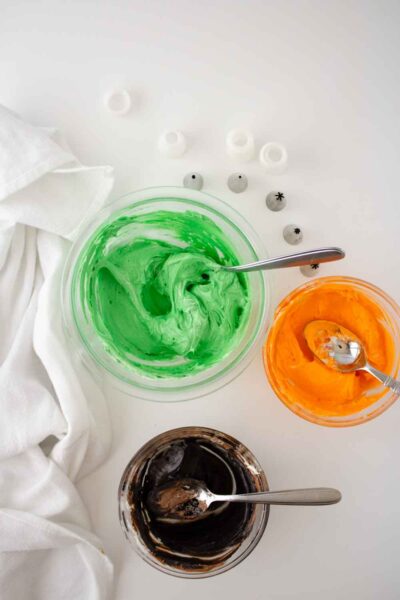
Fit 3 piping bags with couplers and a small star tip (tip 10 or 12)
Add frosting to bags
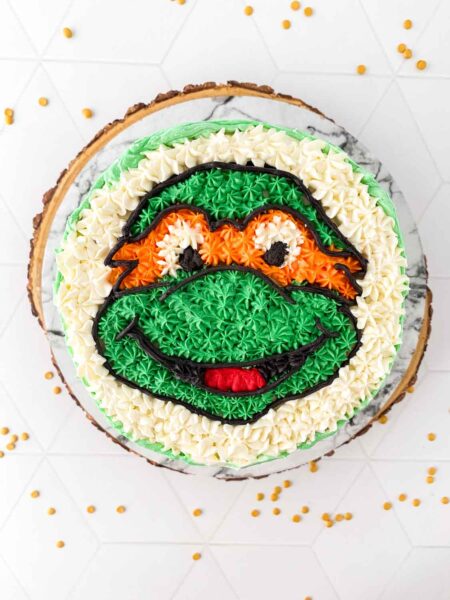
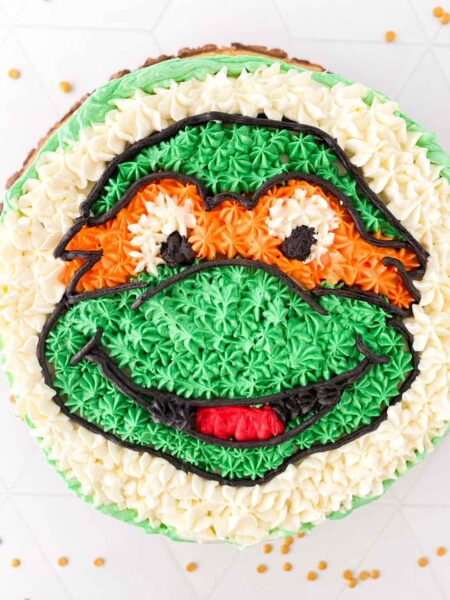
Pipe the mask first, short squeezes of buttercream. Stop squeezing before lifting to move on if your frosting has a “tail” meaning its too long.
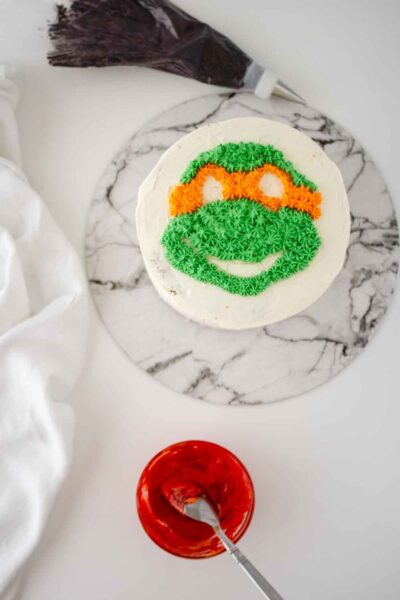
Then pipe the face.
Add the tongue.
Outline in black
Pipe the eyes.
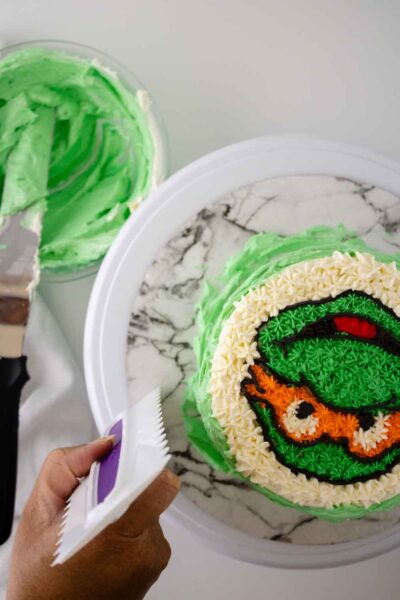
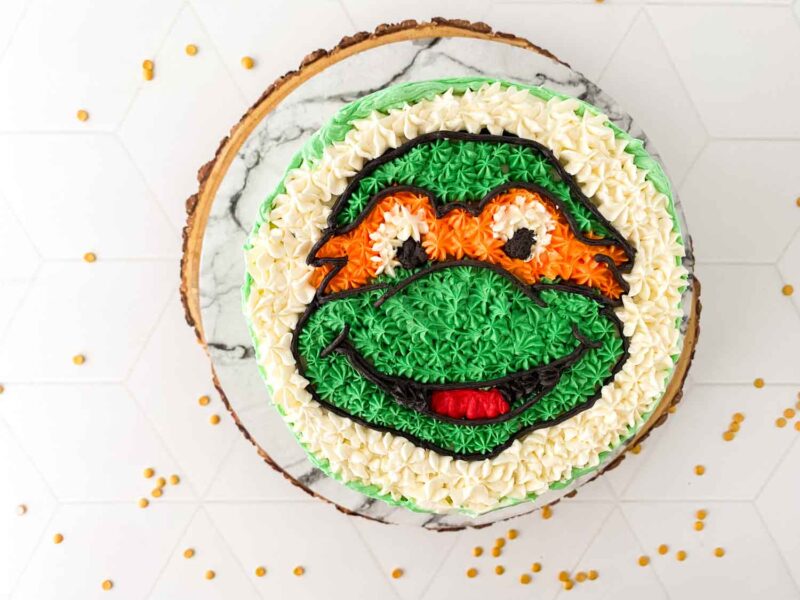
Design the sides however you’d like.
Using a cake comb is a quick and simple to elevate the side.
Important notes:
It’s much easier to decorate a frozen cake.
Use a soft buttercream, I use American Buttercream and let it whip for 10-15 mins to make it super creamy and easy to pipe.
Why This Recipe Works
A Ninja Turtles birthday cake is the perfect union of delicious cake and creative artistry. This means that there’s something for everyone, no matter what their preferred cake flavor is. The black fondant decorations, which include pizza slices, turtle heads, and a sewer lid, are not only fun to make but also bring an eye-catching element to the cake.
Can you make this recipe with kids?
Absolutely! While some parts may require adult supervision (like baking the cakes), kids will definitely enjoy helping with the decorations.
What are the topping options?
The sky’s the limit. The standard design includes pizza slices, turtle heads, and a sewer lid, but feel free to add more if you’d like. You could consider edible glitters, fondant stars, or TMNT action figures to bring extra “Turtle Power” to your cake.

Tips and Tricks
Be sure to place the cake on a metal plate or a sturdy inch cake board for support.
Variations
While the classic TMNT cake is a two-tier cake, you could opt for a single tier if you prefer. You could also switch up the flavors – how about a red velvet sewer lid or caramel turtle heads?
Where to Serve
This cake is perfect for a TMNT party, a 5th birthday celebration, or just to surprise your little guy or girl who loves the ninja turtles.
Storage
The cake should be stored in a cool, dry place, and preferably under a cake dome. It’s best to consume it within 2-3 days for the freshest taste.

Common Problems and How to Avoid Them
Problem: Fondant is tearing or cracking
Avoid rolling your fondant too thin. If your fondant starts to dry out, knead in a bit of shortening to restore its elasticity.
Problem: Cakes of different sizes are baking unevenly
Different size cakes require different baking times. Use a toothpick to check the doneness of each cake to avoid over or under-baking.
Problem: Frosting is not smooth on the sides of the cake

Achieve a smooth finish by applying a thin crumb coat first. Let it chill in the refrigerator, then apply a second, heavier coat of frosting.
Remember, when it comes to custom cakes, patience is key. Enjoy the process, and happy baking! Your Ninja Turtles birthday cake is bound to be the star of any TMNT party. Channel your inner cake decorator and let your creative spirit roam free, all the while knowing you’re creating a work of edible art your little one will remember forever. Turtle power!
What are some other fun kid friendly cake recipes to try?
If you are looking for some more amazing cake recipes be sure to check out this comprehensive list: The Most Delicious Cake Recipes For Dessert!

Ninja Turtles Birthday Cake
This awesome TMNT Cake is so good and fun to make for any ninja turtle event or celebration!
Ingredients
- Prebaked Cake
- Frosting
- Gel Colors (Green, Brown, Black, Orange, Red)
Instructions
Instructions for template:
- Google photos of the character you want.
- Copy the photo.
- Open up Power point and paste the photo in a blank document
- Insert – Shape – Circle
- Make the circle the size of the top of the cake (6 inch, 8 inch, etc)
- Remove the “fill”
- Expand or decrease the photo of the character to fit inside of the circle
- Send the character “backward” or “to the back”
- Print the character in greyscale or color
- Cut out the template
Instructions for the Cake
- Crumb coat the cake and set it in the freezer for at least 30 mins
- Remove from fridge and using a tooth pick trace the outline of the template
- Trace the inside of the template with the tooth pick as well (this will outline face on the cake)
- Remove the template and place cake back in the freezer while making colors
- Dye buttercream your chosen colors:
- Green = ½ cup buttercream
- Black = 1-2 heaping table spoons
- Mask Color = 1-2 heaping table spoon
- Red = 1 tbsp spoon
- Fit 3 piping bags with couplers and a small star tip (tip 10 or 12)
- Add frosting to bags
- Pipe the mask first, short squeezes of buttercream. Stop squeezing before lifting to move on if your frosting has a “tail” meaning its too long.
- Then pipe the face.
- Add the tongue.
- Outline in black
- Pipe the eyes.
- Design the sides however you’d like.
- Using a cake comb is a quick and simple to elevate the side.
Notes
It’s much easier to decorate a frozen cake.
Use a soft buttercream, I use American Buttercream and let it whip for 10-15 mins to make it super creamy and easy to pipe.
Nutrition Information
Yield
1Serving Size
1Amount Per Serving Calories 425Total Fat 19gSaturated Fat 4gTrans Fat 0gUnsaturated Fat 14gCholesterol 50mgSodium 255mgCarbohydrates 64gFiber 1gSugar 52gProtein 2g

Before you go, Grab Your Free Printable Recipe Kit!
Keep track of all your favorite recipes and ingredients with this free printable book!
Hi! I’m Nellie. I am an entrepreneur, a busy mama of 3 and a wife to my high school sweetheart. I have been sharing content for over 12 years about how to cook easy recipes, workout tips and free printables that make life a little bit easier. I have been featured in places like Yahoo, Buzzfeed, What To Expect, Mediavine, Niche Pursuits, HuffPost, BabyCenter, Mom 2.0, Mommy Nearest, Parade, Care.com, and more!
Get comfortable and be sure to come hang out with me on social. Don’t forget to grab your free fitness journal before you go!