Homemade Salted Caramel Ice Cream
I am a big fan of salted caramel anything. I have already shared with you my favorite salted caramel cookie bars recipe, Caramel Brownie Cookies and now I am sharing my favorite salted caramel ice cream recipe with you!

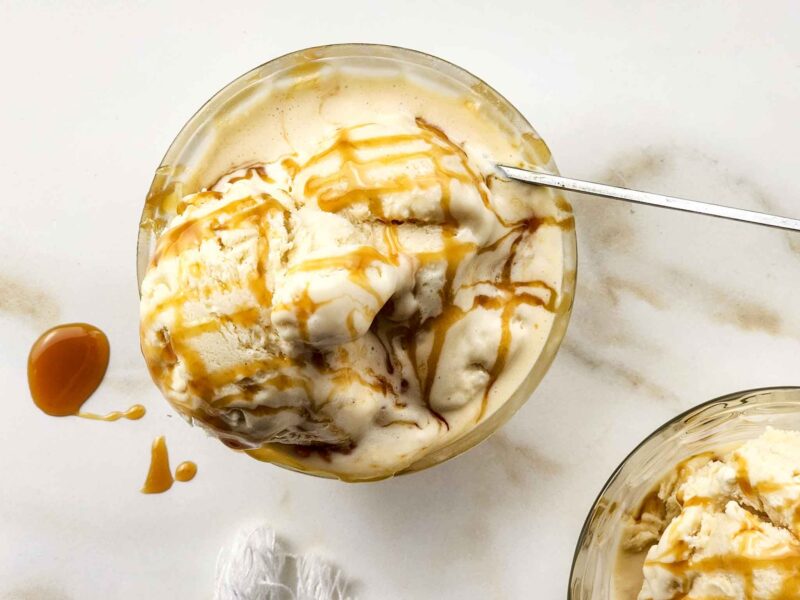
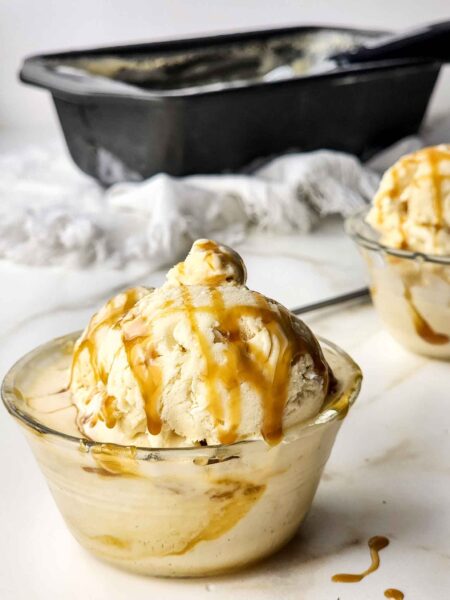
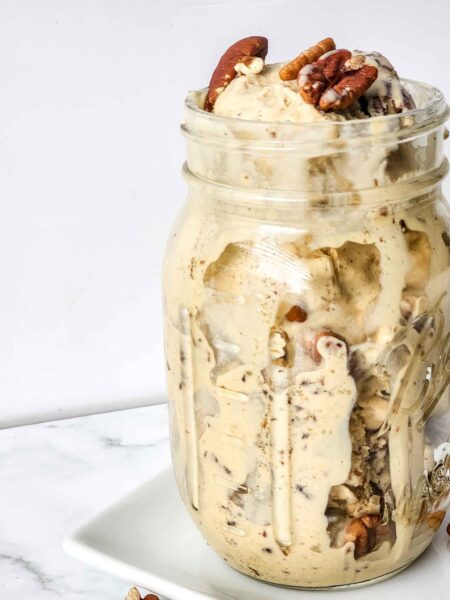
Get ready to indulge in a scoop of pure bliss with this Homemade Salted Caramel Ice Cream! This creamy, dreamy delight is perfect for satisfying your sweet tooth on a hot summer day or for impressing your friends at your next BBQ. With a rich, caramel flavor and just the right amount of saltiness, this ice cream will quickly become a household favorite.
FAQs

Q: Do I need an ice cream maker for this recipe? A: Nope! This recipe is designed to be no-churn, so all you need is a hand mixer.
Q: Can I use store-bought caramel sauce? A: Absolutely! Store-bought caramel works great if you’re short on time, but homemade caramel adds a personal touch.
Q: How long does it take to make this ice cream? A: The prep time is about 20 minutes, but you’ll need to freeze it for at least 4-6 hours, or overnight for best results.
Ingredients

- Heavy cream
- Eggs
- Sweetened condensed milk
- Sea salt
- Vanilla bean paste
- Salted caramel
Why Each Ingredient is Needed
Heavy cream: The base of any good ice cream. It provides that luscious, creamy texture.
Eggs: These add richness and help create a custard-like consistency.
Sweetened condensed milk: Adds sweetness and a smooth texture, helping to keep the ice cream soft and scoopable.
Sea salt: Enhances the caramel flavor and adds a delightful contrast to the sweetness.
Vanilla bean paste: Infuses the ice cream with a rich, aromatic vanilla flavor that pairs perfectly with the caramel.
Salted caramel: The star of the show, adding that irresistible, sweet-salty caramel goodness.
Fun Places to Serve This Ice Cream
Backyard BBQ: Surprise your guests with a homemade treat that will have them asking for seconds.
Rooftop party: Perfect for a swanky urban setting, this ice cream adds a gourmet touch to any gathering.
Picnic in the park: Pack this in a cooler and enjoy it under the sun for a delightful outdoor dessert.
Birthday parties: Kids and adults alike will adore this sweet and salty treat.

How to Store Leftovers
If you have any leftovers (which I doubt!), store them in an airtight container in the freezer. Make sure to place plastic wrap directly on the surface of the ice cream before sealing the container to prevent ice crystals from forming. It should last for up to two weeks, but trust me, it won’t stay around that long!
Tips for Making This Recipe with Kids
Measure ingredients together: Let your little ones help measure out the ingredients. It’s a great way to teach them about cooking and have fun together.
Mixing magic: Kids will love using the hand mixer. Just make sure to supervise closely.
Swirling the caramel: Let the kids drizzle and swirl the caramel into the ice cream base. They’ll feel like little chefs!
Taste test: Don’t forget the best part – tasting the mixture before freezing. It’s a sweet reward for their hard work!
Why This Recipe Works
This recipe is a no-fuss, no-churn version that skips the need for fancy equipment while still delivering a rich and creamy ice cream. The combination of heavy cream and sweetened condensed milk ensures a perfect texture, while the salted caramel and sea salt create a flavor balance that is simply irresistible.
The addition of vanilla bean paste takes it to the next level, making every bite a gourmet experience. Plus, it’s fun to make, especially with kids, making it a delightful kitchen adventure for the whole family.

So, grab your hand mixer, whip up some magic, and enjoy the sweet, salty, creamy goodness of homemade salted caramel ice cream. Happy summer scooping!
Here are some more amazing ice cream recipes for you to try!

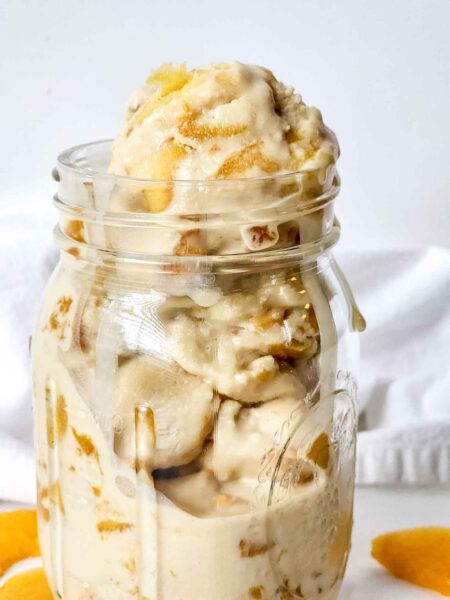

Homemade Salted Caramel Ice Cream
Indulge in this creamy, no-churn salted caramel ice cream that combines rich flavors with a perfect salty-sweet balance. It's a simple and fun treat to make at home, perfect for any occasion!
Ingredients
- 2 cups heavy cream
- 4 eggs
- 14 ounces sweetened condensed milk
- ¼ teaspoon sea salt
- 1 teaspoon vanilla bean paste
- ½ cup salted caramel
Instructions
- Start with a large mixing bowl and add the eggs and sweetened condensed milk. Whisk together until combined.
- Place this bowl over a double boiler with hot water. Whisk the mixture over the heat until it thins out, steams and becomes frothy on top, about 10 minutes.
- Remove from the heat and add the salt and vanilla bean paste.
- Take a hand mixer and blend until it slightly thickens, becoming lighter and foamier, about 7 minutes.
- Fold in ¼ cup of the salted caramel sauce into the egg mixture until combined. Set this aside.
- In a separate, larger bowl, add the heavy cream. Whip on high speed with a hand mixer until the cream has stiff peaks.
- Pour the whipped egg mixture on top of the whipped heavy cream and fold them together until no streaks remain and the two are completely incorporated.
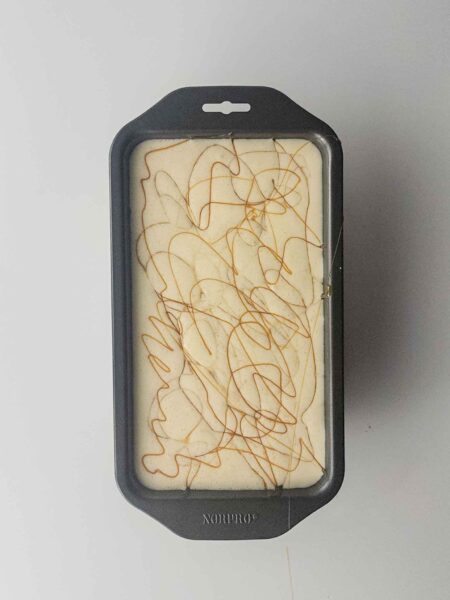
- Pour this into a loaf pan and top by drizzling the rest of the caramel sauce.
- Freeze for at least 6 hours or overnight.
- Scoop with an ice cream scoop to serve and top with more caramel sauce if desired, and enjoy!
Nutrition Information
Yield
12Serving Size
1Amount Per Serving Calories 310Total Fat 20gSaturated Fat 12gTrans Fat 1gUnsaturated Fat 6gCholesterol 122mgSodium 147mgCarbohydrates 27gFiber 0gSugar 27gProtein 7g

Before you go, Grab Your Free Printable Recipe Kit!
Keep track of all your favorite recipes and ingredients with this free printable book!
Hi! I’m Nellie. I am an entrepreneur, a busy mama of 3 and a wife to my high school sweetheart. I have been sharing content for over 12 years about how to cook easy recipes, workout tips and free printables that make life a little bit easier. I have been featured in places like Yahoo, Buzzfeed, What To Expect, Mediavine, Niche Pursuits, HuffPost, BabyCenter, Mom 2.0, Mommy Nearest, Parade, Care.com, and more!
Get comfortable and be sure to come hang out with me on social. Don’t forget to grab your free fitness journal before you go!