Easy Homemade Apple Pie Filling Recipe
The Ultimate Homemade Apple Pie Filling: A Fall Season Delight
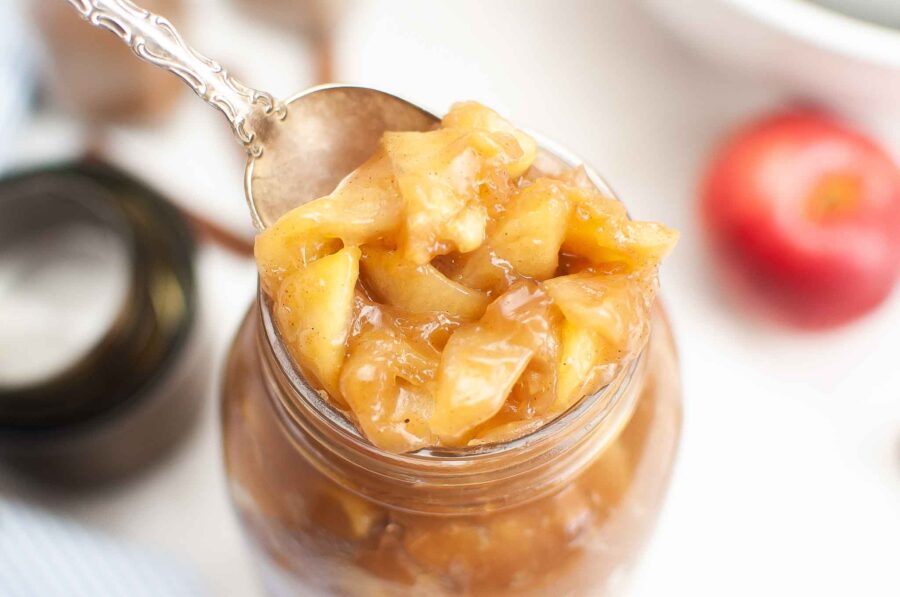
Imagine the perfect apple pie—warm, gooey filling enveloped in a buttery crust. Now, what if you could make that dreamy filling from scratch? With this homemade apple pie filling recipe, you can! It’s packed with fresh apples and warm spices, offering the perfect amount of sweetness for your next pie or dessert.

What ingredients do you need?
Understanding the role of each ingredient can help you achieve the perfect apple pie filling. Here’s why each component is crucial:
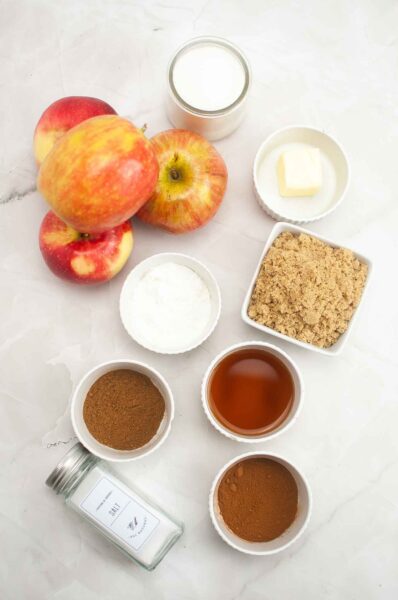
Butter
Butter adds a rich, creamy texture to the apple filling. It also helps to sauté the apple slices, bringing out their natural sweetness.
Apples and 10-15 Medium or Small Apples
Fresh apples are the star of the show. The type of apple you choose can greatly affect the flavor. Granny Smith apples offer a tart flavor, while Golden Delicious and Honeycrisp apples provide a sweeter taste.

Brown Sugar
Brown sugar adds a molasses-like sweetness and depth of flavor that granulated sugar alone can’t provide. It complements the tartness of the apples.
Granulated Sugar
Granulated sugar provides additional sweetness and helps to balance the flavors. It dissolves easily, ensuring a smooth filling.
Ground Cinnamon
Cinnamon is one of those warm spices that pairs beautifully with apples. It adds a spicy kick and aroma that elevates the whole thing.
Apple Pie Spice or Pumpkin Pie Spice
These spice blends add complexity to the filling, incorporating various warm spices like nutmeg and allspice.
Salt
Salt enhances all the flavors, making the sugars sweeter and the spices more aromatic. It’s a small but essential component.
Cornstarch
Cornstarch acts as a thickening agent, ensuring that your apple filling has the perfect consistency. It prevents the filling from becoming too runny or too thick.
Water
Water is the liquid base that helps dissolve the sugars and cornstarch. It also allows the spices to distribute evenly.
2 Teaspoons Apple Cider Vinegar
Apple cider vinegar adds a tangy kick, balancing the sweetness of the sugars. It also brightens up the flavors, making each bite more exciting.
By understanding the role of each ingredient, you can easily customize the recipe to suit your taste preferences. Whether you like your apple pie filling to be sweeter, tarter, or spicier, knowing the purpose of each ingredient gives you the freedom to make it your own.
FAQs
What Are the Best Apples for Pie Filling?
Granny Smith apples are a popular choice due to their tart flavor, but you can also use Golden Delicious or Honeycrisp apples for a sweeter profile.
Can I Use Apple Juice Instead of Water?
Yes, apple juice can add an extra layer of flavor. However, you may want to reduce the granulated sugar to balance the sweetness.

Can I Skip the Apple Cider Vinegar?
The apple cider vinegar adds a tangy kick. If you don’t have it, you can substitute it with lemon juice.
Tips and Tricks
Apple Peeler: Use an apple peeler for quick and even apple slices.
Cornstarch Slurry: Mix cornstarch with a little water before adding it to the saucepan to avoid lumps.
Medium Heat: Cook the apple filling over medium heat for the best texture and flavor.
Variations
Caramel Apple Pie: Add a caramel layer at the bottom crust for a decadent twist.
Apple Crisp: Use this filling for an easy apple crisp.
Spice It Up: Experiment with different warm spices like nutmeg or allspice.

Where to Serve
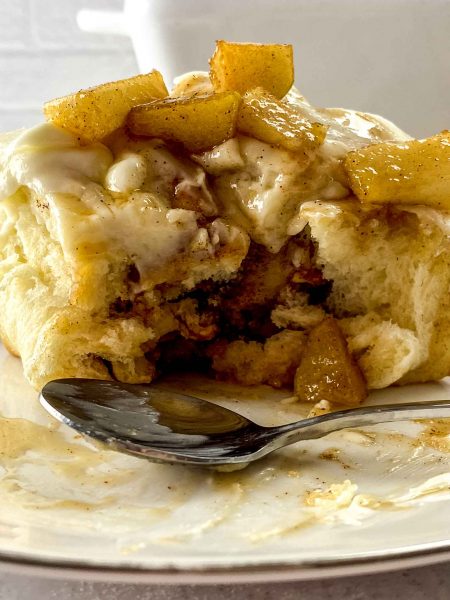
This apple filling is versatile! Use it in a classic apple pie recipe, apple turnovers, or even as a cake filling. It’s also perfect for apple hand pies.
Storage
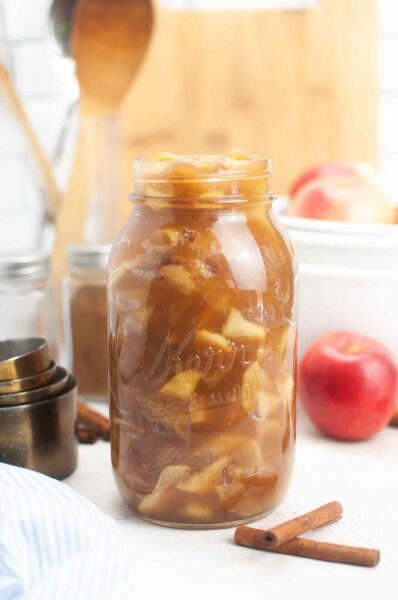
Store the apple filling in an airtight container or mason jar in the fridge for up to a week. For later use, you can also freeze it in a freezer bag.
Common Problems and How to Avoid Them
Too Runny: Make sure to cook the filling until it thickens. If it’s still runny, add a bit more cornstarch slurry.
Too Sweet: Use tart apples like Granny Smith to balance the brown sugar and granulated sugar.
Apple Slices Turning Brown: Toss the apple slices in lemon juice to prevent browning.
Tips for Making This Recipe with Kids
Apple Picking: Make it a family activity by going apple picking to choose your favorite apples.
Food Processor: Let the kids help by using a food processor to slice the apples.
Pie Dough: Use store-bought crust to save time, so the kids can focus on filling the pie.
Topping Options
Scoop of Vanilla Ice Cream: The classic choice and my favorite way to enjoy apple pie.
Egg Wash: Brush the top of the pie with egg wash for a golden brown finish.
Pie Shield: Use a pie shield or aluminum foil to prevent the edges of the crust from burning.
Why This Recipe Works
Simple Ingredients: This recipe uses simple ingredients that you likely already have in your pantry.
Versatility: The filling can be used in various apple recipes, not just pie.
Perfect Sweetness: The blend of brown sugar and granulated sugar provides the perfect sweetness, complemented by the tartness of the apples.
Texture: The cornstarch ensures that the filling is not too runny or too thick, giving you the best apple pie filling possible.
So, the next time you’re in the mood for a sweet treat, skip the canned pie filling and opt for this easy recipe. Your taste buds will thank you!
Here are some amazing recipes that you can use this apple pie filling:


Easy Homemade Apple Pie Filling
This amazing apple pie filling recipe is great for your apple pie or other amazing pastries and desserts!
Ingredients
- 2 tablespoons butter
- 5 large apples, peeled, cored, and thinly sliced
- 10-15 medium or small apples.
- ¾ cup brown sugar packed
- ¼ cup granulated sugar
- 1 teaspoon ground cinnamon
- 1 teaspoon apple pie spice or pumpkin pie spice
- ⅛ teaspoon salt
- 6 tablespoons cornstarch
- 2 ½ cups water
- 2 teaspoons apple cider vinegar
Instructions
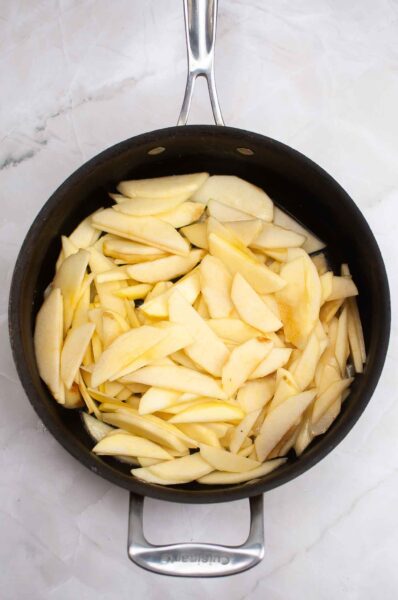
- After apples have been peeled, cored, and sliced thin, add the butter then apple slices to a large sauce skillet and sauté the apples until they are tender.
- Add the sugars and spices and continue to sauté until the sugars have dissolved and simmering.
- Add the cornstarch to water and vinegar and whisk until cornstarch has dissolved.
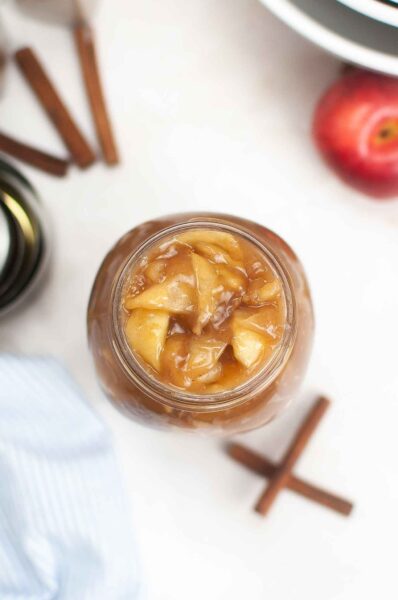
- Add the wet mixture to the apples and gently stir to mix. Bring to a simmer and allow the filling to thicken.
- Once you have reached the desired thickness, remove from the heat and let cool before canning or storing. If you are using it immediately, let cool slightly before using it.
- Canning instructions:
- Clean and sterilize your jars by washing them in hot, soapy water, rinse them well, and then boiling them in a pot of water for about 15 minutes. (Make sure the jars are completely dry before filling them.)
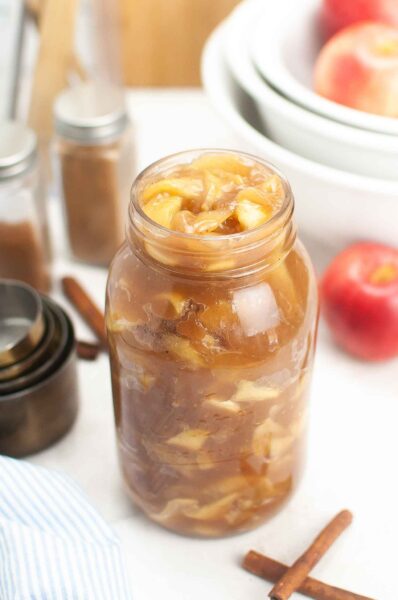
- Once your filling has cooled, fill your jars. It's important to leave about 1/4 inch of headspace at the top of the jar. This will allow the filling to expand as it cools following the sealing process.
- After filling jars, wipe off any excess filling from the rims with a clean, damp cloth to ensure a tight seal.
- Place the lids on the jars, ensuring they are centered and flat. Twist on the screw bands until they are “fingertip” tight. You don't want to over-tighten the lids, air needs to be able to escape during the canning process.
- Place the filled jars back into the boiling water bath, ensuring they are covered with at least one inch of water. Boil times for 12oz and under boils for 10 minutes, for 16 oz boil for 15 minutes, and for 32 oz boil for 25 minutes. Add 2 minutes of boiling time per 1,000 feet above sea level.
- Once the jars have finished processing, remove them from the water using a jar lifter and allow them to cool on a towel or rack for about 24 hours. Once cooled, check to ensure each jar has sealed properly by pressing on the center of the lid - if it pops up, it has not sealed and should be refrigerated and used first.
- Store the jars in a cool, dry place and let them set for about two weeks before using. This allows the flavors to develop. Your jam should be kept for up to a year when stored properly.
Nutrition Information
Yield
4Serving Size
1Amount Per Serving Calories 781Total Fat 8gSaturated Fat 4gTrans Fat 0gUnsaturated Fat 2gCholesterol 15mgSodium 138mgCarbohydrates 191gFiber 24gSugar 146gProtein 3g

Before you go, Grab Your Free Printable Recipe Kit!
Keep track of all your favorite recipes and ingredients with this free printable book!
Hi! I’m Nellie. I am an entrepreneur, a busy mama of 3 and a wife to my high school sweetheart. I have been sharing content for over 12 years about how to cook easy recipes, workout tips and free printables that make life a little bit easier. I have been featured in places like Yahoo, Buzzfeed, What To Expect, Mediavine, Niche Pursuits, HuffPost, BabyCenter, Mom 2.0, Mommy Nearest, Parade, Care.com, and more!
Get comfortable and be sure to come hang out with me on social. Don’t forget to grab your free fitness journal before you go!