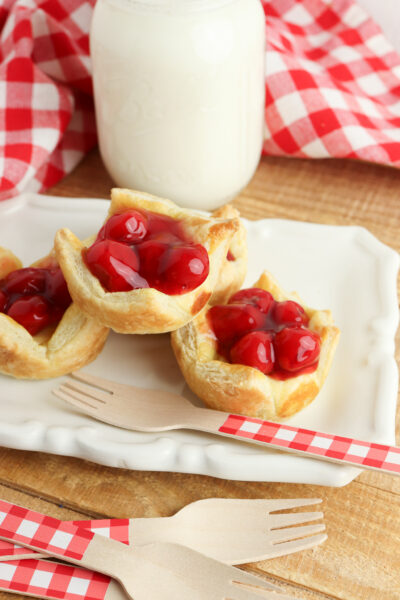
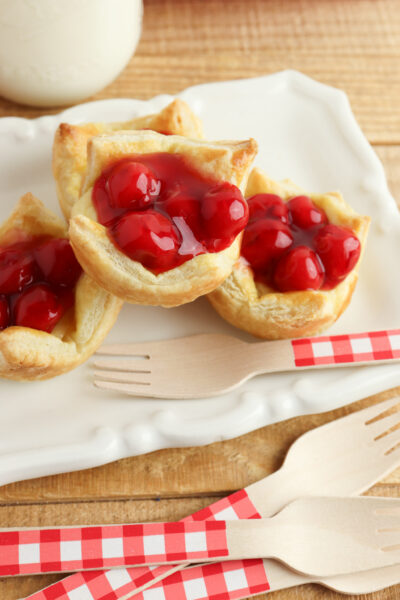
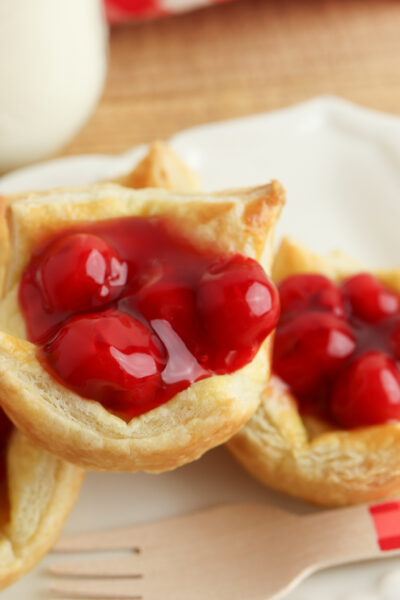
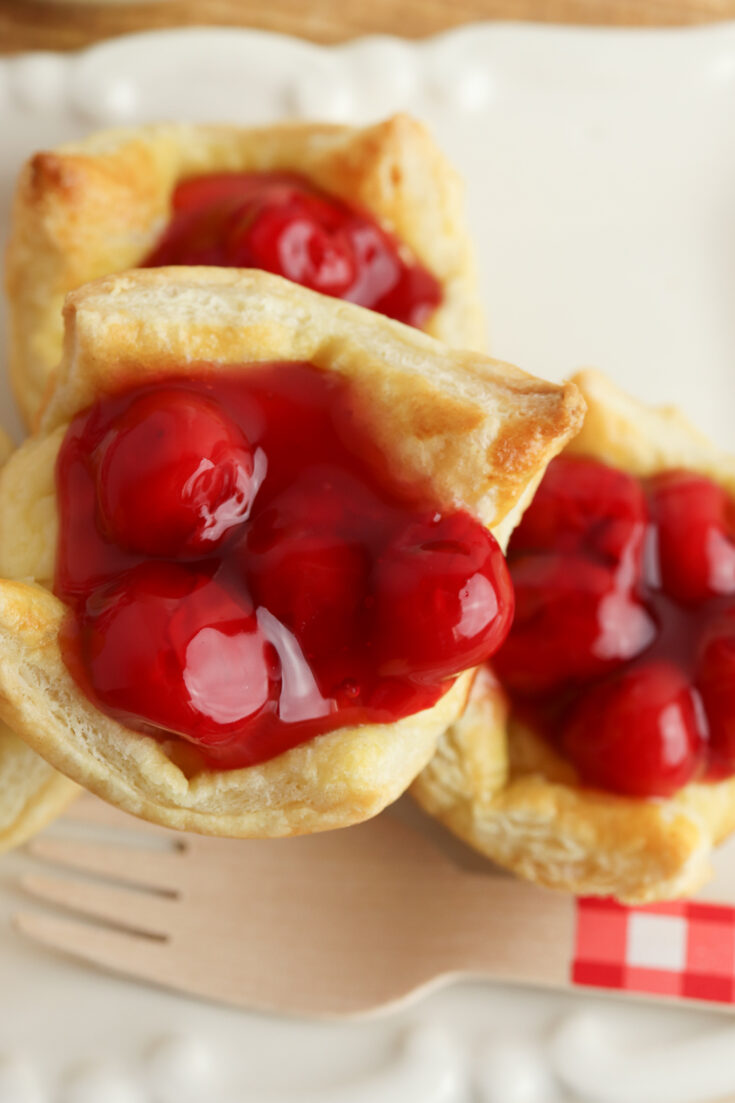
Puff Pastry Cherry Cheesecake
These Puff Pastry Cherry Cheesecake Bites are the perfect mini dessert—crispy, creamy, and bursting with sweet cherry goodness.

They come together fast, look super fancy, and taste like you spent all afternoon baking!
Y’all… these little bites are trouble in the best way possible. Flaky puff pastry, silky cheesecake filling, and that glossy cherry topping? It’s giving bakery vibes without the bakery stress. They’re adorable, they’re delicious, and they disappear so fast you might want to double the recipe right away.
Ingredients for Puff Pastry Cherry Cheesecake Bites

- Puff pastry sheets
- Cream cheese
- Butter
- Eggs
- Sugar
- Vanilla extract
- Cherry pie filling
Why Each Ingredient Works

- Puff pastry gives you those buttery, flaky layers that puff up beautifully and create the perfect little cup.
- Cream cheese brings the dreamy, tangy base for the cheesecake filling.
- Butter adds richness and helps the filling stay smooth and velvety.
- Eggs help the cheesecake set while adding structure and a little extra creaminess.
- Sugar sweetens the filling just enough without overpowering the cherries.
- Vanilla extract rounds out the flavor with a warm, cozy note.
- Cherry pie filling adds that classic pop of color and fruity sweetness.
How to Make Puff Pastry Cherry Cheesecake Bites
- Preheat your oven to 400 degrees so it’s nice and hot before the pastry goes in. Puff pastry loves heat!
- Unfold the thawed puff pastry and roll each sheet until it’s about ¼ inch thick. This gives you more surface area and lighter cups.
- Cut each sheet into 12 rectangles, trying to keep them as even as possible so they bake uniformly.
- Gently press each rectangle into a muffin pan slot, forming little pastry cups with the corners sticking up slightly.
- Lightly beat one egg and brush the tops of the pastry cups. This helps them turn a gorgeous golden color.
- In a medium bowl, mix the cream cheese, butter, the remaining egg, sugar, and vanilla until smooth and fluffy. Take your time here—no lumps!
- Add about one tablespoon of filling into each puff pastry cup. Don’t overfill; the pastry will rise.
- Bake for 12–15 minutes, or until the pastry edges are puffed and golden brown. The filling should look lightly set.
- Let them cool completely at room temp, then chill them in the fridge for at least one hour so the cheesecake gets its full creamy texture.
- When serving, spoon a generous helping of cherry pie filling on top of each bite. The glossy cherries make them extra cute and extra tasty.
When I tested this recipe, my whole family was lurking around the kitchen like I was making state secrets. The kids kept peeking into the oven like something magical was happening in there (honestly… it kinda was). The moment these came out, my husband walked by like, “Oh, we fancy today?” And once everyone snagged their first bite, they immediately asked if I made a second batch. Now these cute little cheesecake bites are officially a “please make this again” dessert in my house.

FAQs About Puff Pastry Cherry Cheesecake Bites
Make sure the pastry is fully baked and golden before removing it from the oven. Cooling and chilling the cups before adding cherries also helps keep everything crisp.
Absolutely! If you have fresh or frozen cherries, simmer them with a little sugar and cornstarch until thick and glossy.
Yes! Make and chill the cheesecake cups the day before, then add the cherry topping right before serving.
For sure—blueberry, strawberry, raspberry, or even lemon curd would be amazing.
Freeze them without the cherry topping, then thaw in the fridge and add the cherries right before serving.
If you want a dessert that feels fancy but comes together with simple ingredients, these little cherry cheesecake bites are your new best friend!
Here are some more amazing recipes to try:
Puff Pastry Cherry Cheesecake
These Puff Pastry Cherry Cheesecake Bites are crispy, creamy, and topped with sweet cherries for the cutest little dessert ever. They come together fast, look bakery-level fancy, and always disappear the second they hit the table.
Ingredients
- 1 package frozen puff pastry (two sheets), thawed
- 8 ounces cream cheese, softened
- 2 tablespoons butter, softened
- 2 eggs, divided
- ¼ cup sugar
- 1 teaspoon vanilla extract
- 1 can cherry pie filling
Instructions
- Preheat the oven to 400 degrees.
- Open the puff pastry and roll each sheet out until it’s around ¼ inch thick. Cut each sheet into 12 rectangles.
- Press the rectangles into two muffin pans to form a cup shape.
- Lightly beat one of the eggs and brush it over the top of each puff pastry cup.
- In a medium bowl, beat together the cream cheese, butter, remaining egg, sugar, and vanilla until well combined.
- Add one tablespoon of mixture to each pastry cup.
- Place in the oven to bake for 12 to 15 minutes, until the edges of the pastry are golden brown.
- Allow the pastry to cool to room temperature, then transfer to the refrigerator to chill for at least one hour.
- When ready to serve, top each of the mini cheesecakes with a spoonful of cherry pie filling.
Nutrition Information
Yield
24Serving Size
1Amount Per Serving Calories 75Total Fat 5gSaturated Fat 3gUnsaturated Fat 2gCholesterol 29mgSodium 88mgCarbohydrates 4gFiber 0gSugar 3gProtein 3g

Before you go, Grab Your Free Printable Recipe Kit!
Keep track of all your favorite recipes and ingredients with this free printable book!
Hi! I’m Nellie. I am an entrepreneur, a busy mama of 3 and a wife to my high school sweetheart. I have been sharing content for over 12 years about how to cook easy recipes, workout tips and free printables that make life a little bit easier. I have been featured in places like Yahoo, Buzzfeed, What To Expect, Mediavine, Niche Pursuits, HuffPost, BabyCenter, Mom 2.0, Mommy Nearest, Parade, Care.com, and more!
Get comfortable and be sure to come hang out with me on social. Don’t forget to grab your free fitness journal before you go!