Fried Chicken Ice Cream – Vanilla Ice Cream Shaped Like a Drumstick
My kids saw this on TikTok and immediately requested it. That’s usually how it starts in my house — someone shows me a screen and says “can we make this?” and I either say yes or I say yes but later. This one I said yes to immediately because the concept is just too good.
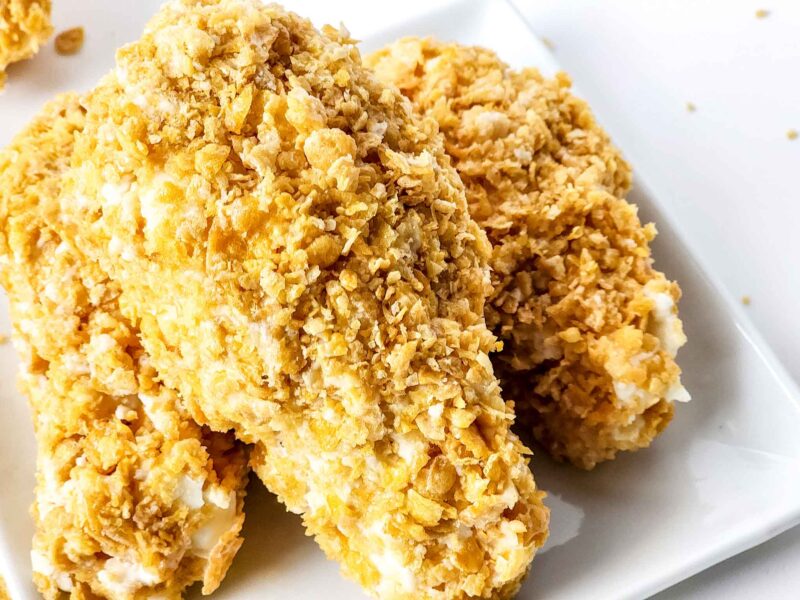
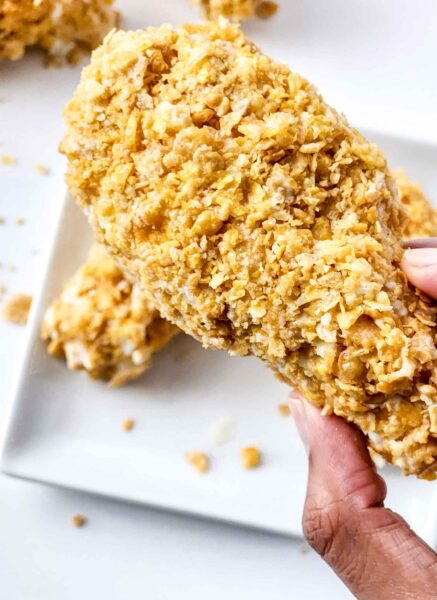
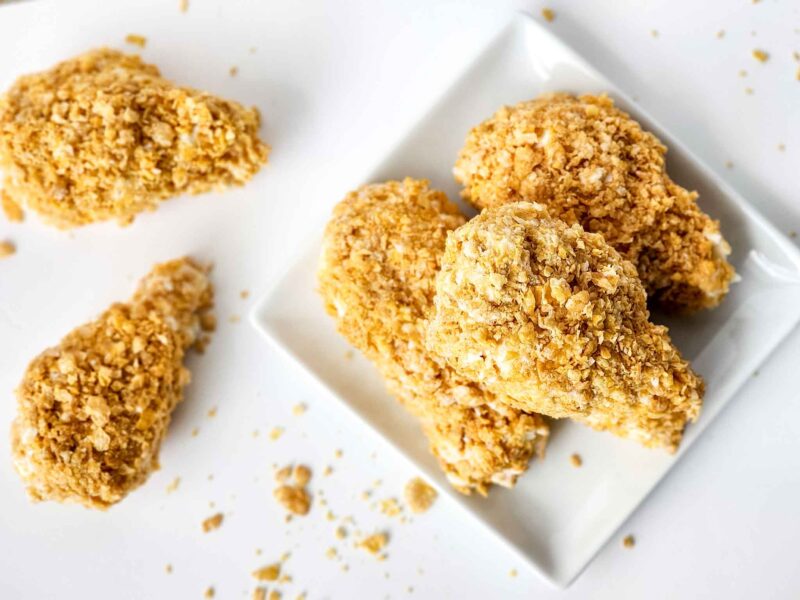
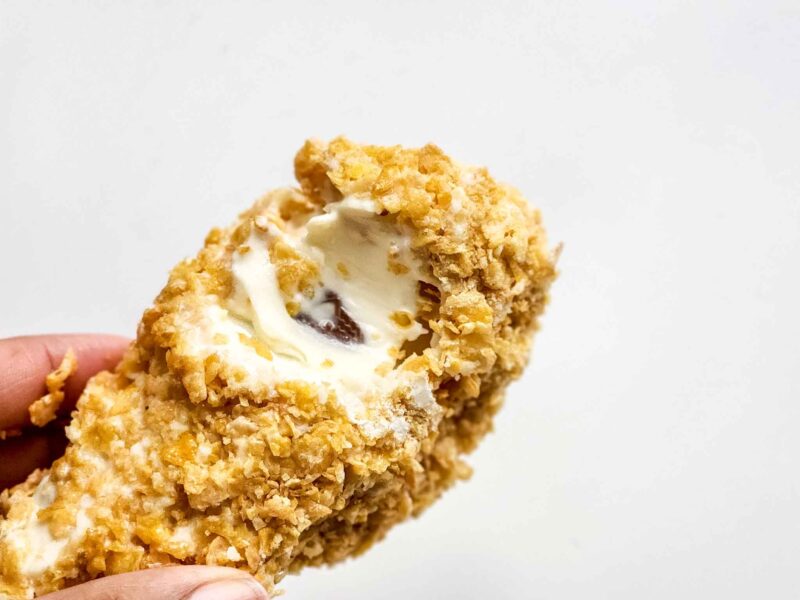
It’s vanilla ice cream. Shaped like a chicken drumstick. Coated in white chocolate and crushed corn flakes so it genuinely looks like fried chicken. There is no savory flavor anywhere in it — it’s all sweet — but it looks convincing enough that the first time I served these at a cookout, two adults reached for one thinking it was the real thing. The moment the fork went through the corn flake coating and hit ice cream instead of chicken is something I will not forget.
The technique is straightforward once you understand the two-freeze method: shape and freeze first, then coat and freeze again. The shaping is the part that requires the most speed — your hands warm up fast and the ice cream melts faster than you expect. Have your gloves on and your tray ready before you start.
What is Fried Chicken Ice Cream?
Fried Chicken Ice Cream is a unique and delicious dessert that has become popular on the social media platform TikTok. It resembles fried chicken but instead of being savory, it’s actually made from vanilla ice cream coated with cookie crumbs or crushed cereal to give it the “fried” look.
The base of this treat is the vanilla ice cream which can be rolled in the crushed cookie crumbs or cereal and then frozen with a fun candy treat in the middle. Once it sets, the Fried Chicken Ice Cream is ready to be eaten!
What ingredients do you need for these fun treats?
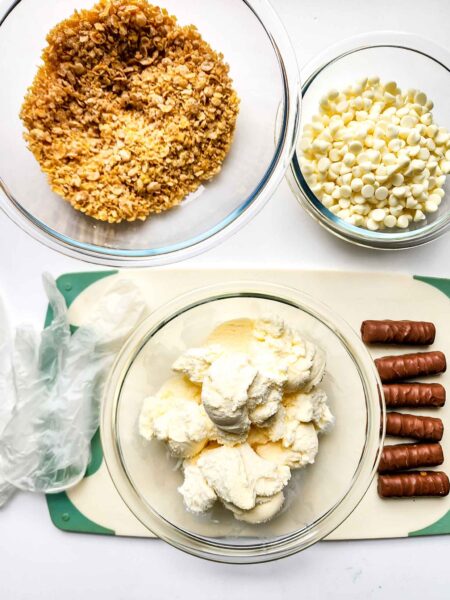
- 1.75 quarts vanilla ice cream
- 6 Mini Twix Bars
- 2 cups white chocolate chips
- 3 cups corn flakes, crushed
How do I make Fried Chicken Ice Cream?
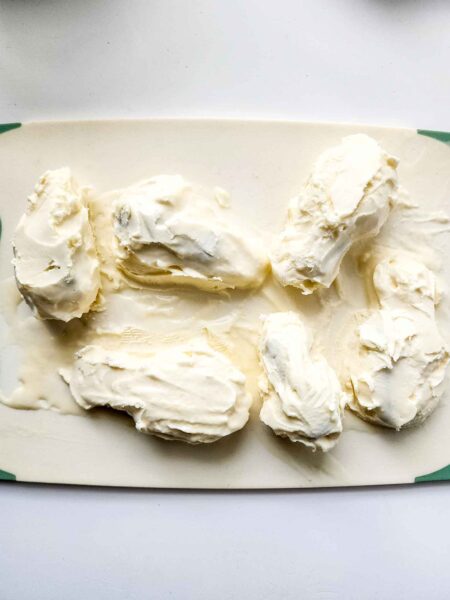
- Place the cold ice cream in a large bowl. Have a cutting board or clean surface to place the ice cream on and can go in the freezer.
- Put your gloves on and have the Twix bars ready to go. Take a handful of ice cream and flatten in your hand. Place a Twix in the middle and add more ice cream on top.
- Mold the ice cream to cover the Twix bar and create a chicken drumstick shape. Work quickly because the ice cream will start to melt and your hands will get cold.
- Once you have your desired chicken wing shape, place it on your cutting board. You can do any extra smoothing and shaping with a spoon while its on the platter.
- Repeat this with the rest of the ice cream and Twix bars.
- Once you have completed them all, place the platter in the freezer for 2 hours.
- About 30 minutes before the 2 hours is up, melt the white chocolate in the microwave at 30 second intervals until smooth.
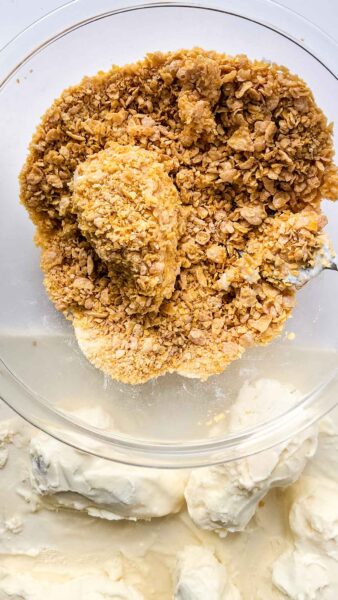
- Prep the corn flakes by crushing them up into small pieces.
- Once you have your station prepared, remove the ice cream from the freezer.
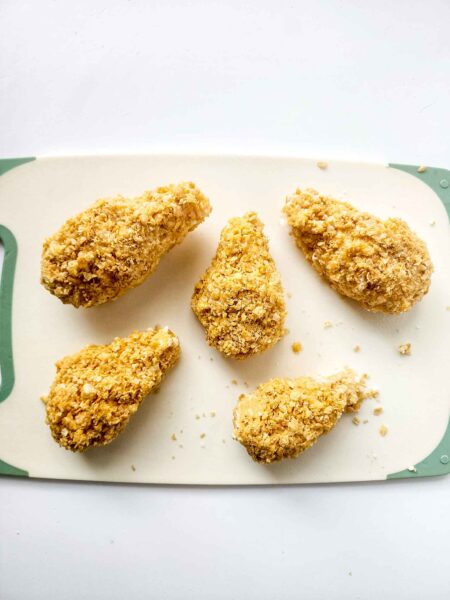
- Pick up each ice cream drumstick and place first in the white chocolate and coat, then into the corn flakes. Pat and cover every inch of the white chocolate and do any extra shaping to make sure it still looks like a drumstick.
- Place back on the platter and repeat with the rest of the ice cream.
- Once you are finished, place the platter back into the freezer for another 2 hours.
- Once you take them out, enjoy!
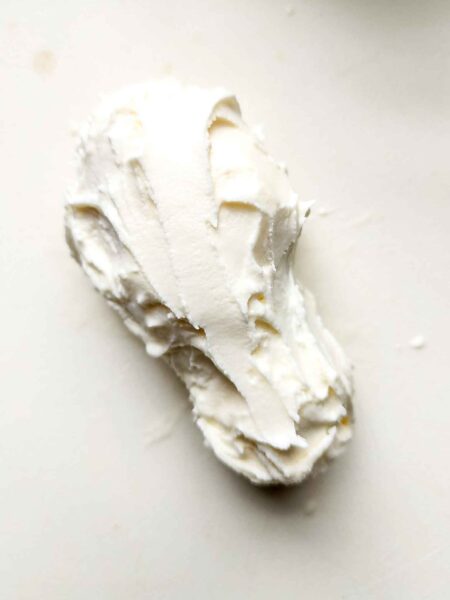
Vanilla ice cream (1.75 quarts): The full container is used for 6 pieces, which means each piece is roughly ¼ cup more than a standard single scoop. Premium ice cream with higher fat content holds its shape during the shaping process better than lower-quality ice cream, which tends to melt faster and become icy after re-freezing. Breyers, Häagen-Dazs, and Turkey Hill are all reliable. Avoid soft-serve style or “frozen dairy dessert” products — they melt too quickly to shape.
Mini Twix bars (6): The fun-size bars sold in bulk bags work perfectly. Each one becomes the “bone” inside the drumstick. The caramel and cookie inside create a satisfying textural contrast against the ice cream — this is the detail that makes the eating experience as good as the visual. Kit Kat bars are a good swap if you prefer a different flavor. Avoid anything with nuts, which can create structural issues when shaping.
White chocolate chips (2 cups): This becomes the adhesive layer between the ice cream and the corn flake coating — the functional equivalent of egg wash in actual fried chicken. It also adds sweetness and sets firm after the second freeze. Use real white chocolate chips (Ghirardelli or Guittard), not white baking chips or white melting wafers, which have a different fat content and may not set as firmly.
Corn flakes (3 cups, crushed): The size of the crush matters. Too fine and it looks like breadcrumbs — convincing but too uniform. Too coarse and it doesn’t adhere well. Aim for pieces roughly the size of panko breadcrumbs — a mix of sizes that mimics the irregular look of actual fried chicken breading. Crush them in a zip-lock bag with a rolling pin so you can control the consistency.
FAQs
No — there’s nothing savory about it. The flavor is all sweet: vanilla ice cream, chocolate and caramel from the Twix, sweet white chocolate coating, and slightly sweet corn flake crunch. The resemblance to fried chicken is entirely visual.
Yes, they store well in the freezer for up to one month. Just note the cereal coating may lose some crunch over time.
Plan for about 4–5 hours total—including shaping and two stages of freezing (initial and post-coating)—plus any prep time.
The ice cream wasn’t cold enough when you started coating. The pieces need to be completely frozen solid — 2 full hours minimum — before the white chocolate goes on. If they’ve softened at all, the chocolate won’t set evenly and will pool at the base. Return the shaped pieces to the freezer for another hour and try again.
Mini or fun-size Twix bars — the individually wrapped ones sold in bulk bags. Full-size bars are too long and wide to shape the ice cream around cleanly. King-size bars won’t work at all.
Yes — shaping the ice cream directly with bare hands transfers too much heat too quickly and the ice cream starts melting before the shape is set. Food-safe disposable gloves (the kind used for food prep) are available at grocery stores and restaurant supply stores. They’re listed as needed equipment for this recipe.
How to shape the ice cream without it becoming a disaster
This is the step that will either work smoothly or turn into a warm, melting mess, and the difference is preparation. Everything needs to be ready before the ice cream comes out of the container.
Set up your station first. You need: food-safe gloves, a parchment-lined cutting board or baking sheet that fits in your freezer, and all your Twix bars unwrapped and within reach. The ice cream should be firm — not rock hard straight from the freezer, but not soft-serve. If it’s been in a deep freeze, let it sit at room temperature for 3–4 minutes before starting. If it’s soft already, put it back for 20 minutes.
Work one drumstick at a time. Scoop a generous handful — roughly ¾ cup of ice cream — and flatten it in your gloved hand. Place the Twix bar lengthwise in the center (this becomes the “bone”). Fold the ice cream up and around the Twix, pressing firmly to eliminate air pockets. The thicker end should be rounded like the meaty top of a drumstick; narrow it toward one end where the “bone” sticks out slightly.
Smooth on the tray, not in your hand. Once the basic shape is formed, place it on the parchment-lined tray and use the back of a cold spoon to smooth and refine the shape. Your hands transfer heat continuously — the spoon doesn’t.
Work fast and freeze fast. You have approximately 60–90 seconds of workable time per piece before the ice cream starts to lose integrity. If you feel it getting soft in your hands, put that piece on the tray immediately and let it firm up before finishing the shaping. Don’t rush the shaping to compensate — a rushed drumstick looks rushed.
The 2-hour freeze between shaping and coating is not optional. The shaped pieces need to be completely firm before the white chocolate coating goes on, or the coating won’t set evenly and the shape won’t hold. If you try to rush this step, the coating slides off and you lose the illusion entirely.
How to coat without losing the shape
Melt the white chocolate correctly. Use 30-second microwave intervals and stir between each one. White chocolate burns faster than dark or milk chocolate and once it seizes it can’t be fixed — you’ll need to start over. Stop microwaving when there are still small unmelted pieces and let the residual heat finish the job while stirring. The chocolate should be fluid but not hot.
Work quickly but deliberately. Remove one piece from the freezer at a time — leaving all pieces out while you coat them gives the uncoated ones too much time to soften. Hold the drumstick by the narrow end (the “bone” side) and lower it into the white chocolate, using a spoon to coat any missed areas. Let excess chocolate drip back into the bowl for 3–4 seconds.
Coat with corn flakes immediately. Transfer the chocolate-coated piece directly into the crushed corn flakes while the chocolate is still liquid. Press gently on all sides — enough to adhere, not enough to compress the shape. This is the step that creates the fried chicken illusion: the corn flakes need to look natural and slightly irregular, like actual breading, not perfectly uniform.
Back in the freezer, flat side down. The second 2-hour freeze sets the coating completely. Don’t cover the tray with plastic wrap during this freeze — the wrap will stick to the corn flakes and ruin the surface when you pull it off. Leave uncovered for the final freeze, then transfer to an airtight container for storage.
What are some fun ways to serve this recipe?
The presentation is half the recipe. Serve these well and the reaction is significantly better than serving them from a plate in a kitchen where everyone already knows what they are.
The cookout reveal: Set these in a paper-lined basket alongside the real food — next to the actual chicken if you’re feeling bold. Don’t announce what they are. The best reactions happen when someone reaches for what they think is a drumstick.
The kid’s birthday version: Present these on a tray as “dinner” before the cake. Children in the 6–12 range lose their minds at the reveal. Works equally well as an April Fool’s Day project.
The dipping sauce setup: Serve with small cups of chocolate sauce, caramel sauce, or strawberry sauce labeled as “BBQ sauce” and “ranch.” The condiment commitment to the bit makes the presentation complete.
For photos: The best shot is the bite-reveal — the cross-section showing the white chocolate layer, the ice cream interior, and the Twix center. This is the image that performs on Pinterest and Instagram. If you’re photographing these, plan for it specifically and do it fast before the ice cream softens.
VARIATIONS
Swap the ice cream flavor: Chocolate ice cream with dark chocolate coating instead of white creates a different visual — darker “skin,” still convincing. Strawberry ice cream adds a pink interior reveal. Cookie butter or dulce de leche ice cream pairs exceptionally well with the Twix center.
Swap the candy center: Kit Kat (thinner profile, easier to shape around), Snickers (caramel and peanut — changes the flavor profile significantly), or a chocolate truffle for a simpler bite.
Swap the coating: Frosted Flakes instead of corn flakes for a sweeter coating. Rice Krispies for a lighter crunch. Graham cracker crumbs for a different color and flavor. All three still read visually as fried chicken if crushed to the right size.
Mini version: Use 12 mini Twix bars and divide the ice cream into 12 smaller pieces. Roughly half the size, half the calories per piece, easier for kids to handle. Better for a crowd where you need more individual servings.
What are some other fun ice cream recipes to make?
If you are looking for more ice cream recipes be sure to check out this comprehensive list –> The Best Homemade Ice Cream Recipes

Super Fun and Viral Fried Chicken Ice Cream Recipe
This viral ice cream recipe looking like fried chicken except it's ice cream with with fun candy center!
Ingredients
- 1.75 quarts vanilla ice cream
- 6 Mini Twix Bars
- 2 cups white chocolate chips
- 3 cups corn flakes, crushed
Instructions
- Step 1: Prep your stationLine a baking sheet with parchment paper and confirm it fits in your freezer flat. Unwrap all 6 Twix bars and place them within reach. Put your food-safe gloves on. Remove the ice cream from the freezer and let it sit at room temperature for 3–4 minutes — it should be firm but slightly pliable, not rock hard.
- Step 2: Shape the drumsticksWorking one at a time, scoop a generous handful of ice cream (roughly ¾ cup) and flatten in your gloved hand. Place a Twix bar lengthwise in the center. Fold the ice cream around the Twix and press firmly to eliminate air pockets. Shape into a drumstick — rounded and thick at one end, narrowing toward the other where the Twix sticks out slightly as the "bone." Transfer to the parchment-lined tray and use the back of a cold spoon to smooth and refine the shape. Work fast — you have about 60–90 seconds per piece before the ice cream starts softening.
- Step 3: First freezePlace the tray in the freezer for 2 hours minimum. The shaped pieces need to be completely solid before coating.
- Step 4: Prep the coatingAbout 30 minutes before the 2 hours is up, crush the corn flakes in a zip-lock bag to a rough panko-like consistency — varied sizes, not powder. Melt the white chocolate in 30-second microwave intervals, stirring between each, until just fluid. Let it cool slightly — it should be fluid but not steaming hot.
- Step 5: Coat the drumsticksRemove the tray from the freezer. Working one piece at a time, hold by the narrow end and lower into the white chocolate, spooning to coat any missed spots. Let excess drip for 3–4 seconds. Immediately press into the crushed corn flakes on all sides, patting gently to adhere without compressing the shape. Return to the tray. Repeat with remaining pieces.
- Step 6: Second freezeReturn the coated tray to the freezer, uncovered, for 2 more hours until the coating is completely set.
- Step 7: ServeRemove from the freezer and serve immediately, or transfer to an airtight container for storage. For the full effect, serve in a paper lined basket or tray alongside actual food so guests don't immediately know what they're grabbing.
Nutrition Information
Yield
6Serving Size
1Amount Per Serving Calories 962Total Fat 49gSaturated Fat 32gTrans Fat 0gUnsaturated Fat 13gCholesterol 84mgSodium 391mgCarbohydrates 119gFiber 2gSugar 95gProtein 13g

Before you go, Grab Your Free Printable Recipe Kit!
Keep track of all your favorite recipes and ingredients with this free printable book!
Hi! I’m Nellie. I am an entrepreneur, a busy mama of 3 and a wife to my high school sweetheart. I have been sharing content for over 12 years about how to cook easy recipes, workout tips and free printables that make life a little bit easier. I have been featured in places like Yahoo, Buzzfeed, What To Expect, Mediavine, Niche Pursuits, HuffPost, BabyCenter, Mom 2.0, Mommy Nearest, Parade, Care.com, and more!
Get comfortable and be sure to come hang out with me on social. Don’t forget to grab your free fitness journal before you go!