Strawberry Pudding Parfait Cups
If you are looking for a healthy easy and tasty treat check out these yummy strawberry pudding parfait cups! Great for snacks for kids!
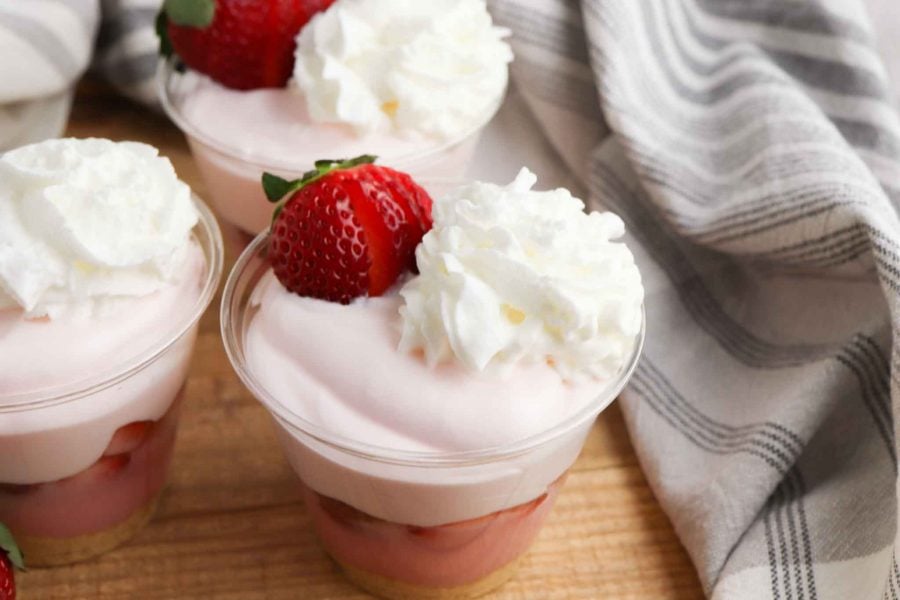
Strawberry Pudding Parfaits – The Sweetest Little Layered Treat

The first time I made these, I was just trying to pull something together fast. My kids came home hangry, I had a box of pudding mix in the pantry and strawberries that needed to be used, and I figured — let’s see what happens. I layered everything into clear cups, popped them in the fridge, and went on with my afternoon.
When my youngest opened the fridge later and saw them sitting there all pink and layered and pretty, she said “Mom, this is fancy.” And I stood there and just took that win completely unearned.
That’s the magic of these strawberry pudding parfait cups. They look like you did something. You did not do very much. And they taste genuinely good — creamy, fresh, a little crunchy from the graham crackers, and sweet without being heavy. We’ve made them for after-school snacks, summer cookouts, and birthday parties, and they disappear every single time.

Ingredients and Why They Work
Instant Strawberry Pudding Mix (1 box, 3.9 oz) This is the flavor base and the creamy layer. Instant pudding — not cook-and-serve — is what you want here because it sets quickly with just cold milk and no heat required. I used the Sonic Strawberry Shake pudding from Walmart, which has a really bright strawberry flavor, but any instant strawberry pudding works. You can also use vanilla, cheesecake, or even lemon if you want to mix it up.
Milk (2 cups) Cold milk is what activates the instant pudding and gives it that thick, silky texture. Use whole milk for the richest result, but 2% works fine too. Don’t use non-dairy milk unless it’s specifically labeled as working with instant pudding — not all of them set properly.
Whipped Topping (1 cup, plus more for serving) This does double duty. Some of it goes on top of each finished cup as garnish, but the key move is mixing the rest into the second half of your pudding before the final layer. That’s what makes the top layer lighter and fluffier — almost mousse-like — instead of just more pudding. It’s a small step that makes a real difference in texture and presentation. Use Cool Whip or any store-brand equivalent straight from the tub.
Graham Cracker Crumbs (1 cup) The crunch. The graham cracker layer at the bottom gives every bite a buttery, slightly sweet contrast to the creamy pudding above it. You can buy graham cracker crumbs pre-crumbled, or crush a sleeve of graham crackers yourself in a zip-lock bag with a rolling pin — either works. For an upgrade, use golden Oreo crumbs or shortbread cookie crumbles instead.
Chopped Strawberries (1 cup, plus more for topping) Fresh strawberries bring the real fruit flavor that instant pudding alone can’t replicate. They add juice, texture, and a little tartness that cuts through the sweetness of the pudding. Chop them small enough that you get strawberry in every spoonful. If your strawberries aren’t very sweet, toss them with a tiny pinch of sugar and let them sit for 5 minutes — they’ll release their juice and taste much better.
Clear Plastic Cups Not just for aesthetics — the clear cup is part of the experience. Seeing the layers is half the appeal, especially for kids. Standard 9 oz clear plastic cups work perfectly. If you’re making these for a party, they also make for easy grab-and-go serving with no plates or spoons to manage.

How to Make This Perfectly Layered Dessert
Start by making the pudding. Whisk together the pudding mix and cold milk in a medium bowl for about 2 minutes until smooth and well combined. Let it sit for 3–5 minutes to thicken up. You want it set enough to hold a layer but still spoonable — it should be the consistency of a thick yogurt.
While the pudding sets, get your cups ready and your strawberries chopped.
Now here’s how the layering works — and the order matters:
Add ¼ cup of graham cracker crumbs to the bottom of each cup. Press them down lightly so they form a solid base layer. This keeps them from floating up when you add the pudding.
Spoon half of the pudding (divided evenly across all four cups) over the graham cracker layer. Use the back of the spoon to smooth it down gently.
Add ¼ cup of chopped strawberries on top of the pudding in each cup. This is your fresh fruit layer — don’t skip it.
Now take the remaining half of the pudding and fold in the full cup of whipped topping. Stir gently until just combined — you want it light and airy, not deflated. This mixture is noticeably fluffier and lighter than the straight pudding, almost like a strawberry mousse. Spoon it over the strawberry layer in each cup.
Cover the cups and refrigerate for at least one hour. This chill time is important — it lets the layers settle and firm up, and the flavors come together much better cold than at room temperature.
When you’re ready to serve, add a dollop of whipped topping to each cup and place a whole strawberry on top. That’s it.
The first time I made these, I was just trying to pull together something fun for my kids after school—because honestly, they were coming home hangry and I didn’t have the energy for full-on baking. I layered everything into the cups, popped them in the fridge, and when they opened the door later, it was like I had just handed them golden tickets to Willy Wonka’s factory. My youngest actually said, “This is fancy, Mom!”—and I happily took that win.
Tips for Perfect Parfait Cups
Don’t skip the chill time. One hour minimum, two hours is even better. The layers hold their shape much more cleanly after a proper chill, and the graham crackers soften slightly in the best way — think the texture of a no-bake cheesecake crust.
Press the graham cracker layer down. A loose crumb layer will float up when you add pudding. A light press with the back of a spoon keeps it anchored.
Fold, don’t stir, the whipped topping into the pudding. Stirring too hard deflates it and you lose the mousse-like texture. Gentle folds until just combined is all you need.
Chop strawberries small. Large chunks make the layers uneven and harder to layer cleanly. Aim for pieces about the size of a blueberry.
Make these ahead. They keep beautifully in the fridge for up to 24 hours — just hold off on adding the final whipped topping dollop and strawberry garnish until right before serving so they look fresh.
For a party: Set up an assembly station and let kids layer their own. It’s a low-mess activity that keeps them busy and gives them ownership over what they’re eating.

FAQs About Strawberry Pudding Parfaits
Totally! Vanilla, cheesecake, or even chocolate would work.
Yes! You can prep them the night before and they’ll still be perfect the next day.
Nope, but the layers are half the fun.
Yes. Whip heavy cream to stiff peaks with a tablespoon of powdered sugar and a splash of vanilla. It’s richer and slightly less stable than Cool Whip, so serve the same day if you go this route.
Up to 24 hours covered in the refrigerator. After that the graham crackers get very soft and the fresh strawberries start to break down. They’re best eaten within the day they’re made or the morning after.

What Makes This Recipe Uniquely Mine
I don’t just layer the pudding and call it a day—mixing the whipped topping into the second layer makes it extra light and fluffy, almost mousse-like. Plus, I always load up on real strawberries so you get that burst of freshness in every single bite.
If you make these, leave a comment and tell me how it went — especially if your kids had anything to say about them. And if you’re saving recipes for summer, pin this one now. It’s the kind of thing you’ll want ready when strawberry season hits and you need a fast, crowd-pleasing dessert that looks like you put in way more effort than you actually did.
Here are some more yummy treats to try

Strawberry Pudding Parfait Cups
This strawberry pudding parfait cup is so easy to make and great for an after school snack!
Ingredients
- 1 3.9 ounce package instant strawberry pudding (I used Sonic Strawberry Shake pudding from Wal-Mart)
- 2 cups milk
- 1 cup whipped topping, plus more for topping
- 1 cup graham cracker crumbs
- 1 cup chopped strawberries, plus more strawberries for topping
- Clear plastic cups
Instructions
- Whisk together the strawberry pudding and milk until smooth and well combined. Allow the pudding to rest until thickened.
- Add ¼ cup graham cracker crumbs to the bottom of each cup.
- Spoon half the pudding over the top of the graham cracker crumbs.
- Place ¼ cup chopped strawberries on top of each layer of pudding.
- Add the whipped topping to the remaining pudding and stir to mix. Spoon the remaining pudding mixture over the top of the chopped strawberries.
- Place the cups in the refrigerator to chill for at least one hour.
- Top each cup with a fresh strawberry and a dollop of whipped topping before serving.
Nutrition Information
Yield
4Serving Size
1Amount Per Serving Calories 275Total Fat 11gSaturated Fat 6gTrans Fat 0gUnsaturated Fat 3gCholesterol 25mgSodium 179mgCarbohydrates 39gFiber 2gSugar 26gProtein 7g

Before you go, Grab Your Free Printable Recipe Kit!
Keep track of all your favorite recipes and ingredients with this free printable book!
Hi! I’m Nellie. I am an entrepreneur, a busy mama of 3 and a wife to my high school sweetheart. I have been sharing content for over 12 years about how to cook easy recipes, workout tips and free printables that make life a little bit easier. I have been featured in places like Yahoo, Buzzfeed, What To Expect, Mediavine, Niche Pursuits, HuffPost, BabyCenter, Mom 2.0, Mommy Nearest, Parade, Care.com, and more!
Get comfortable and be sure to come hang out with me on social. Don’t forget to grab your free fitness journal before you go!