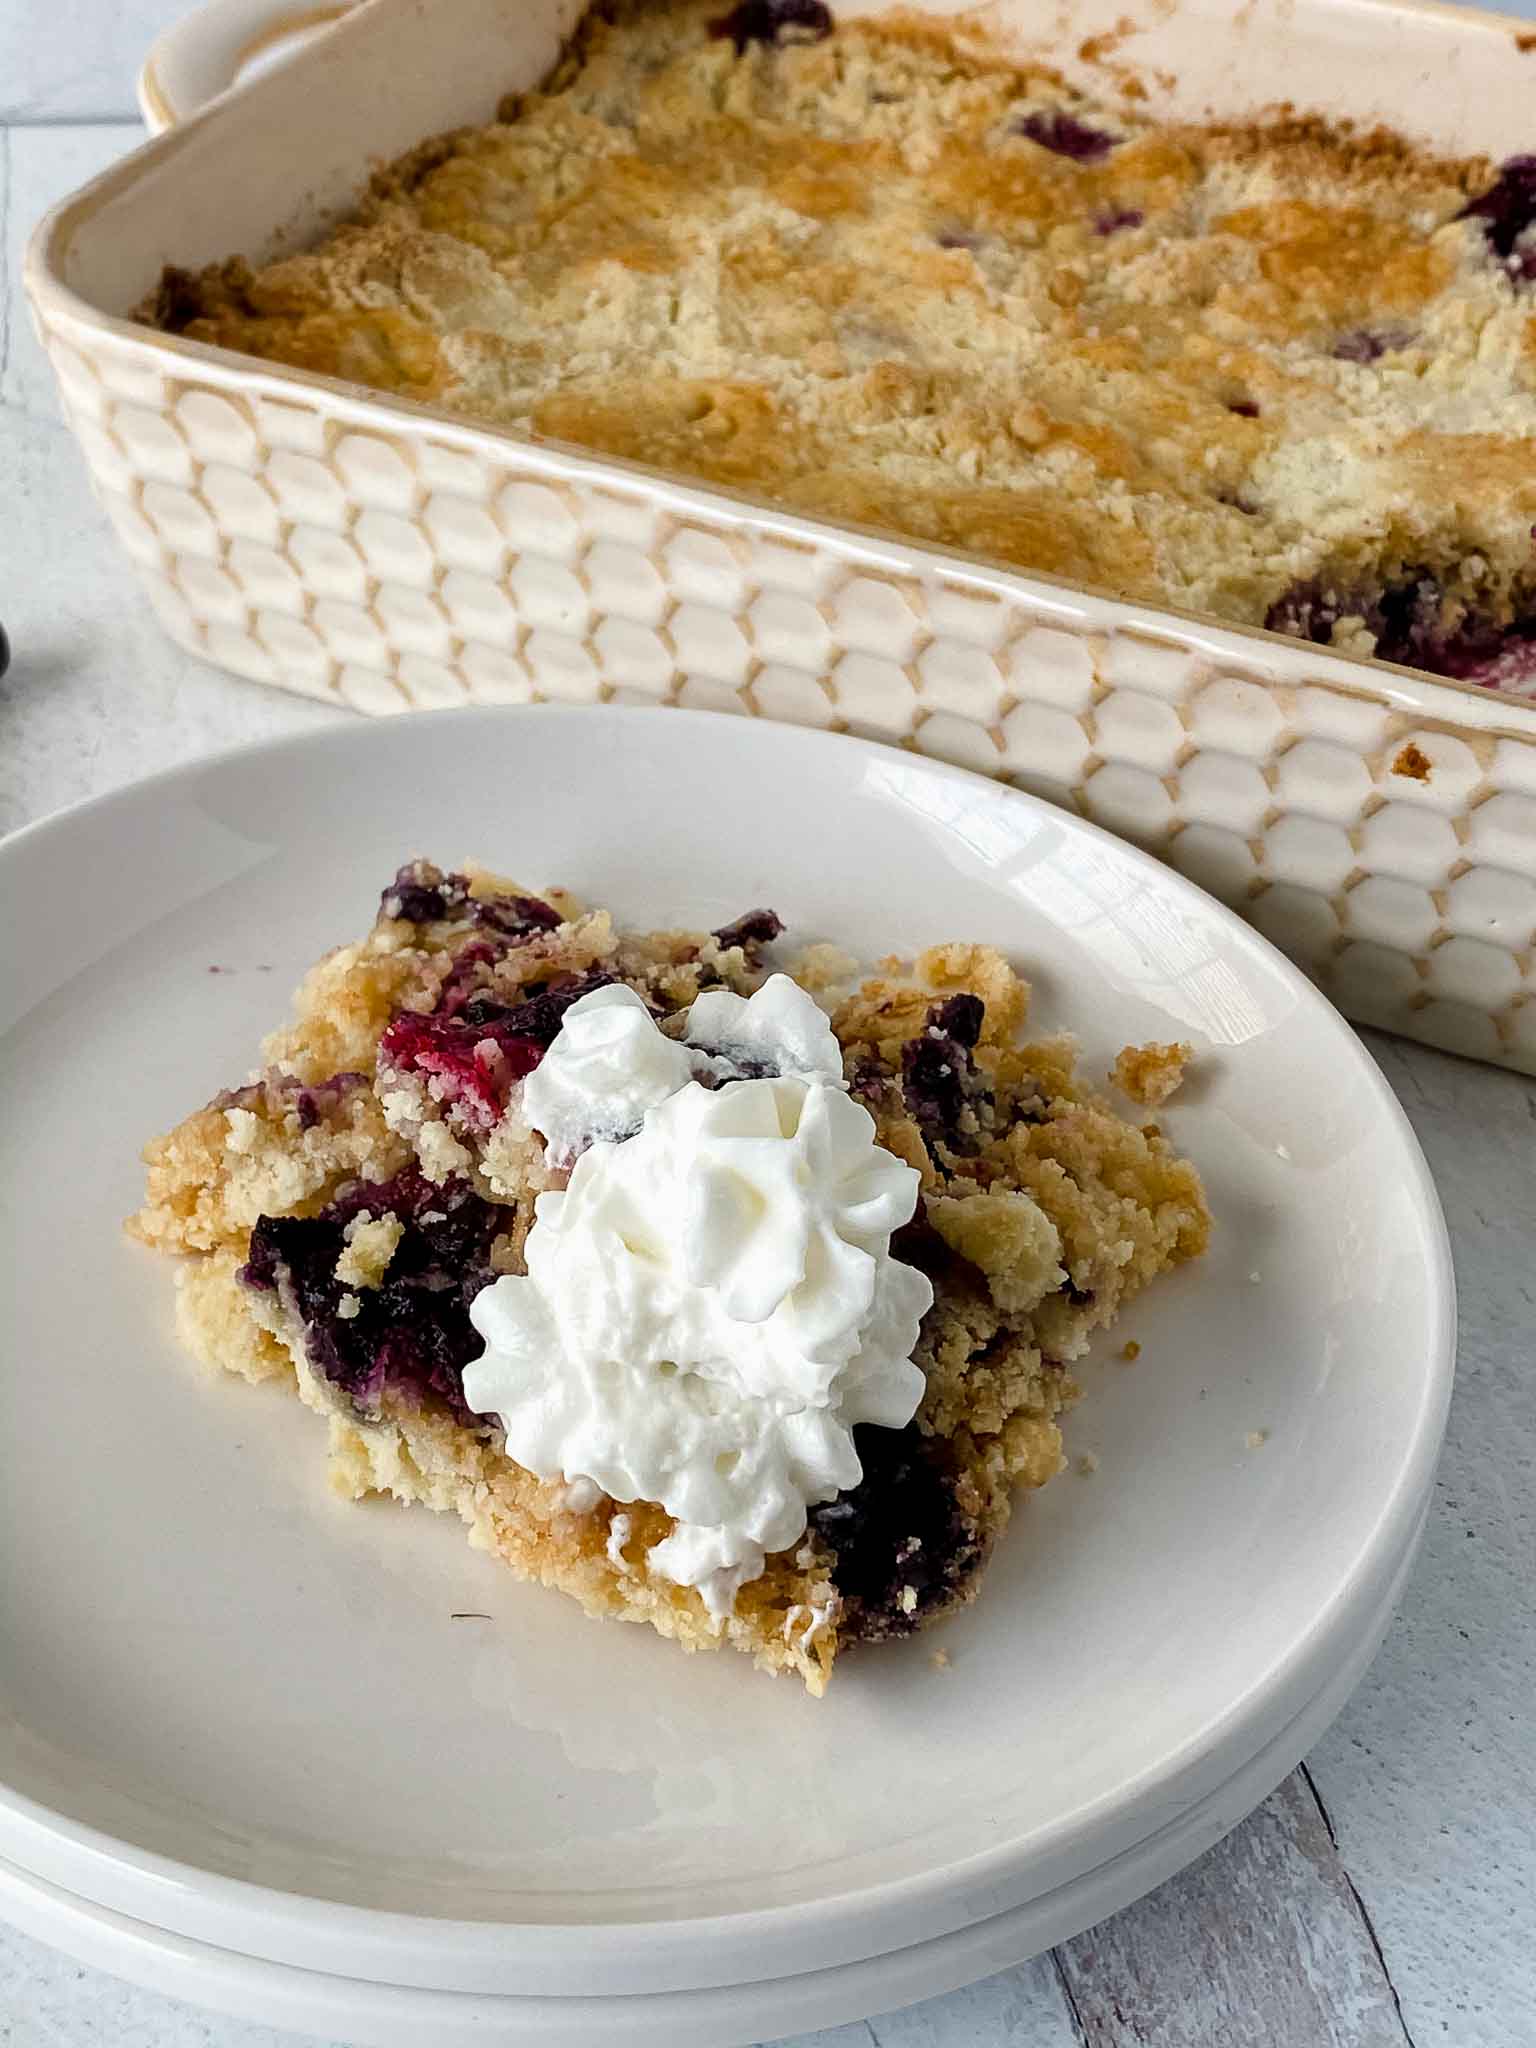
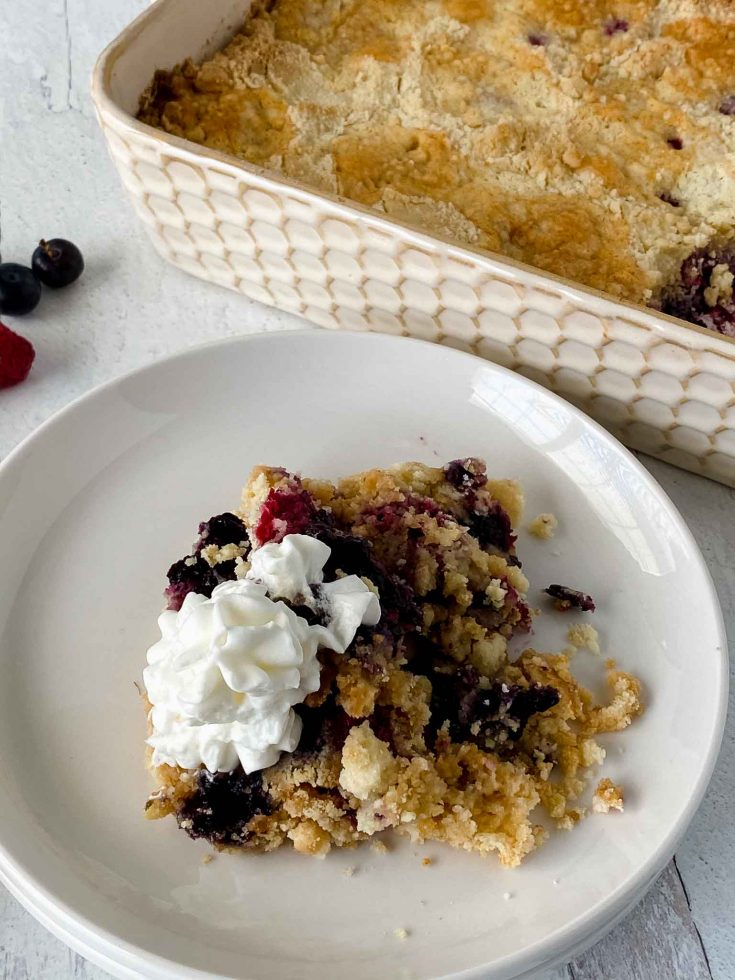
Easy Very Berry Dump Cake With Fresh Berries
This very berry dump cake is made with yummy raspberries and blueberries. It’s a super delicious dessert with super simple ingredients.
Dump cake is exactly what it sounds like. You dump the fruit in the pan, dump the cake mix on top, distribute butter over everything, bake it, and eat it warm with whatever topping you like. There are no bowls to clean except the one you tossed the berries in. There is no mixer, no batter, no technique to master. It takes about ten minutes of active time and the oven does the rest.
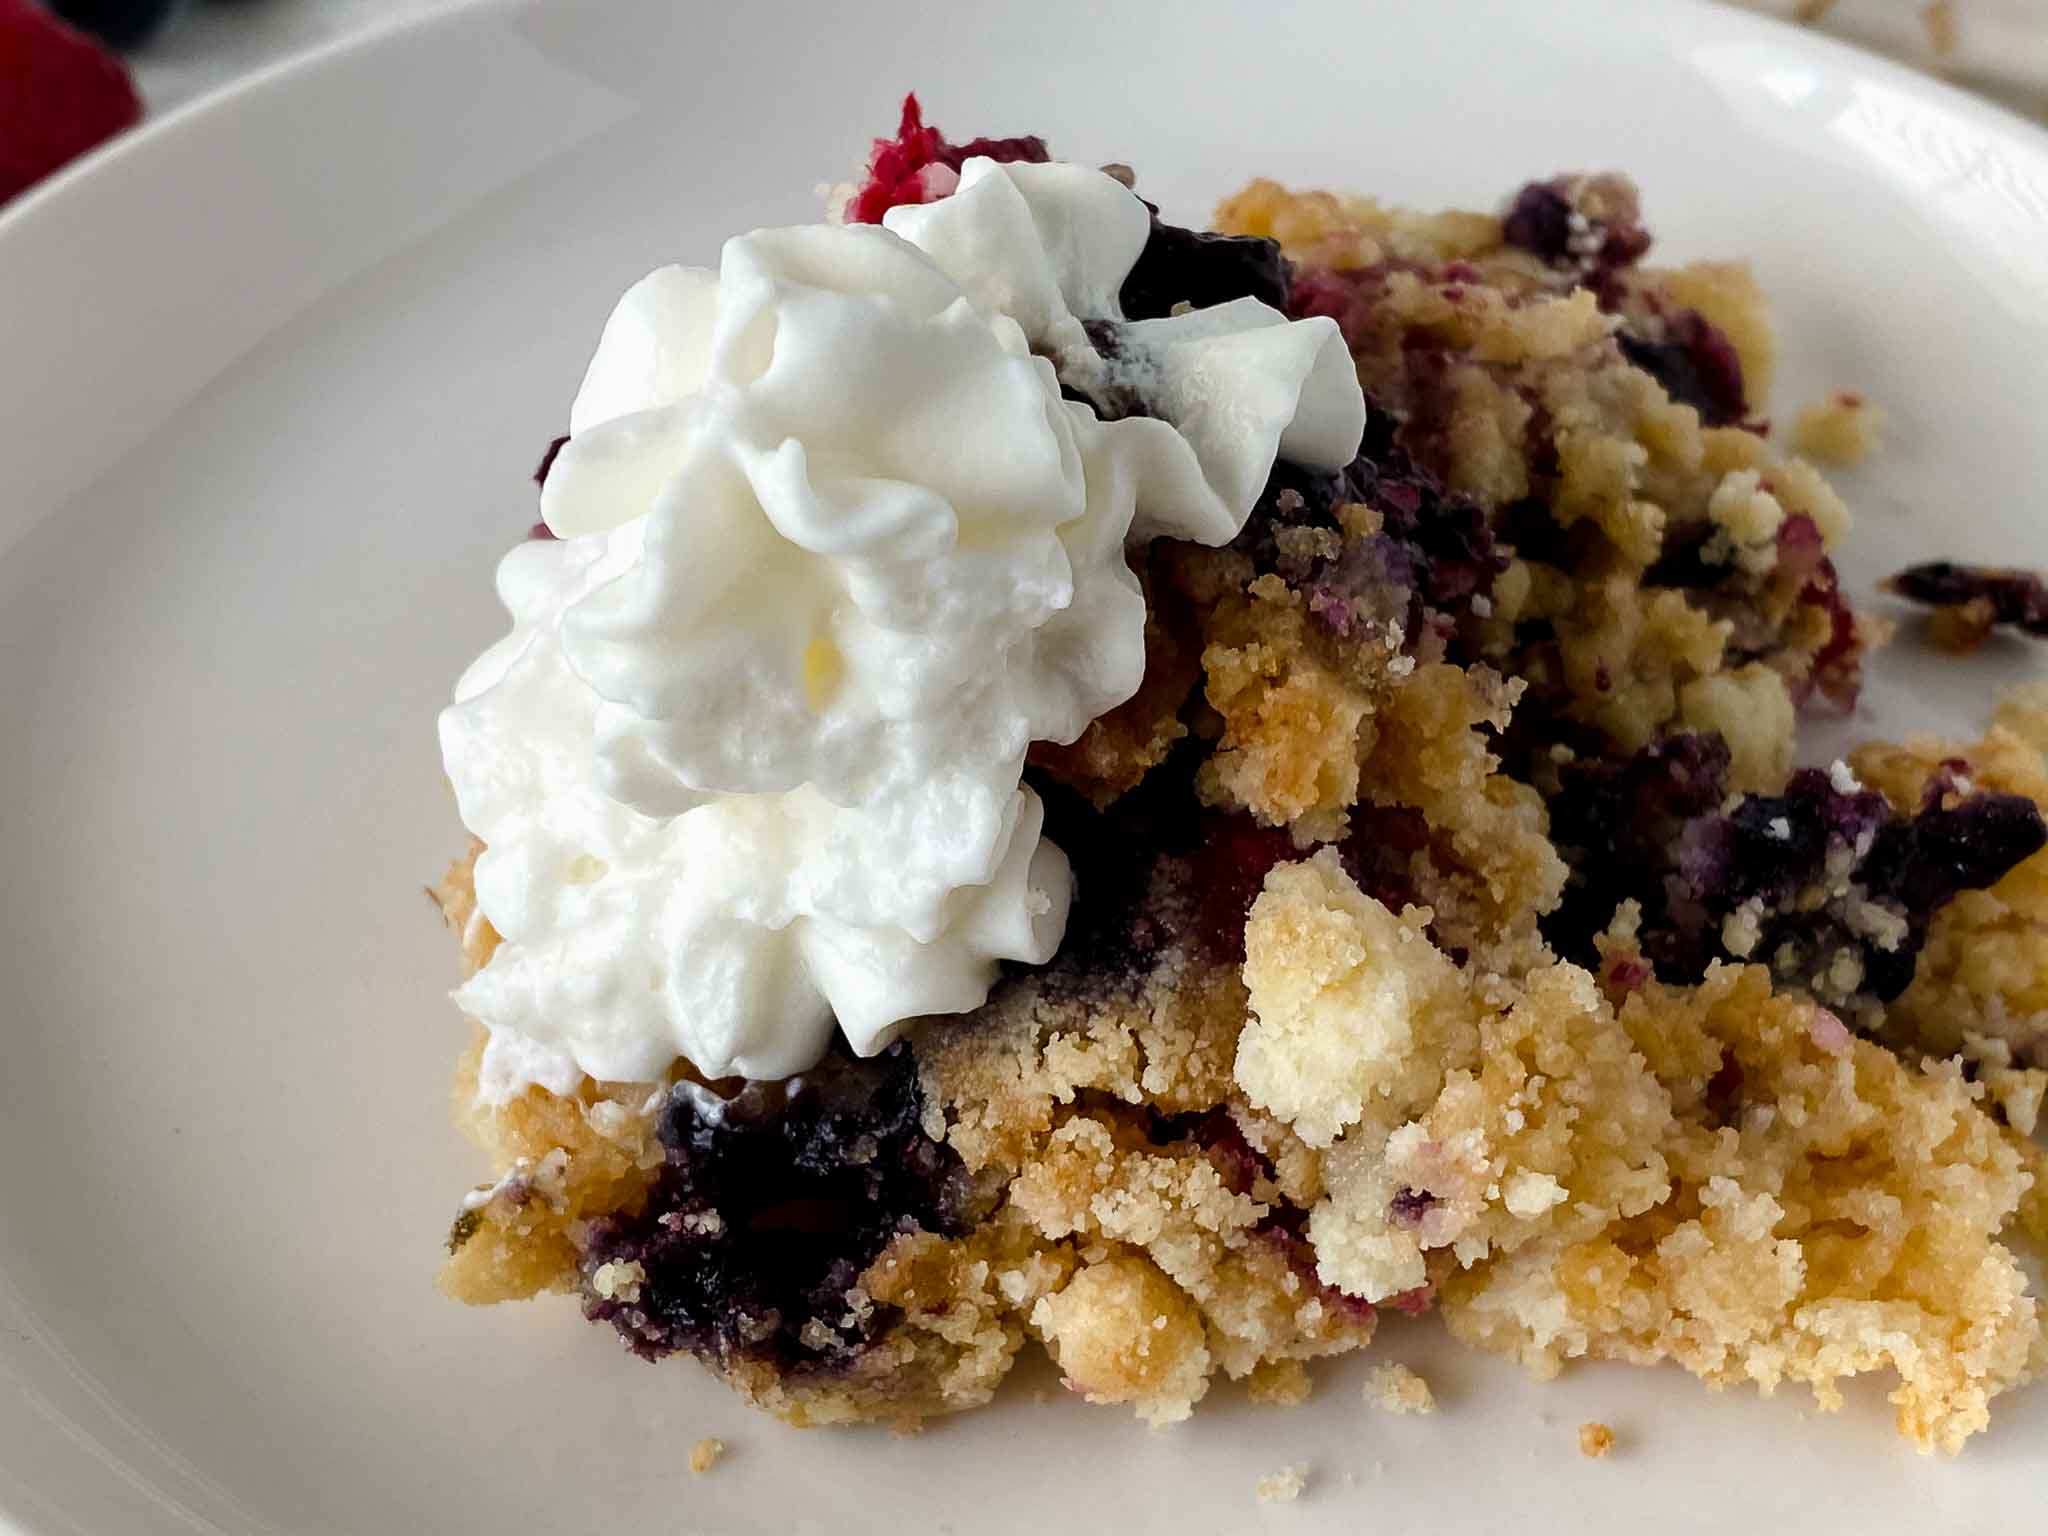
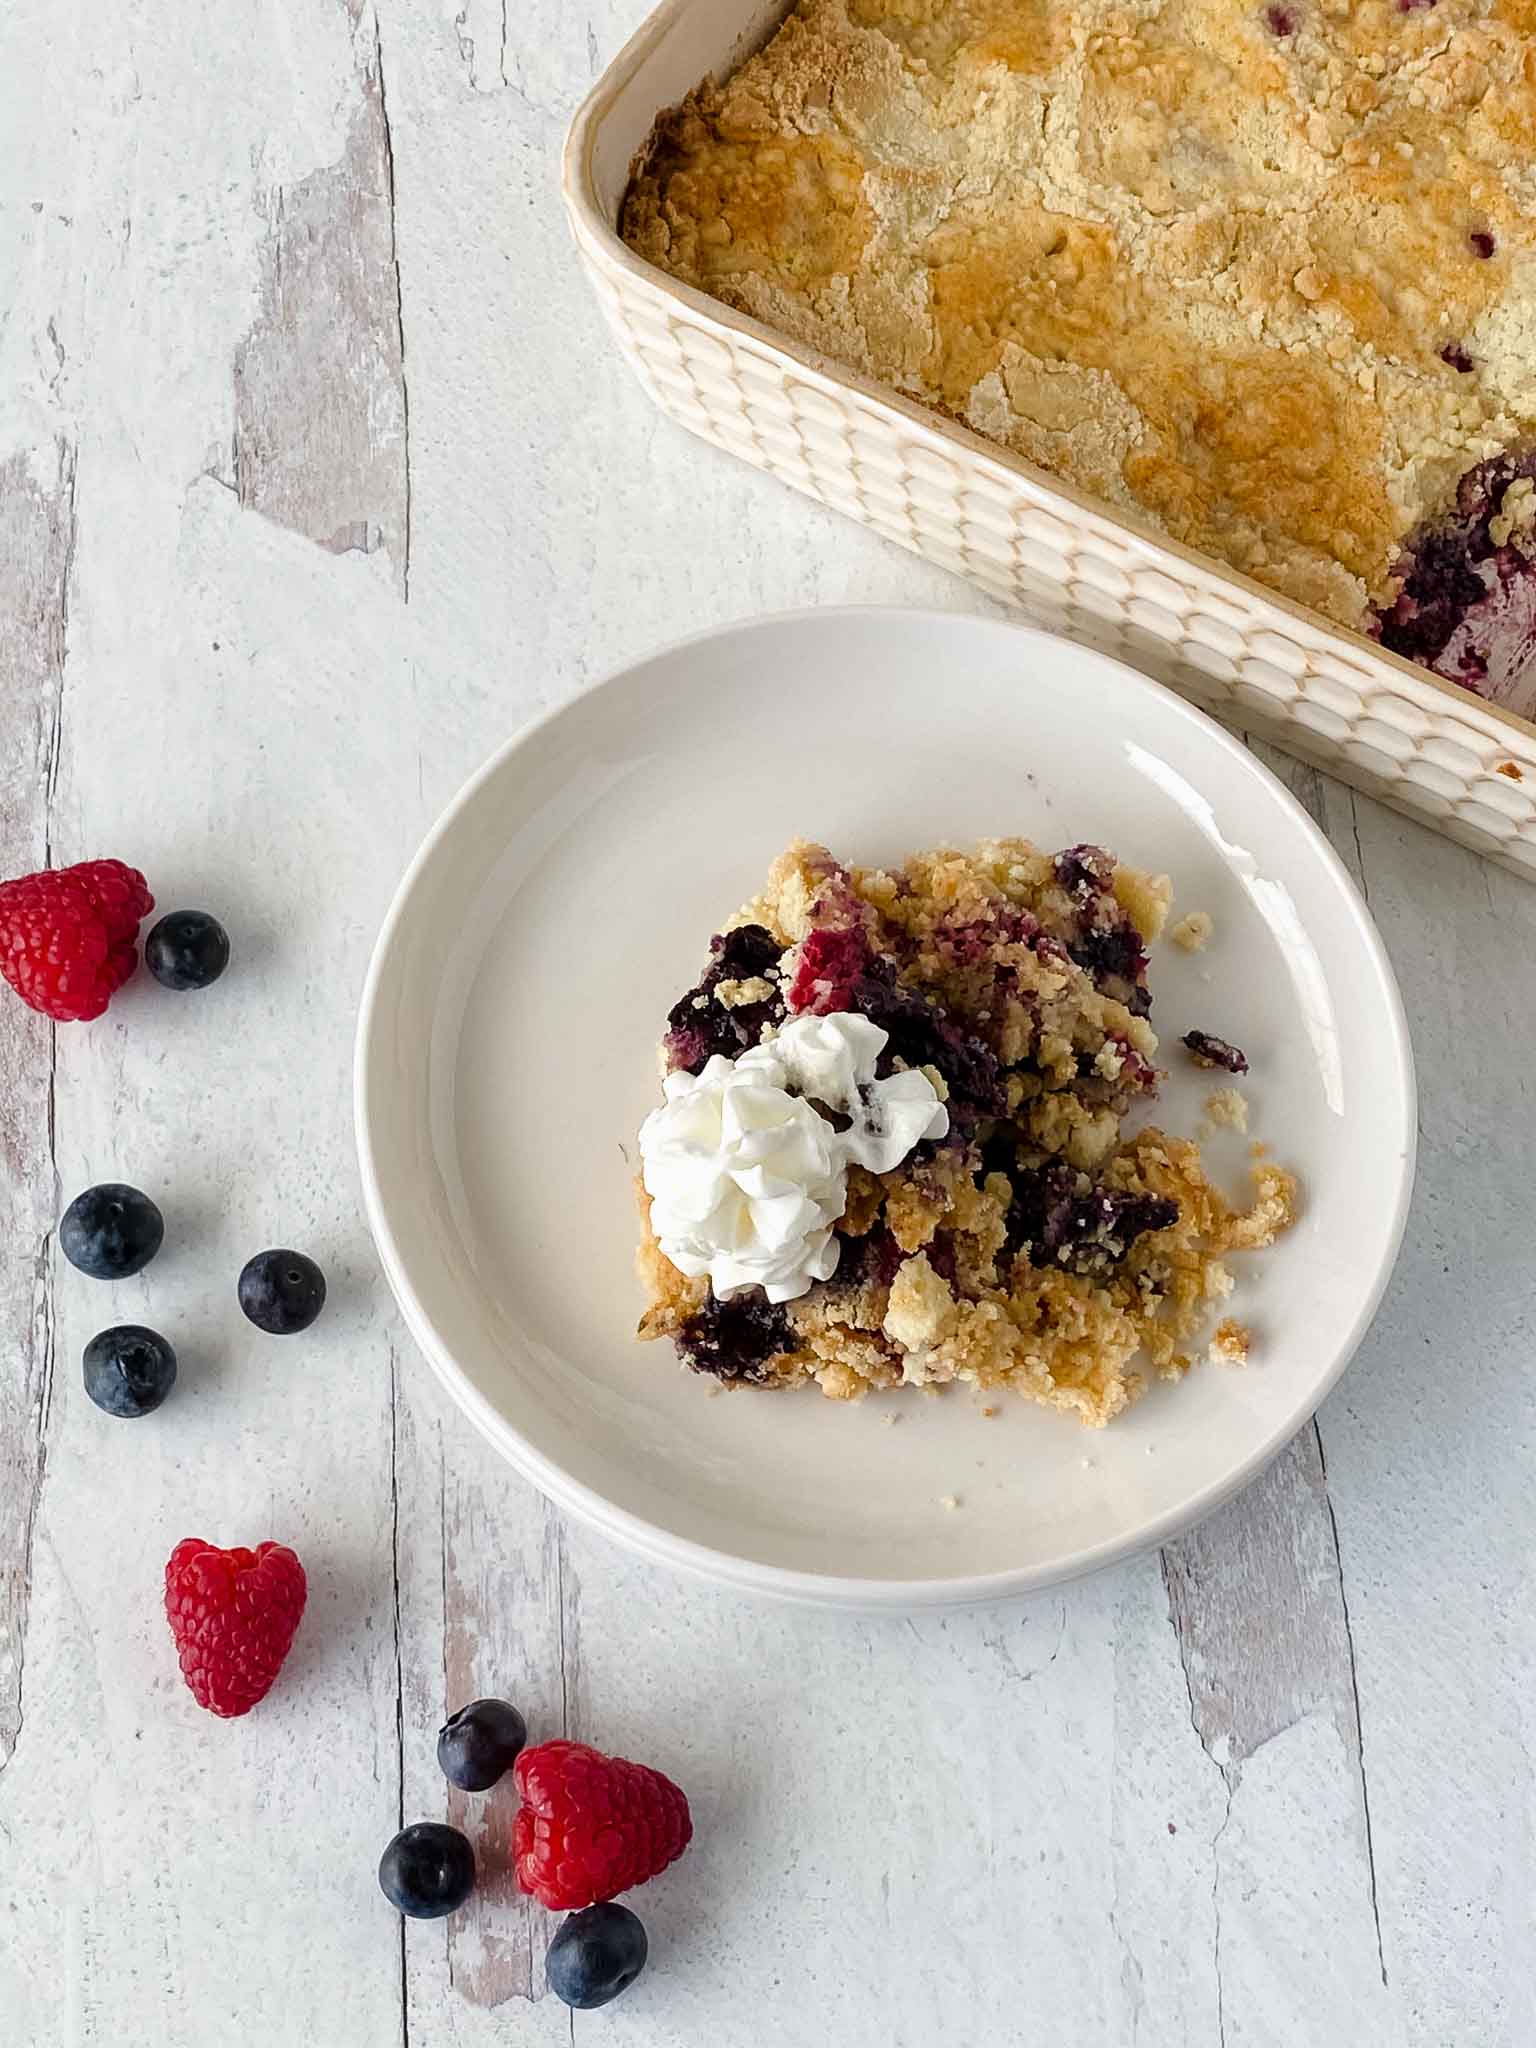
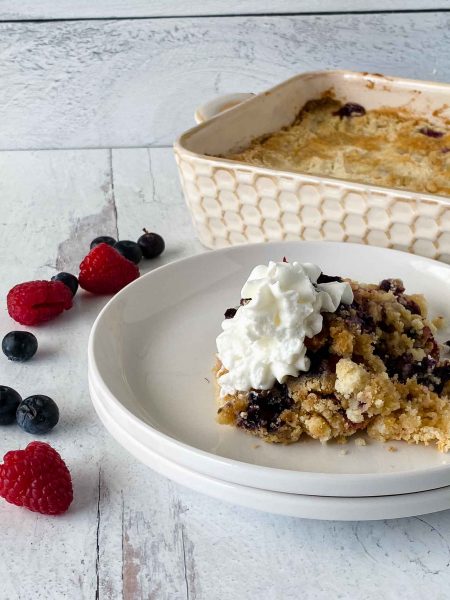
This berry version is the one I come back to when blueberries and raspberries are good at the store — the tartness of both berries works against the sweetness of the French vanilla cake mix in a way that canned pie filling never quite manages. The lemon juice brightens everything. The cinnamon is subtle, just enough to make people wonder what that note is. The top bakes into something golden and slightly crisp where the butter covered it, and jammy and bubbly where the fruit broke through.
Sarah made this with 5 cups of all raspberries for her husband’s birthday and called it amazing. You can absolutely skew the ratio toward whichever berry you love more — the recipe is flexible that way.
Serve it warm with whipped cream or a scoop of vanilla ice cream. It tastes like significantly more work than it is, which is the whole point.
Ingredients
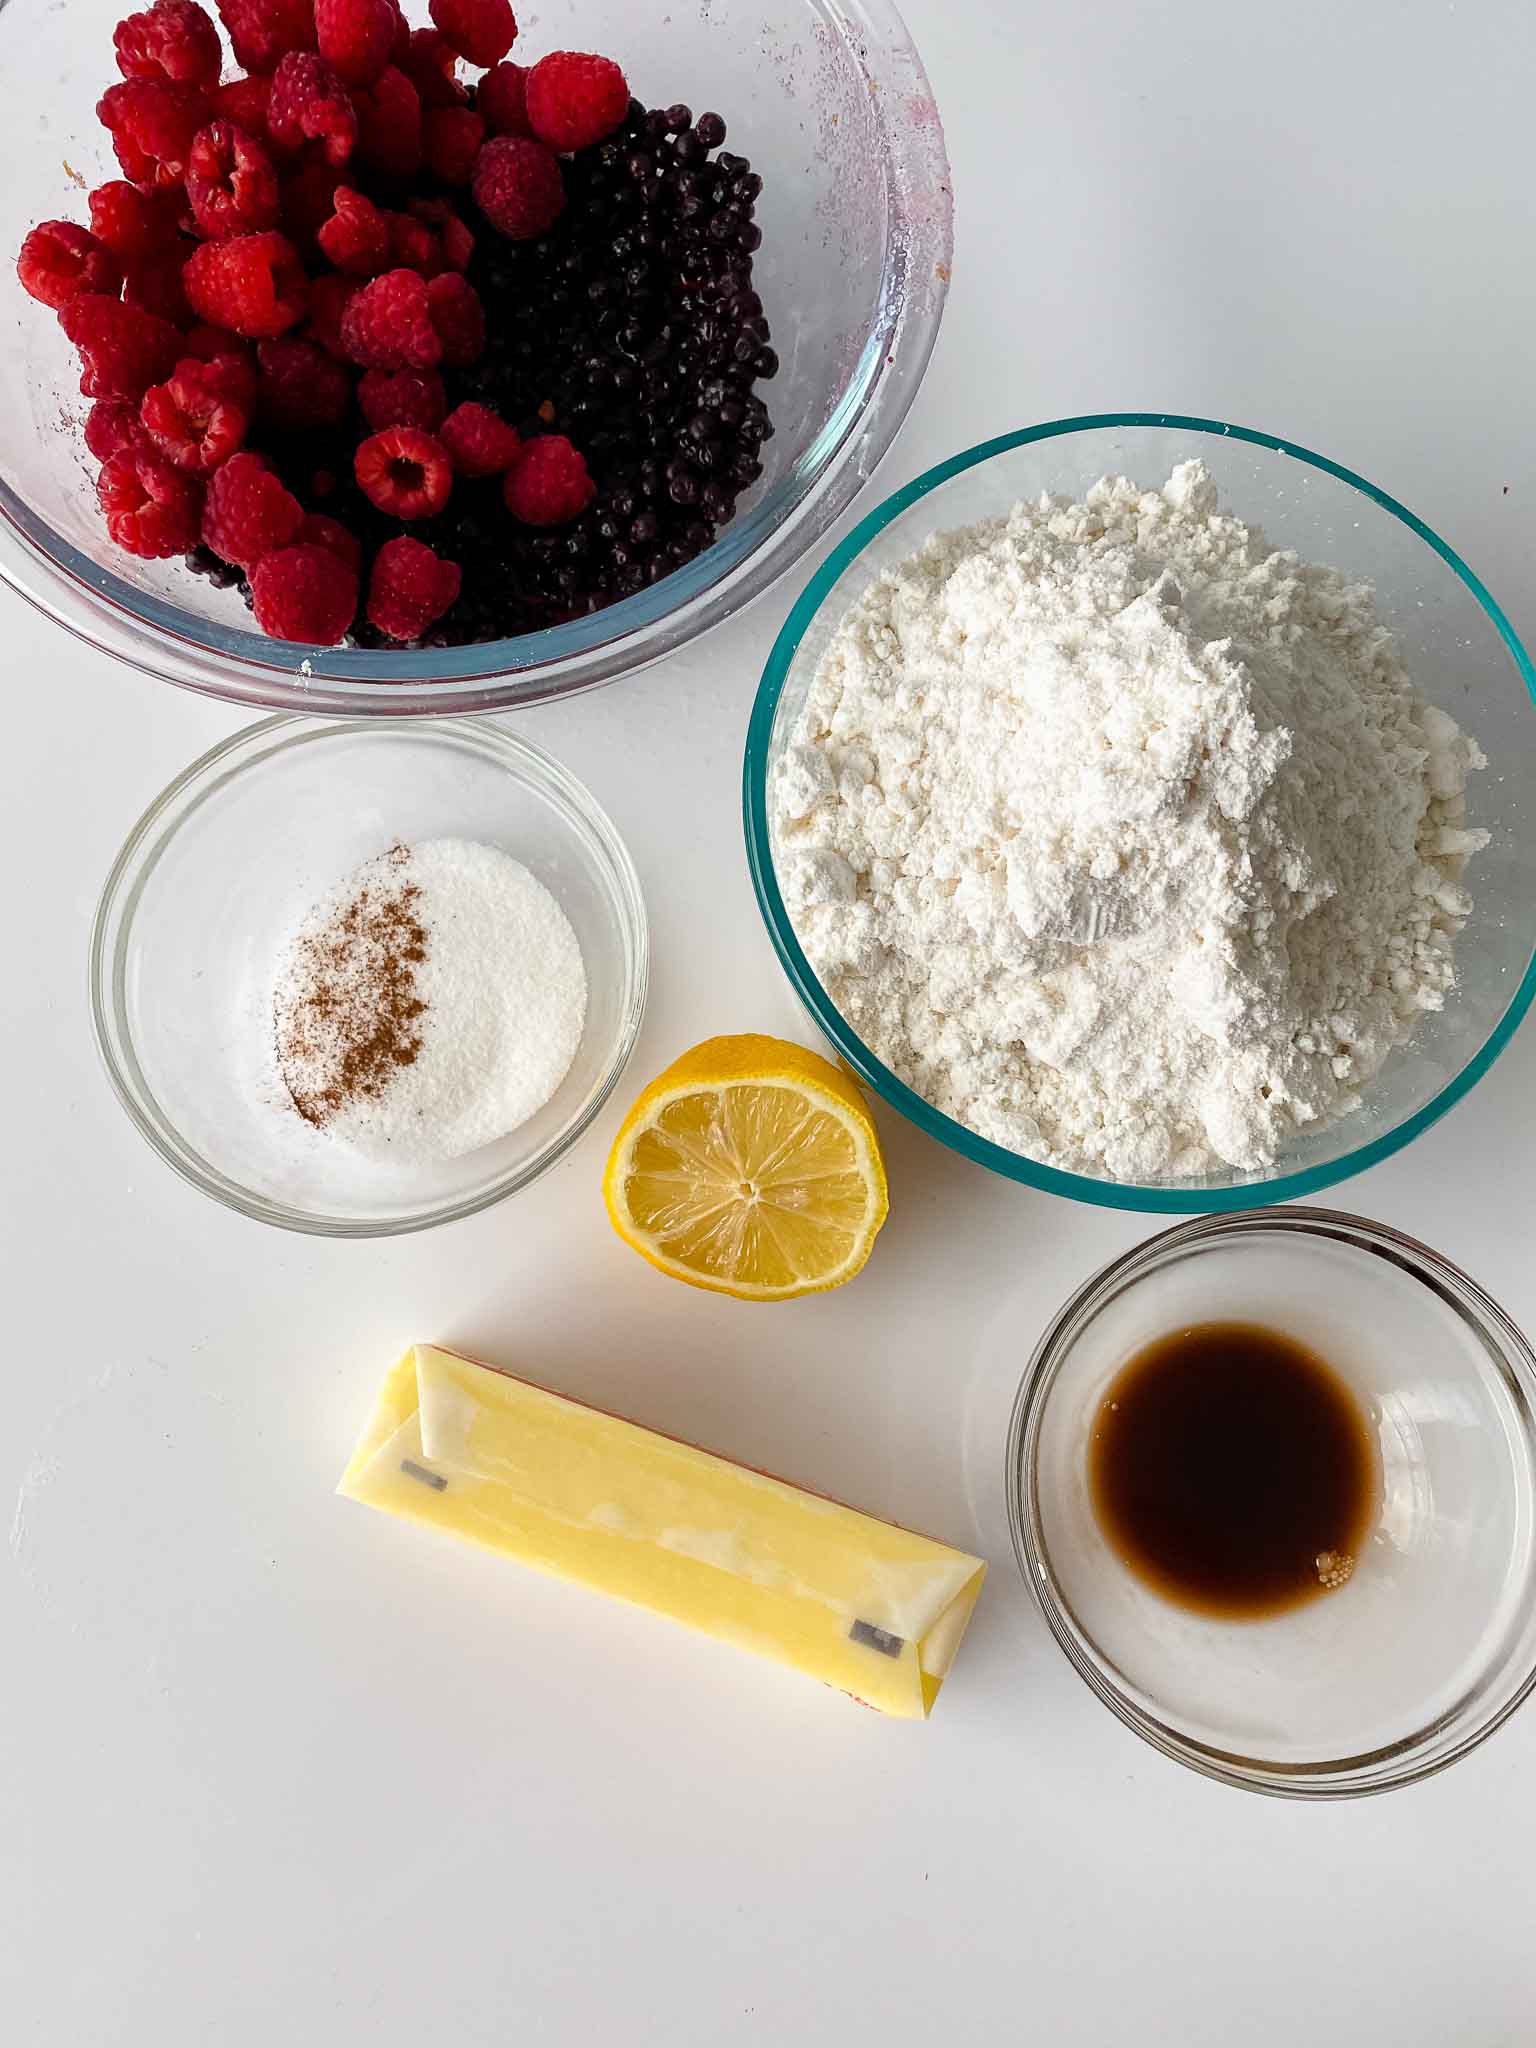
- Blueberries
- Raspberries
- Granulated sugar
- Pure vanilla extract
- Lemon juice
- Cinnamon
- French vanilla cake mix
- Cold butter
- Whipped topping (optional, but come on, who’s saying no to whipped topping?)
How Do You Make Berry Dump Cake?
Preheat your oven to 350°F and get out a 9×13 baking dish — no need to grease it, the butter from the topping handles that.
In a medium bowl, combine the blueberries and raspberries with the granulated sugar, vanilla extract, lemon juice, and cinnamon. Toss gently — you want the berries coated but not crushed. Raspberries especially will fall apart if you’re too aggressive. Pour the berry mixture into the baking dish and spread into an even layer.
Open the box of French vanilla cake mix and pour it directly over the berries. Use a spoon or your hands to spread it into an even layer that covers the berries completely from edge to edge. Don’t press it down — just a flat even layer.
Now the butter. Slice the cold stick into 16–20 thin pats and lay them across the entire surface of the cake mix in rows, overlapping slightly, trying to cover as much area as possible. The more coverage, the fewer dry spots.
Bake uncovered at 350°F for 45–50 minutes until the top is golden and the fruit is visibly bubbling up around the edges and through the topping. The bubbling is your confirmation that the fruit is fully cooked and the juices have thickened slightly. If there are dry powder spots at 45 minutes, drizzle a tablespoon of melted butter over them and give it another 5 minutes.
Let it rest for 10 minutes before serving — the filling will be extremely hot directly out of the oven and needs a few minutes to settle. Serve warm with whipped cream or vanilla ice cream.
FAQs
Yes — don’t thaw them first. Toss frozen berries with the sugar and seasonings and pour directly into the pan. The cake mix and butter go on top as usual. Add 5–10 minutes to the bake time since you’re starting from frozen. The result will be slightly juicier than the fresh version since frozen berries release more liquid as they thaw and cook — both versions are good.
No worries! Any white or yellow cake mix can step in as a substitute. The French vanilla mix does add a nice flavor, but it’s all good either way. French vanilla adds a warm, slightly custard-y flavor that pairs well with berries, but any white or yellow cake mix works. Vanilla cake mix is essentially the same result. If you want to lean into the berry flavor even more, a lemon cake mix is excellent here. Strawberry cake mix creates a very sweet, very pink result that kids tend to love. Avoid chocolate cake mix — it fights the berry flavor rather than complementing it.
The butter didn’t cover enough of the cake mix surface. This is the most common dump cake problem. Fix it immediately: drizzle 1–2 tablespoons of melted butter over the dry patches and return the pan to the oven for 5 more minutes. Prevent it next time by slicing the butter into 16–20 thin pats and spreading them in overlapping rows across the entire surface before baking.
Yes — dump cake is extremely adaptable. Strawberries work well (hull and halve them, same seasoning). Blackberries are excellent. Peaches — fresh, peeled and sliced — are a classic. Mixed berry (blueberry, raspberry, blackberry, strawberry) is great. For stone fruits like peaches or cherries, skip the raspberry and use the same sugar-lemon-cinnamon base. Canned pie filling also works if you skip the sugar and lemon step — just dump, top, bake.
Yes, with adjustments. An 8×8 or 9×9 pan: halve all the ingredients and reduce bake time to 30–35 minutes. A 10-inch cast iron skillet: same amounts as the original, bake time similar to 9×13. The thicker the layer, the longer it needs — use the bubbling-and-golden-top visual cues rather than strict timing.
Yes — mix ½ cup rolled oats, 2 tablespoons brown sugar, and 2 tablespoons melted butter into a rough crumble and scatter it over the cake mix layer before adding the butter pats. It adds a texture layer and a slightly nuttier flavor. The base dump cake is still underneath doing its thing.
Why Fresh Berries Instead of Canned
Most dump cake recipes call for canned pie filling — cherry, blueberry, peach — because it already has the sugar and thickener built in. Fresh berries are a different situation. They release their own juice as they bake, and the sugar, lemon juice, and cinnamon you toss them in before baking is doing the work that the filling does in a canned version. The result is brighter, less syrupy, and more genuinely fruity than the canned alternative. You taste the actual berry rather than the filling.
Frozen berries also work — don’t thaw them first, just toss with the sugar and seasonings and go. Add 5–10 minutes to the bake time since you’re starting from frozen.
The Butter — Why It Matters and How to Do It Right
The butter is the most important technique decision in this recipe, and “place slices of butter all over the top” doesn’t give you enough to go on.
Here’s what you’re doing: the dry cake mix won’t bake into a golden crust on its own — it needs fat to activate and brown. The butter melts down through the cake mix layer during baking and does that job. Where the butter covers the mix, you get golden crust. Where it doesn’t, you get dry powder pockets. The goal is even coverage.
Practical guidance: slice the full stick into 16–20 thin pats. Lay them in rows across the entire surface, overlapping slightly if needed, trying to cover as much of the dry cake mix as possible. It won’t be perfect — there will be gaps — but the more surface area you cover, the fewer dry patches you’ll have at the end. If you hit a dry spot when you’re done baking, drizzle 1–2 tablespoons of melted butter over that area and return to the oven for 5 more minutes.
Cold butter is correct here, not melted. Cold butter melts slowly during baking, giving it time to distribute evenly as it goes. Pre-melted butter soaks in unevenly and you lose control of where the fat ends up.

Tips For The Perfect Berry Dump Cake
Use cold butter, not melted. Cold butter melts gradually during baking which gives you more control over distribution. Melted butter soaks into the cake mix unevenly and you lose the golden crust effect in spots.
Cover the cake mix as completely as possible with butter pats. Wherever cake mix sits without butter coverage, it won’t bake through properly — you’ll get dry powder patches. 16–20 thin pats spread in rows across the whole surface gives you the best result.
Don’t stir anything once it’s in the pan. The whole point of a dump cake is the layers — fruit on the bottom, dry cake mix on top, butter on top of that. Stirring collapses the layers and you end up with a wet, uneven bake. Resist the urge.
The fruit amount is flexible. 4 cups total (2 cups each berry) makes a more cake-forward result with a thinner fruit layer. 5–6 cups total makes a jammier, more fruit-dominant dish. Both are correct — adjust to your preference. You can also swap the ratio toward whichever berry you prefer or use all one type.
Taste your berries before you bake. Very tart berries benefit from the full ¼ cup of sugar. Sweet, ripe in-season berries in July might only need 2–3 tablespoons. The lemon juice keeps it bright regardless — don’t skip it.
Check at 45 minutes, not 50. Ovens vary. The top should be golden, not brown, and the fruit should be bubbling. Overbaking dries out the topping and makes the edges bitter.
Rest before serving. 10 minutes out of the oven lets the fruit filling settle and thicken slightly. It’s also significantly safer — fresh-from-oven fruit filling is extremely hot.

Storage and Make-Ahead
Cover the baking dish with foil or transfer portions to an airtight container and refrigerate for up to 3 days. The flavors genuinely improve overnight — the fruit juices soak further into the cake layer and everything melds together. Day 2 is arguably the best version.
Reheat individual portions in the microwave for 45–60 seconds or cover the whole dish with foil and warm in a 300°F oven for 10–15 minutes.
This recipe doesn’t freeze well — the texture of the cake layer gets dense and the fruit breaks down further on thawing. Best enjoyed fresh or within 3 days refrigerated.
Make-ahead option: you can toss the berries with the sugar and seasonings and refrigerate overnight in the bowl. In the morning, pour into the pan, add the cake mix and butter, and bake. The berries will be even more flavorful from the overnight maceration.
Here are some more amazing recipes to try:


Easy Very Berry Dump Cake With Fresh Berries
This amazing dump cake is filled with fresh berries, easy to put together and can be served with a fresh scoop of vanilla ice cream!
Ingredients
- 2-3 cups blueberries
- 2-3 cups raspberries
- 1/4 c. granulated sugar
- 1 tsp. pure vanilla extract
- Juice of 1⁄2 a lemon
- 1/4 tsp. cinnamon
- 1 box French vanilla cake mix
- 1/2 c. (1 stick) cold butter, cut into small cubes
- Whipped topping, for serving, optional
Instructions
- Preheat oven to 350°
- In a medium bowl, raspberries and blueberries, sugar, vanilla, lemon juice, and cinnamon.
- Pour into a 9*13 baking pan.
- Layer cake mix over the top and spread into a even layer.
- Place slices of butter all over the top and bake until top is golden and fruit is bubbly (45-50 min). Serve warm with whipped topping.
Nutrition Information
Yield
12Serving Size
1Amount Per Serving Calories 273Total Fat 3gSaturated Fat 1gTrans Fat 0gUnsaturated Fat 1gCholesterol 1mgSodium 335mgCarbohydrates 61gFiber 6gSugar 36gProtein 3g

Before you go, Grab Your Free Printable Recipe Kit!
Keep track of all your favorite recipes and ingredients with this free printable book!
Hi! I’m Nellie. I am an entrepreneur, a busy mama of 3 and a wife to my high school sweetheart. I have been sharing content for over 12 years about how to cook easy recipes, workout tips and free printables that make life a little bit easier. I have been featured in places like Yahoo, Buzzfeed, What To Expect, Mediavine, Niche Pursuits, HuffPost, BabyCenter, Mom 2.0, Mommy Nearest, Parade, Care.com, and more!
Get comfortable and be sure to come hang out with me on social. Don’t forget to grab your free fitness journal before you go!
I made this for my husbands birthday and I used 5 cups o fries raspberries. It was amazing!!! Thank you for sharing. 😀
I made this for my husbands birthday and I used 5 cups of fresh raspberries. It was amazing!!! Thank you for sharing. 😀