
Easy and Amazing Fresh Fruit Watermelon Popsicles
Every summer, I’d see people talking about making homemade watermelon popsicles—all over Pinterest, all over Instagram—and every time, I’d think, that looks good, but is it really worth the effort? Then one super hot day, I finally tried it for myself, and let me tell you, I had been missing OUT.

These popsicles are refreshing, naturally sweet, and the perfect way to get my kids to eat fruit while thinking they’re getting a full-on dessert. Plus, they’re so easy to make, and the little “seeds” (aka mini chocolate chips) make them even more fun.
Ingredients

A small watermelon—because that’s the star of the show
Vanilla yogurt—adds a creamy, slightly tangy contrast to the watermelon
Honey, maple syrup, or agave—just a touch of natural sweetness
Mashed kiwi—gives that fun “rind” look and a fresh, citrusy kick
Mini chocolate chips or cocoa nibs (optional)—because fake watermelon seeds make these even cuter
Watermelon (small, about 4 cups cubed): The star and the base layer. Ripe, sweet watermelon makes a noticeably better popsicle than one that’s pale and watery inside — press on the rind and listen for a hollow thump, and look for yellow field spotting on the underside, which are both signs of a ripe one. Remove all seeds before blending or strain them out after. Four cups of cubed watermelon blends down to enough liquid to fill 12 standard popsicle molds about halfway.
Vanilla yogurt (½ cup): The middle white layer and the creamy contrast to the sweet watermelon. Full-fat vanilla yogurt gives the cleanest, richest flavor. Plain yogurt with an extra drizzle of honey works just as well. For dairy-free, coconut yogurt is the best substitute — its natural creaminess pairs well with watermelon in a way that almond or oat yogurt doesn’t quite replicate.
Honey, maple syrup, or agave (½ tablespoon): Stirred into the yogurt before it goes into the molds. A small amount to round out the yogurt’s tang without making the whole thing overly sweet — the watermelon is already providing most of the sweetness. Adjust up or down based on how sweet your watermelon is and how sweet you want the yogurt layer to taste.
Kiwi (2-3, peeled and mashed): The green “rind” at the bottom of the popsicle — the layer that makes these actually look like watermelon slices. Mash with a fork to mostly smooth with a little texture remaining; completely pureed kiwi runs too thin and doesn’t hold its layer as cleanly. The tartness of kiwi is genuinely a good contrast to the sweet watermelon and creamy yogurt rather than just a visual trick.
Mini chocolate chips or cocoa nibs (optional): Pressed into the watermelon layer to mimic seeds. Optional but worth doing if you want the full visual effect — it’s the detail that makes kids look twice. Cocoa nibs are slightly less sweet and have a more authentic seed-like appearance; mini chocolate chips are sweeter and easier to find.

How to Make It
Start with the watermelon. Cut or scoop out about 4 cups of flesh, remove any seeds, and add it to the blender. Blend on high until completely smooth, then strain through a fine mesh sieve if you want to catch any remaining seeds or pulp. The liquid should look like a bright pink juice.
Pour the blended watermelon into your popsicle molds, filling each cavity a little more than halfway. If you’re adding the chocolate chip seeds, drop a few into each cavity now and use a toothpick or skewer to position them so they’re visible against the sides of the mold rather than just floating in the middle. Place the molds in the freezer and leave them for a full hour.

At the hour mark, tap the side of one mold. The watermelon layer should feel completely firm with no movement when you tap it. If it still jiggles or feels soft in the center, put everything back in for another 30 minutes and check again. This is the step that determines whether you get clean stripes or a blended swirl, so don’t rush it.
While the watermelon layer is freezing, mix the vanilla yogurt and honey together in a small bowl until combined. Peel the kiwis and mash them with a fork in a separate bowl until mostly smooth with a little texture remaining — not fully pureed, just broken down enough to pour.
Once the watermelon layer is fully firm, take the molds out and pour the yogurt mixture over each one, filling in the next section of the cavity. Return to the freezer for 45 minutes.
After 45 minutes, check the yogurt layer the same way — firm with no jiggle. Once it’s set, spoon the mashed kiwi over the top of each mold as the final layer, filling to just below the rim.
Insert the popsicle sticks now, pushing each one down through all three layers into the center of the mold. The layers should be firm enough at this point to hold the stick upright without it drifting to one side.
Freeze everything until completely solid — at least 4 to 5 hours, overnight if you can. To unmold, run warm water over the outside of each mold for about 20 to 30 seconds, then gently pull the popsicle out by the stick. If it resists, run a little more warm water and try again — don’t force it or the layers can separate.

More On The Popsicle Technique
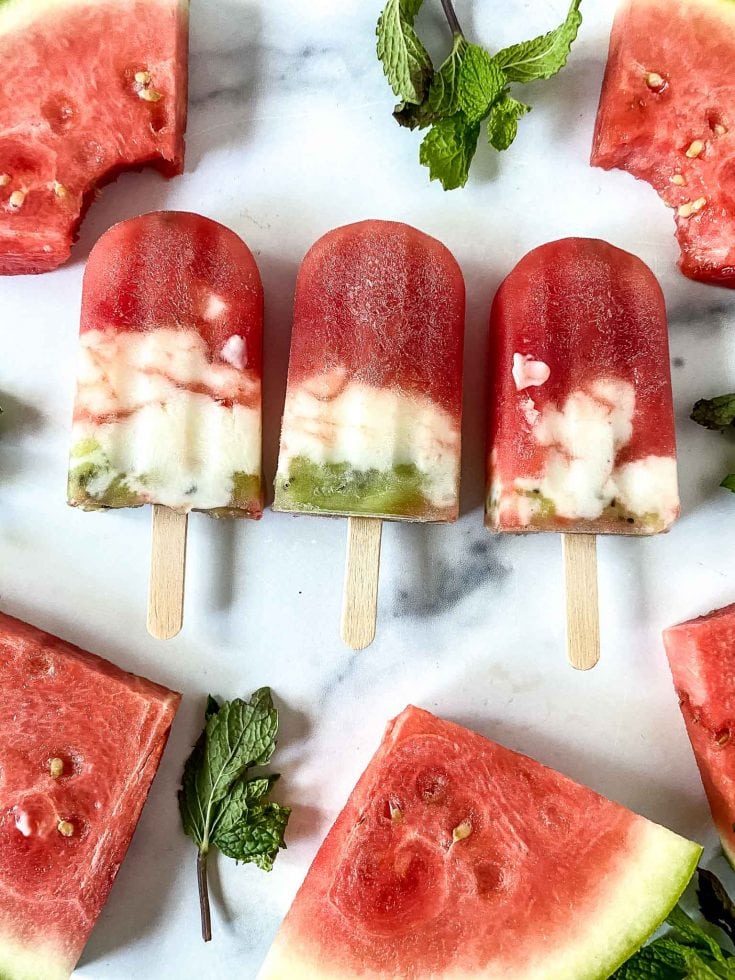
These popsicles have three distinct layers — watermelon pink, white yogurt, green kiwi — and the only thing that keeps them distinct is patience between each pour. The watermelon layer needs to be genuinely firm before the yogurt goes on. Not just cold, not just set around the edges — firm all the way through with no jiggle when you tap the mold.
An hour in the freezer usually gets you there, but if your freezer runs warm or the molds are thick, give it another 30 minutes and check again. Pour the yogurt layer over a soft watermelon layer and the two blend together into a pink swirl instead of clean stripes. Same principle applies between the yogurt and kiwi layers — 45 minutes minimum, check before you pour. The visual payoff is worth the waiting.
FAQs
Yes! Just use small paper cups and stick a wooden popsicle stick in after the first freeze.
You can use plain yogurt with a little extra honey, or even coconut yogurt for a dairy-free version.
Of course! You can use mashed honeydew melon or even a little blended spinach for that green effect without changing the taste too much.

How long do these last in the freezer? About two weeks, but trust me—they won’t last that long!
The layers are the whole visual — watermelon pink in the middle, white yogurt band, green kiwi at the bottom, chocolate chip “seeds” scattered through the red. Get the watermelon layer fully firm before the yogurt goes on and you’ll have clean, distinct layers that show through the mold. Rush it and they blend together. Other than that, this is genuinely hands-off — freeze, wait, freeze again, wait, freeze again. Leave a comment and tell me if your kids figured out they were eating actual fruit.
Here are some more delicious popsicle recipes:

Easy and Amazing Fresh Fruit Watermelon Popsicles
These amazing popsicles are made with fresh fruit including watermelon and kiwi and you can add chocolate chips if you want!
Ingredients
- Small watermelon
- 1/2 cup Vanilla Yogurt
- 1/2 tbsp Honey, maple syrup or agave Mashed kiwi
- Mini chocolate chips or cocoa nibs, optional
Instructions
- Cut or scoop out the watermelon flesh (about 4 cups) and add to blender.
- Blend on high until smooth. Strain out any seeds.
- Fill popsicle mold cavities a little more than halfway with the blended watermelon.
- If using, add a few mini chocolate chips or cocoa nibs to each cavity to mimic watermelon seeds.
- Place molds in the freezer for 1 hour, until the watermelon layer is firm to the touch with no jiggle. If still soft after an hour, freeze another 30 minutes before proceeding.
- Mix together the vanilla yogurt and honey (or maple syrup or agave) in a small bowl.
- Peel and mash the kiwi with a fork until mostly smooth with some texture remaining — this becomes the "rind" layer.
- Remove molds from the freezer. Pour the yogurt mixture over the firm watermelon layer in each cavity.
- Return to the freezer for 45 minutes until the yogurt layer has firmed up slightly.
- Add the mashed kiwi as the final layer on top.
- Insert popsicle sticks and freeze until completely solid — a minimum of 4-5 hours, overnight is more reliable.
- To unmold, run warm water over the outside of the mold for 20-30 seconds before gently pulling the popsicles out by the sticks.
Nutrition Information
Yield
12Serving Size
1Amount Per Serving Calories 98Total Fat 5gSaturated Fat 3gTrans Fat 0gUnsaturated Fat 2gCholesterol 0mgSodium 8mgCarbohydrates 16gFiber 1gSugar 13gProtein 1g
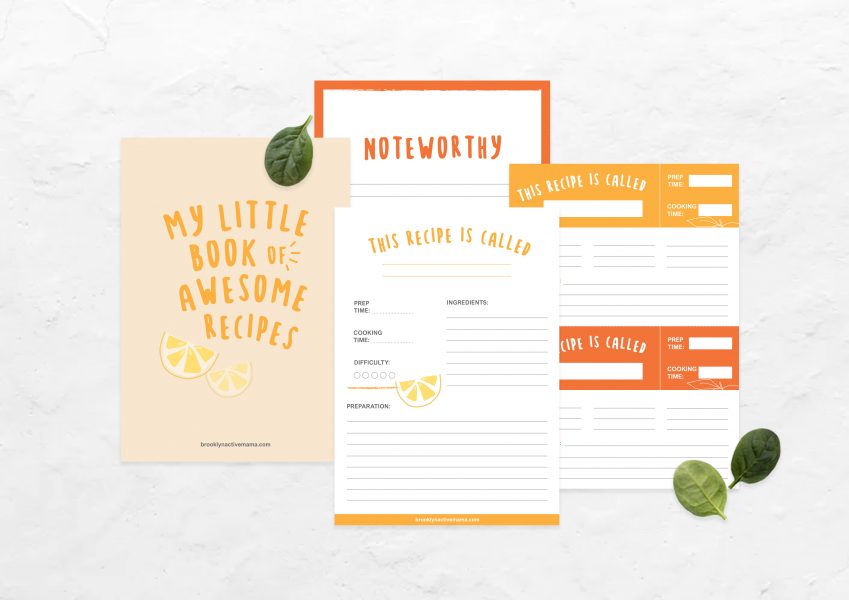
Before you go, Grab Your Free Printable Recipe Kit!
Keep track of all your favorite recipes and ingredients with this free printable book!

Hi! I’m Nellie. I am an entrepreneur, a busy mama of 3 and a wife to my high school sweetheart. I have been sharing content for over 12 years about how to cook easy recipes, workout tips and free printables that make life a little bit easier. I have been featured in places like Yahoo, Buzzfeed, What To Expect, Mediavine, Niche Pursuits, HuffPost, BabyCenter, Mom 2.0, Mommy Nearest, Parade, Care.com, and more!
Get comfortable and be sure to come hang out with me on social. Don’t forget to grab your free fitness journal before you go!
