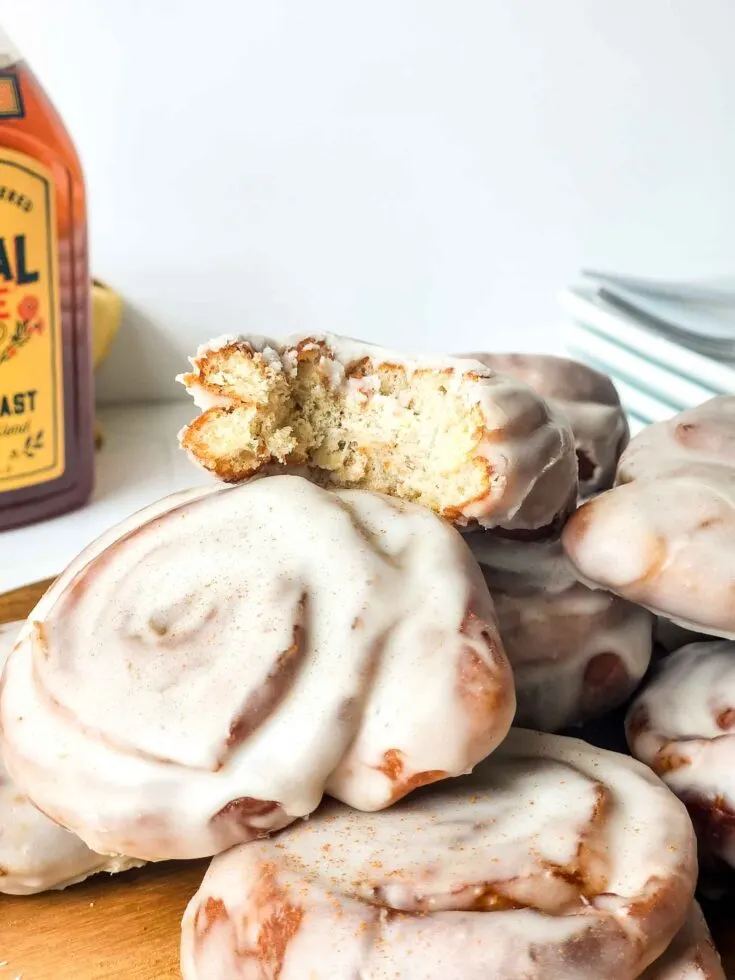
These homemade honey buns remind me of my high school days when I used to grab one for a quarter before school. Am I aging myself with that memory? LOL These cinnamon-infused delights, with their golden-brown exteriors and sticky-sweet glaze, are a yummy sweet treat and so good for anytime.
I remember in high school when honey buns used to be 25 cents at the corner store! Those days are long gone but you can still make these popular treats right at home.

What ingredients do you need for these sweet treats?
For the Honey Bun Dough:
- Warm water
- White granulated sugar
- Active yeast
- All-purpose flour
- Honey
- Butter, melted
- Egg yolks
- Vanilla extract
- Salt
For the Cinnamon Sugar:
- White granulated sugar
- Ground cinnamon
For the Glaze:
- Powdered sugar
- Honey
- Melted butter
- Vanilla extract
- Salt
- Hot water
How To Make Honey Buns Step by Step Instructions:
In a stand mixer, start by adding the warm water, sugar and yeast. Whisk together and let sit for 5 minutes so the yeast can activate.

Then pour in the flour, honey, melted butter, egg yolks, vanilla and salt. Use a hook attachment to mix and knead together for 8 minutes. Use a rubber spatula to scrape down the sides as needed throughout the mixing. The dough will be slightly sticky.

Transfer the dough to an oiled mixing bowl and cover with plastic wrap. Let proof at room temperature for 1 hour or until the dough doubles in size.
A few minutes before the dough is done proofing mix together the cinnamon and sugar in a bowl with a fork.

Once proofed, remove the dough from the bowl and place on a clean, floured surface.
Roll the dough out into a large rectangle about ¼-½ inch thick. Spread the cinnamon sugar mixture evenly across the dough. Coat all areas by spreading with your hands and press the mixture into the dough.

Tightly roll the dough, lengthwise, into a long log. Place the log diagonally on your clean surface. Use a knife to cut straight vertically along the diagonal log to create 2 inch slices.

Place these cut honey bun rolls on a baking sheet. Cover in plastic wrap and allow to proof for another 30 minutes.
Heat the oil in a frying pan on medium high heat.
The honey buns will have almost doubled in size after proofing. Once the frying oil is hot, place 3-5 buns in at a time, depending on the size of your pan/pot.

Let cook on each side for about 1 ½ to 2 minutes, or until golden brown on both sides.
Remove from the oil and place on a plate with paper towel to drain excess oil. Fry all the honey buns and set aside to cool. Use a spatula to press down each honey bun and create a flat look, just like the packaged version.
While those cool, make the glaze.

In a mixing bowl add the powdered sugar, honey, melted butter, vanilla extract and salt all at once. Whisk together until combined. The mixture will still look like slightly clumpy powdered sugar.
Slowly pour in the hot water while whisking the powdered sugar mixture until a thick white glaze is formed. Start slowly because you may not need all the water.
Prepare a baking sheet with parchment paper and a cooling rack on top.
Dip each honey bun into the glaze, coating each side. Because this is a thicker glaze be sure to shake off excess frosting before transferring to the cooling rack.

Let the rest of the honey bun glaze drip off and then harden on the pastry for about 20 minutes
Enjoy or store in a tight sealed container!
FAQs
Q: What are homemade honey buns, and how do they differ from store-bought versions?
A: Homemade honey buns are freshly baked, soft, and tender pastries infused with honey and cinnamon, topped with a luscious glaze. Unlike their store-bought counterparts, homemade honey buns are made from scratch, allowing you to control the quality of ingredients and enjoy the unmatched taste of a warm, homemade treat.
Q: Can I make these honey buns ahead of time?
A: Yes, you can! Prepare the dough, shape the honey buns, and place them on a baking sheet. Cover with plastic wrap and refrigerate overnight. In the morning, allow them to come to room temperature for about 30 minutes before baking.
Q: Can I make these honey buns vegan?
A: Absolutely! You can substitute dairy ingredients with plant-based alternatives. Use vegan butter, non-dairy milk, and vegan cream cheese for the glaze. It’s a versatile recipe that can cater to various dietary preferences.

Where to Serve
Homemade honey buns are a versatile treat that can be enjoyed in various settings. Here are some suggestions:
- Breakfast: Start your day on a sweet note by serving these honey buns alongside a cup of warm coffee or a glass of cold milk.
- Brunch: Impress your guests with a brunch spread that includes homemade honey buns. They’re perfect for special occasions and gatherings.
- Dessert: Warm honey buns make for a delightful dessert, especially when served with a scoop of vanilla ice cream.

Storage
To keep your homemade honey buns fresh and delicious, follow these storage tips:
- Airtight Container: Store the honey buns in an airtight container at room temperature for up to 2 days.
- Reheating: If you want to enjoy them warm again, simply pop them in the microwave for 10-15 seconds.
Tips for Making This Recipe with Kids
Getting kids involved in the kitchen is a wonderful way to bond and teach them valuable cooking skills. Here are some tips for making this honey bun recipe a fun and educational experience for children:
- Age-Appropriate Tasks: Assign age-appropriate tasks to your kids. Younger children can help with measuring ingredients and mixing, while older kids can assist with rolling out the dough and shaping the honey buns.
- Safety First: Always prioritize safety. Teach kids how to handle kitchen tools and equipment safely, and supervise them closely throughout the process.
- Creativity: Encourage creativity by allowing kids to add their own spin to the recipe. They can experiment with different glaze flavors or sprinkle toppings like chopped nuts or chocolate chips.
- Learning Opportunity: Use this cooking session as an opportunity to teach kids about ingredients, measurements, and the science of baking. Explain how yeast works and watch the dough rise together.
- Quality Time: Baking together can be a bonding experience. Use this time to chat, tell stories, and create lasting memories in the kitchen.

Why This Recipe Works
This homemade honey bun recipe works for several reasons:
- Made from Scratch: Unlike store-bought honey buns, these are made from scratch, ensuring the use of high-quality ingredients and the absence of preservatives.
- Irresistible Flavor: The combination of honey, cinnamon, and a sweet glaze creates a flavor profile that’s impossible to resist. Each bite is a burst of warmth and sweetness.
- Versatile: You can enjoy these honey buns for breakfast, brunch, or dessert, making them a versatile addition to your culinary repertoire.
- Perfect for Sharing: Whether you’re serving them to your family or sharing them with friends, these honey buns are a delightful treat that brings people together.

These homemade honey buns are a labor of love that will fill your home with the delicious aroma of freshly baked pastries. With their soft, golden-brown exteriors, cinnamon-infused interiors, and sweet glaze, they are sure to become a cherished favorite in your kitchen.
So roll up your sleeves, gather your little chefs, and let’s go on a baking adventure that will result in the most scrumptious homemade honey buns you’ve ever tasted.
Here are some more fun copycat recipes to try:
- Copycat Crumbl Strawberry Shortcake Cookies
- How To Make The Best Homemade Copycat Milano Cookies
- Easy Fudgy Copycat Cosmic Brownie Cookies
- Easy Copycat Mrs. Fields Chocolate Chip Cookies Recipe

Easy Homemade Honey Buns Recipe
Homemade honey buns are a warm, gooey delight that captivates taste buds with their sweet honey-cinnamon goodness. Whether for breakfast, brunch, or dessert, these made-from-scratch treats are a labor of love that brings joy to every bite.
Ingredients
- Honey Bun Dough
- ½ cup warm water
- 3 tablespoons white granulated sugar
- 1 tablespoon active yeast
- 2 ⅔ cup all purpose flour
- ⅓ cup honey
- ¼ cup butter, melted
- 3 egg yolks
- 1 teaspoon vanilla extract
- ½ teaspoon salt
- Cinnamon Sugar
- ¼ cup white granulated sugar
- 1 ½ teaspoons cinnamon
- Glaze
- 4 cups powdered sugar
- 2 ½ tablespoons honey
- 1 tablespoon melted butter
- ½ teaspoon vanilla extract
- ¼ teaspoon salt
- ⅓ - ½ cup hot water
Instructions
- In a stand mixer, start by adding the warm water, sugar and yeast. Whisk together and let sit for 5 minutes so the yeast can activate.
- Then pour in the flour, honey, melted butter, egg yolks, vanilla and salt. Use a hook attachment to mix and knead together for 8 minutes. Use a rubber spatula to scrape down the sides as needed throughout the mixing. The dough will be slightly sticky.
- Transfer the dough to an oiled mixing bowl and cover with plastic wrap. Let proof at room temperature for 1 hour or until the dough doubles in size.
- A few minutes before the dough is done proofing mix together the cinnamon and sugar in a bowl with a fork.
- Once proofed, remove the dough from the bowl and place on a clean, floured surface.
- Roll the dough out into a large rectangle about ¼-½ inch thick. Spread the cinnamon sugar mixture evenly across the dough. Coat all areas by spreading with your hands and press the mixture into the dough.
- Tightly roll the dough, lengthwise, into a long log. Place the log diagonally on your clean surface. Use a knife to cut straight vertically along the diagonal log to create 2 inch slices.
- Place these cut honey bun rolls on a baking sheet. Cover in plastic wrap and allow to proof for another 30 minutes.
- Heat the oil in a frying pan on medium high heat.
- The honey buns will have almost doubled in size after proofing. Once the frying oil is hot, place 3-5 buns in at a time, depending on the size of your pan/pot.
- Let cook on each side for about 1 ½ to 2 minutes, or until golden brown on both sides.
- Remove from the oil and place on a plate with paper towel to drain excess oil. Fry all the honey buns and set aside to cool. Use a spatula to press down each honey bun and create a flat look, just like the packaged version.
- While those cool, make the glaze.
- In a mixing bowl add the powdered sugar, honey, melted butter, vanilla extract and salt all at once. Whisk together until combined. The mixture will still look like slightly clumpy powdered sugar.
- Slowly pour in the hot water while whisking the powdered sugar mixture until a thick white glaze is formed. Start slowly because you may not need all the water.
- Prepare a baking sheet with parchment paper and a cooling rack on top.
- Dip each honey bun into the glaze, coating each side. Because this is a thicker glaze be sure to shake off excess frosting before transferring to the cooling rack.
- Let the rest of the honey bun glaze drip off and then harden on the pastry for about 20 minutes
- Enjoy or store in a tight sealed container!
Nutrition Information
Yield
12Serving Size
1Amount Per Serving Calories 557Total Fat 13gSaturated Fat 6gTrans Fat 0gUnsaturated Fat 6gCholesterol 59mgSodium 276mgCarbohydrates 107gFiber 3gSugar 71gProtein 5g

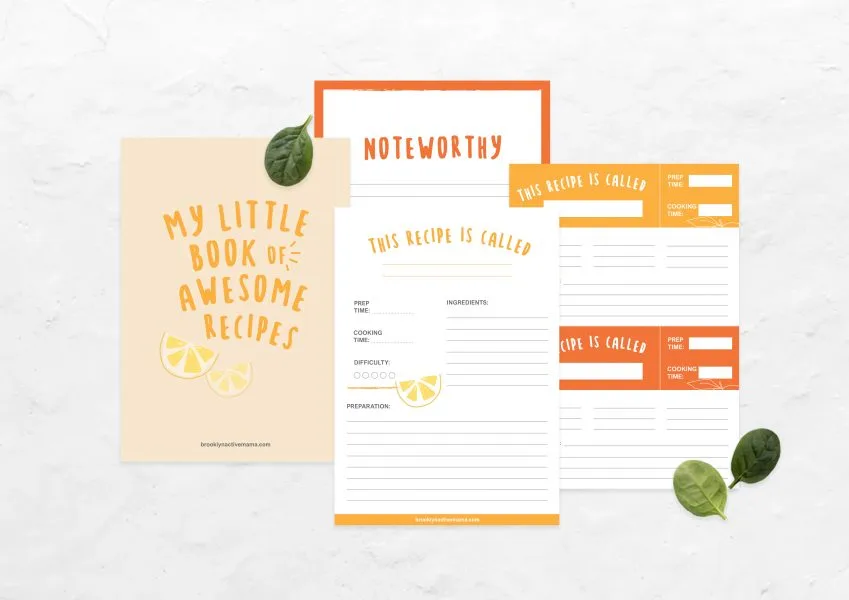
Before you go, grab Your Free Printable Recipe Kit!
Keep track of all your favorite recipes and ingredients with this free printable book!
Hi! I’m Nellie. I am an entrepreneur, a busy mama of 3 and a wife to my high school sweetheart. I have been sharing content for over 12 years about how to cook easy recipes, workout tips and free printables that make life a little bit easier. I have been featured in places like Yahoo, Buzzfeed, What To Expect, Mediavine, Niche Pursuits, HuffPost, BabyCenter, Mom 2.0, Mommy Nearest, Parade, Care.com, and more!
Get comfortable and be sure to come hang out with me on social. Don’t forget to grab your free fitness journal before you go!
