Strawberry Cheesecake Stuffed Waffles
This strawberry cheesecake stuffed waffles recipe will knock your socks off! Waffles stuffed with a delicious sweet creamy filling, breakfast will never be the same!
Breakfast is my absolute favorite meal of the day — always has been. I will try any breakfast, make any breakfast, eat any breakfast. My family benefits from this obsession regularly, and they have zero complaints.
But stuffed waffles? That used to be a special occasion thing. The kind of breakfast you’d get at a brunch spot in the city, where it comes out looking like an event and costs $18. I loved them but wasn’t making them at home.
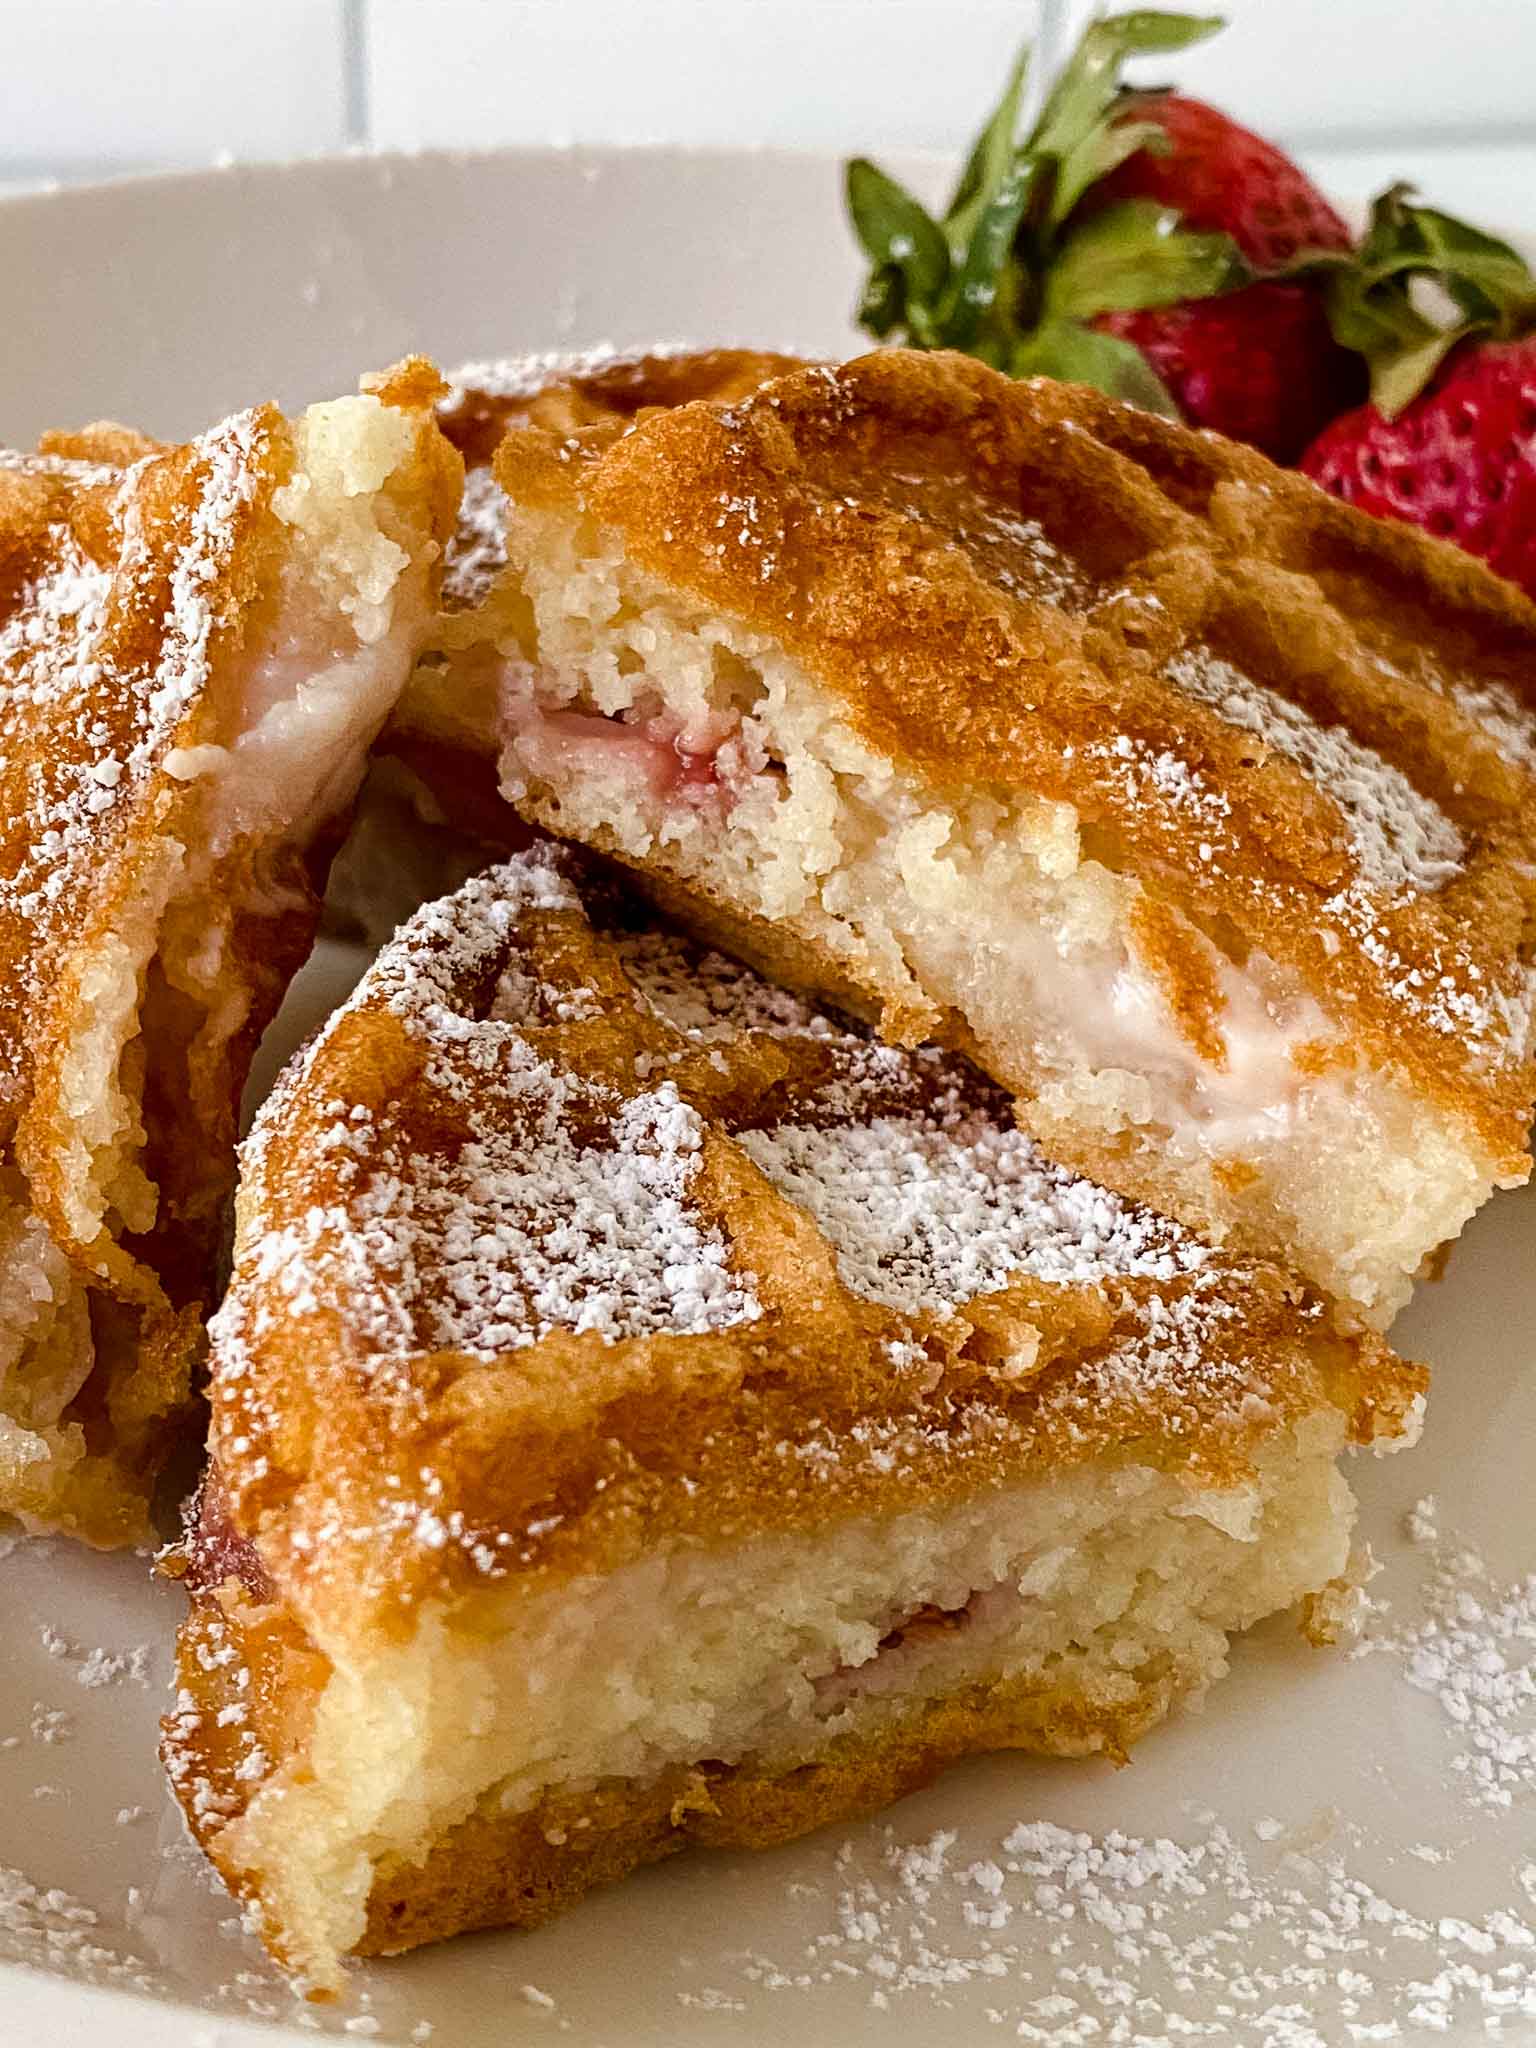
Then I figured out the technique, and now I can’t stop. The method is simpler than it sounds — bottom layer of batter, cream cheese filling with fresh strawberries in the center, another thin layer of batter on top to seal it, and the waffle iron does the rest. What comes out is a golden waffle with this warm, creamy strawberry cheesecake center that nobody in my house can resist.
These are a weekend staple now. And if you’ve never made stuffed waffles before, this is the recipe to start with.
What ingredients are needed for this strawberry stuffed waffles?
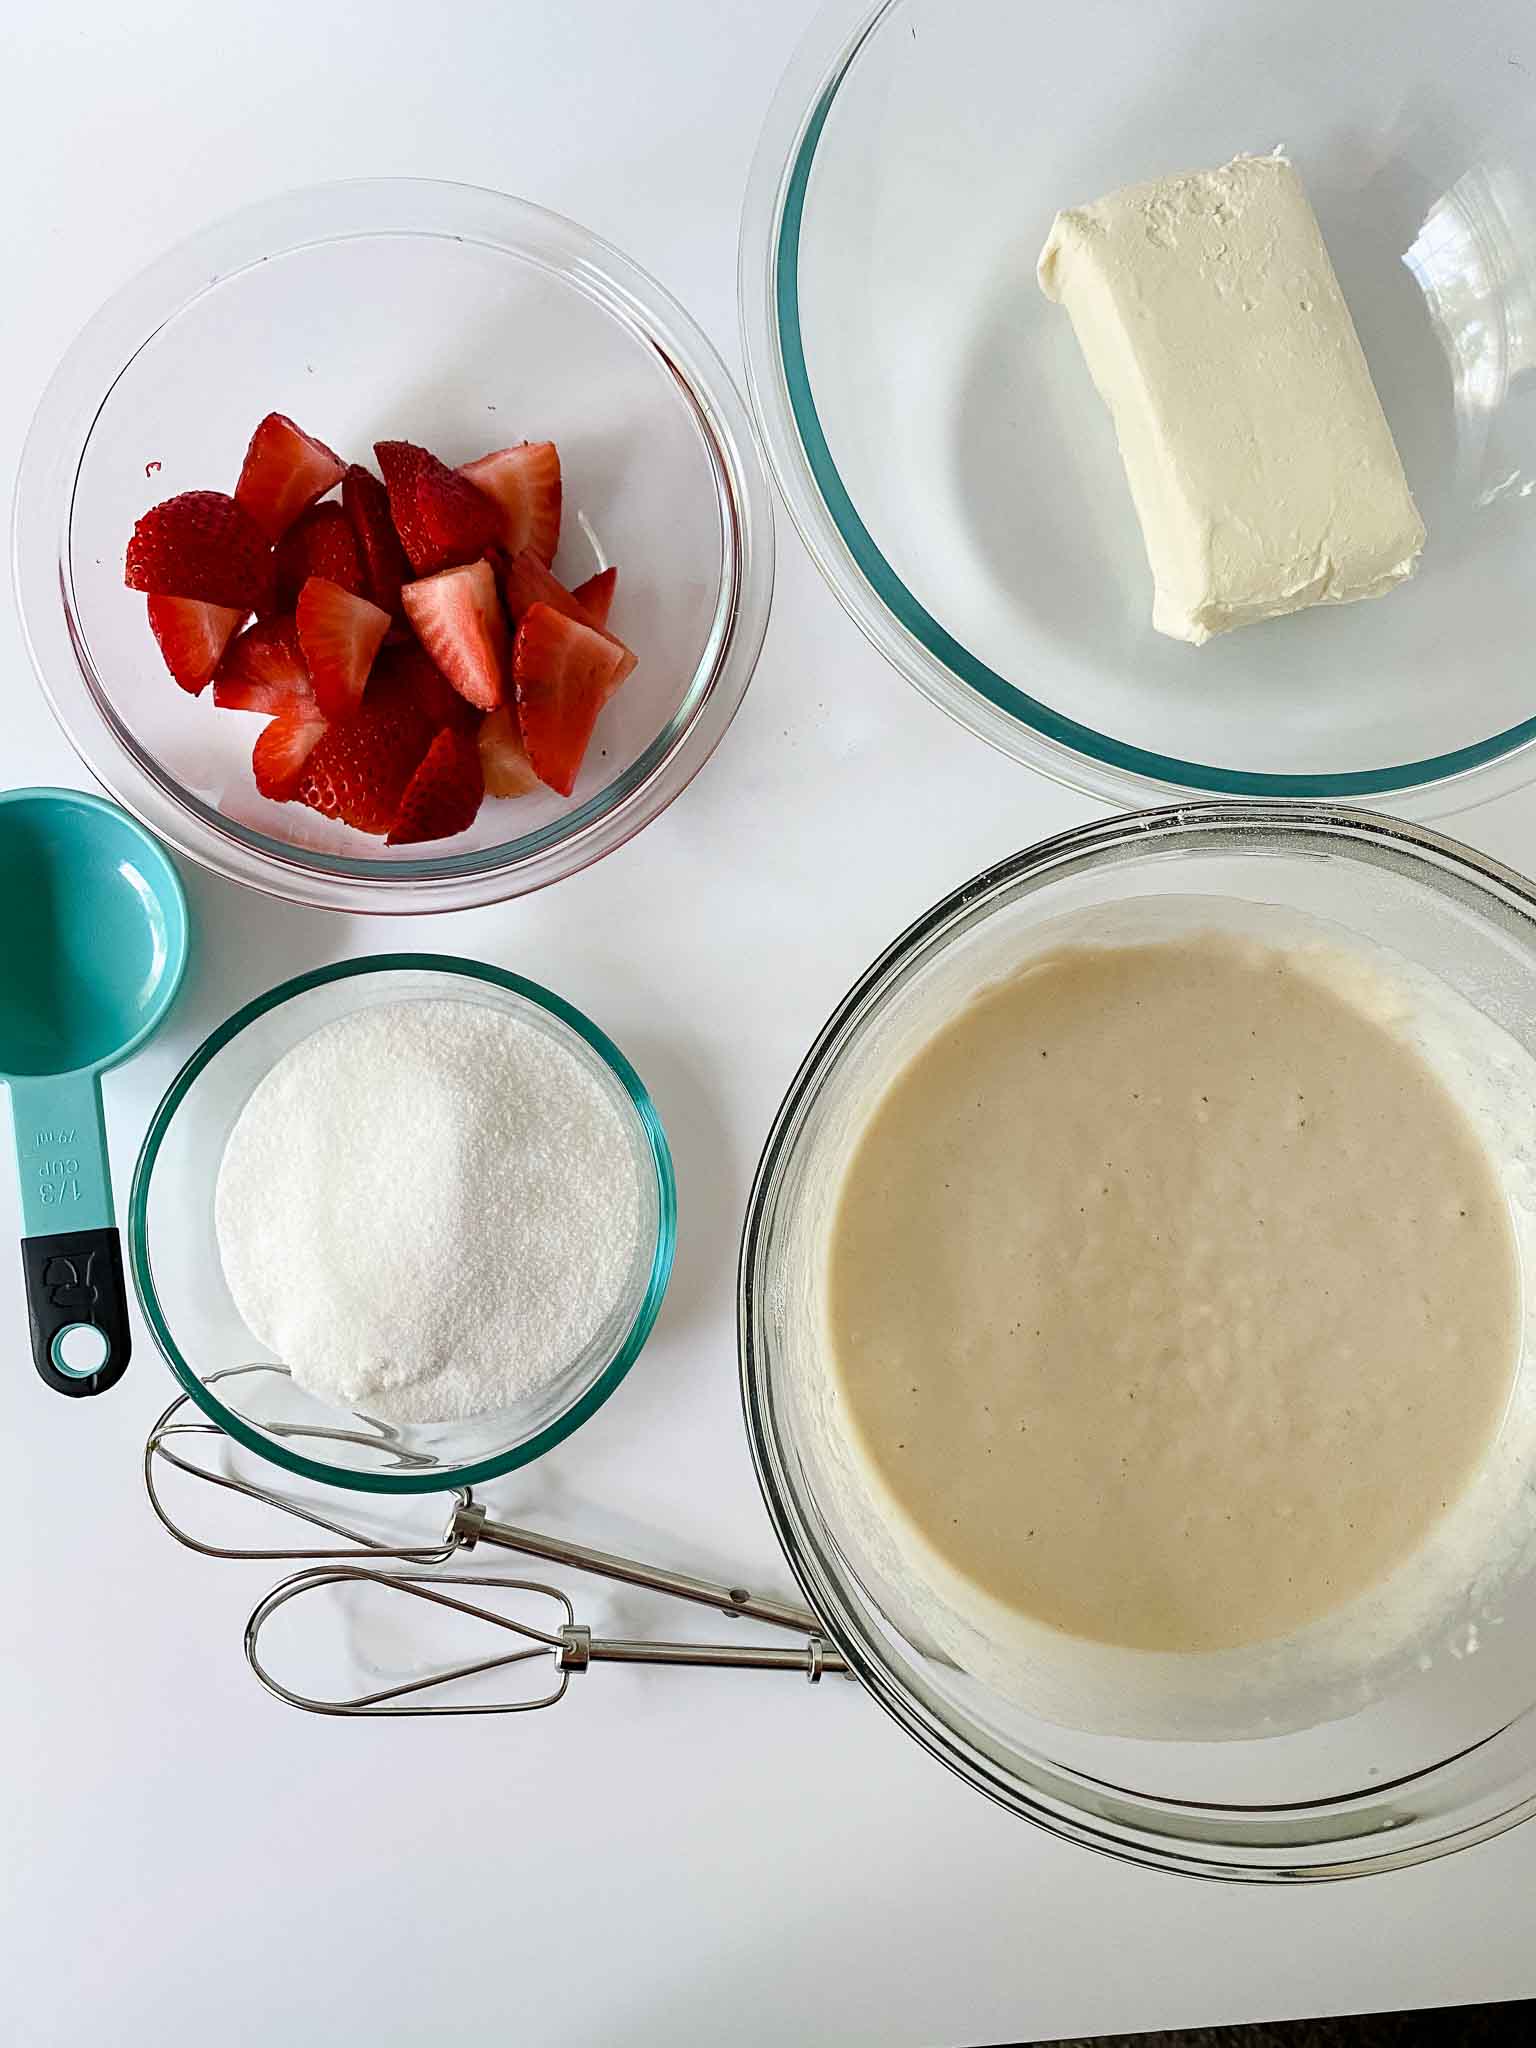
Cheesecake Filling
- 4 oz cream cheese, softened to room temperature
- ½ cup granulated sugar
- 1 tsp vanilla extract
- ½ to ¾ cup fresh strawberries, chopped or mashed (or 2–3 tablespoons strawberry preserves)
Waffle Batter
- 1 cup dry waffle mix (prepared according to package directions — yields approximately 2 cups batter)
- Eggs, oil, and water or milk as directed by your waffle mix package
For Serving (optional but recommended)
- Fresh strawberry slices
- Powdered sugar
- Maple syrup
- Whipped cream
How Do You Make These Stuffed Waffles?
- Heat waffle iron
- In one bowl with a hand mixer or whisk, Mix cream cheese, sugar and vanilla until fully incorporated.
- In another bowl mix waffle mix according to package instructions
- Pour 1/3 cup batter into bottom of waffle iron covering make sure to cover the slots with batter.
- Add cheese cheese mixture (either mix in strawberries or lay them in-if making a lot mix the fresh strawberries or strawberry preserves into the cheesecake filling)
- Top with more batter
- Close the waffle maker, clasp the handles and flip over
- Cook for 10-12 mins

Tips for Stuffed Waffle Success
The technique is straightforward once you know these three things:
Soften the cream cheese all the way. Not just out of the fridge for a few minutes — leave it at room temperature for at least 30 minutes until it’s completely soft. Cold cream cheese won’t mix smooth no matter how long you beat it, and lumpy filling is hard to work with in a hot waffle iron.
Don’t overfill. This is the most common mistake. About 2–3 tablespoons of filling per waffle — placed in the center, not spread to the edges — is all you need. Too much filling and it squeezes out the sides when you close the iron, makes a mess, and burns onto the plates. A small, centered dollop is enough.
Go medium heat, not high. High heat cooks the outside too fast before the filling warms through. Medium heat gives the whole waffle time to cook evenly.
FAQs
Yes — thaw them first and pat them dry thoroughly. Frozen strawberries release a lot of water as they thaw, and excess moisture will make the filling runny and can cause the waffle to steam from the inside rather than cook properly. Dry them well and you’re good.
Yes. Stir 2–3 tablespoons of strawberry preserves directly into the cream cheese mixture. The filling will be smoother and more uniform — easier to work with, slightly sweeter. Skip the fresh strawberries if using preserves.
Two common causes: too much filling, or filling spread too close to the edges. Stick to 2–3 tablespoons placed in the center, and close the iron gently but firmly. Some minimal leakage is normal — a significant leak means overfilling.
Yes. Make the cream cheese filling up to 2 days ahead and store it covered in the refrigerator. Give it a quick stir before using — it may thicken slightly in the fridge but softens right back up.
Toaster oven at 350°F for 5–7 minutes is the best method — it crisps the outside back up. Avoid the microwave, which makes the waffle soft and the filling watery. Leftover stuffed waffles store in an airtight container in the refrigerator for up to 2 days.
Any standard Belgian waffle iron with deeper pockets works well — the deeper pockets give the filling more room. Thinner waffle irons can work but require less filling and more care. A flip waffle iron tends to cook stuffed waffles the most evenly.
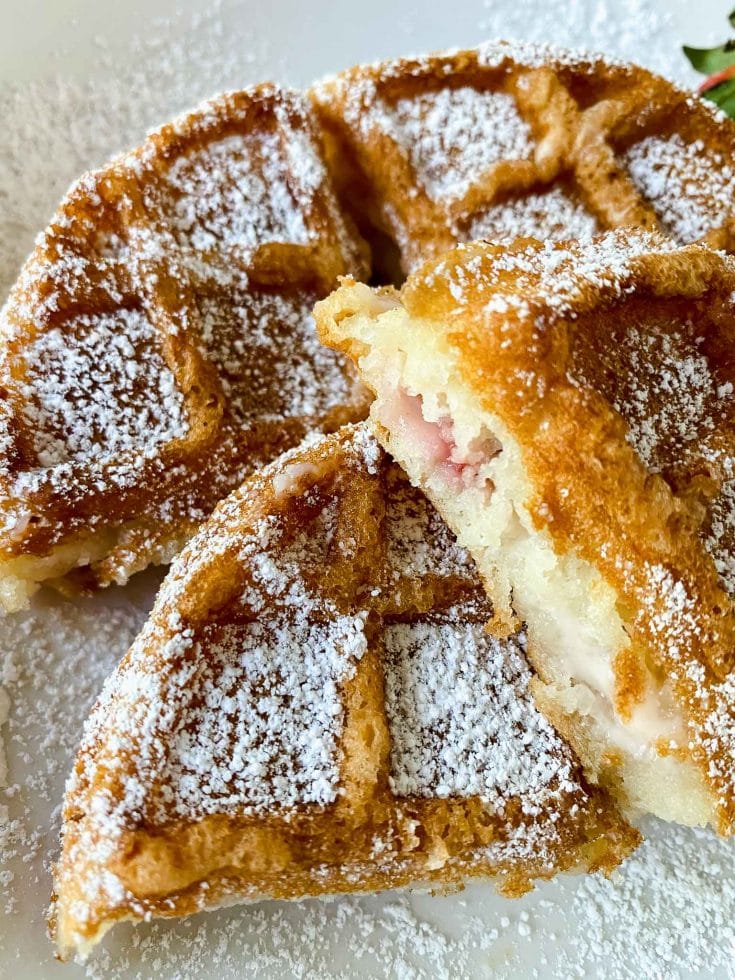
When we make waffles we are used to pouring the waffle batter into the machine and closing it. This recipe calls for you to put down some waffle mix, the cheesecake blend, then more waffle mix. Perfection.
Did I mention that you are using fresh strawberries in this recipe?! Lots of times you might be accustomed to adding fresh fruit on top this time it’s cooked right in. So yummy!

Here are some more delicious waffles recipes to try:


Strawberry Cheesecake Stuffed Waffles
These strawberry cream cheese stuffed waffles will be your new favorite brunch treat!
Ingredients
- Cheesecake Filling
- 4 oz cream cheese, softened to room temperature
- ½ cup granulated sugar
- 1 tsp vanilla extract
- ½ to ¾ cup fresh strawberries, chopped or mashed (or 2–3 tablespoons strawberry preserves)
- Waffle Batter
- 1 cup dry waffle mix (prepared according to package directions — yields approximately 2 cups batter)
- Eggs, oil, and water or milk as directed by your waffle mix package
- For Serving (optional but recommended)
- Fresh strawberry slices
- Powdered sugar
- Maple syrup
- Whipped cream
Instructions
Make the Filling
- Take your cream cheese out at least 30 minutes before you start — it needs to be fully softened, not just slightly less cold. Truly room temperature cream cheese mixes smooth in about a minute. Cold cream cheese stays lumpy no matter how long you beat it, and lumpy filling is hard to work with once the iron is hot.
- Beat the softened cream cheese, sugar, and vanilla together with a hand mixer or whisk until completely smooth. If you're mixing the strawberries directly into the filling, fold them in now. If you'd rather layer them in separately for a chunkier center, keep them on the side. Both work great — it's just a texture preference.
- Set the filling aside while you get the batter ready.
Make the Batter
Prepare your waffle mix according to the package directions. You're aiming for about 2 cups of prepared batter total, which is enough for 4 stuffed waffles.
Cook the Waffles
- Preheat your waffle iron to medium heat — not high. Medium heat gives the filling time to warm through while the outside cooks evenly. High heat rushes the outside before the center is ready.
- When the iron is hot, spray both plates generously with nonstick cooking spray. Pour about ⅓ cup of batter into the center and spread it to cover the bottom plates completely. Make sure the slots are all covered — this is your base layer and it needs to be solid.
- Spoon 2–3 tablespoons of the cream cheese filling into the center of the batter. Keep it toward the middle — don't spread it to the edges or it will squeeze out when you close the iron. If you're laying fresh strawberry pieces in separately, place them on top of the filling now.
- Pour 2–3 tablespoons of batter over the filling to seal it in. You just need enough to cover it — not a full second layer. Less is more here.
- Close the waffle iron firmly and clasp the handles. If your iron flips, flip it now. Cook until the steam from the iron reduces significantly — that's your best sign that the waffle is done. Most irons also have an indicator light. Don't open it early and don't go by time alone since every waffle iron runs differently. When you do open it, you're looking for a deep golden exterior.
- Let it sit for one minute before removing. The filling gets very hot.
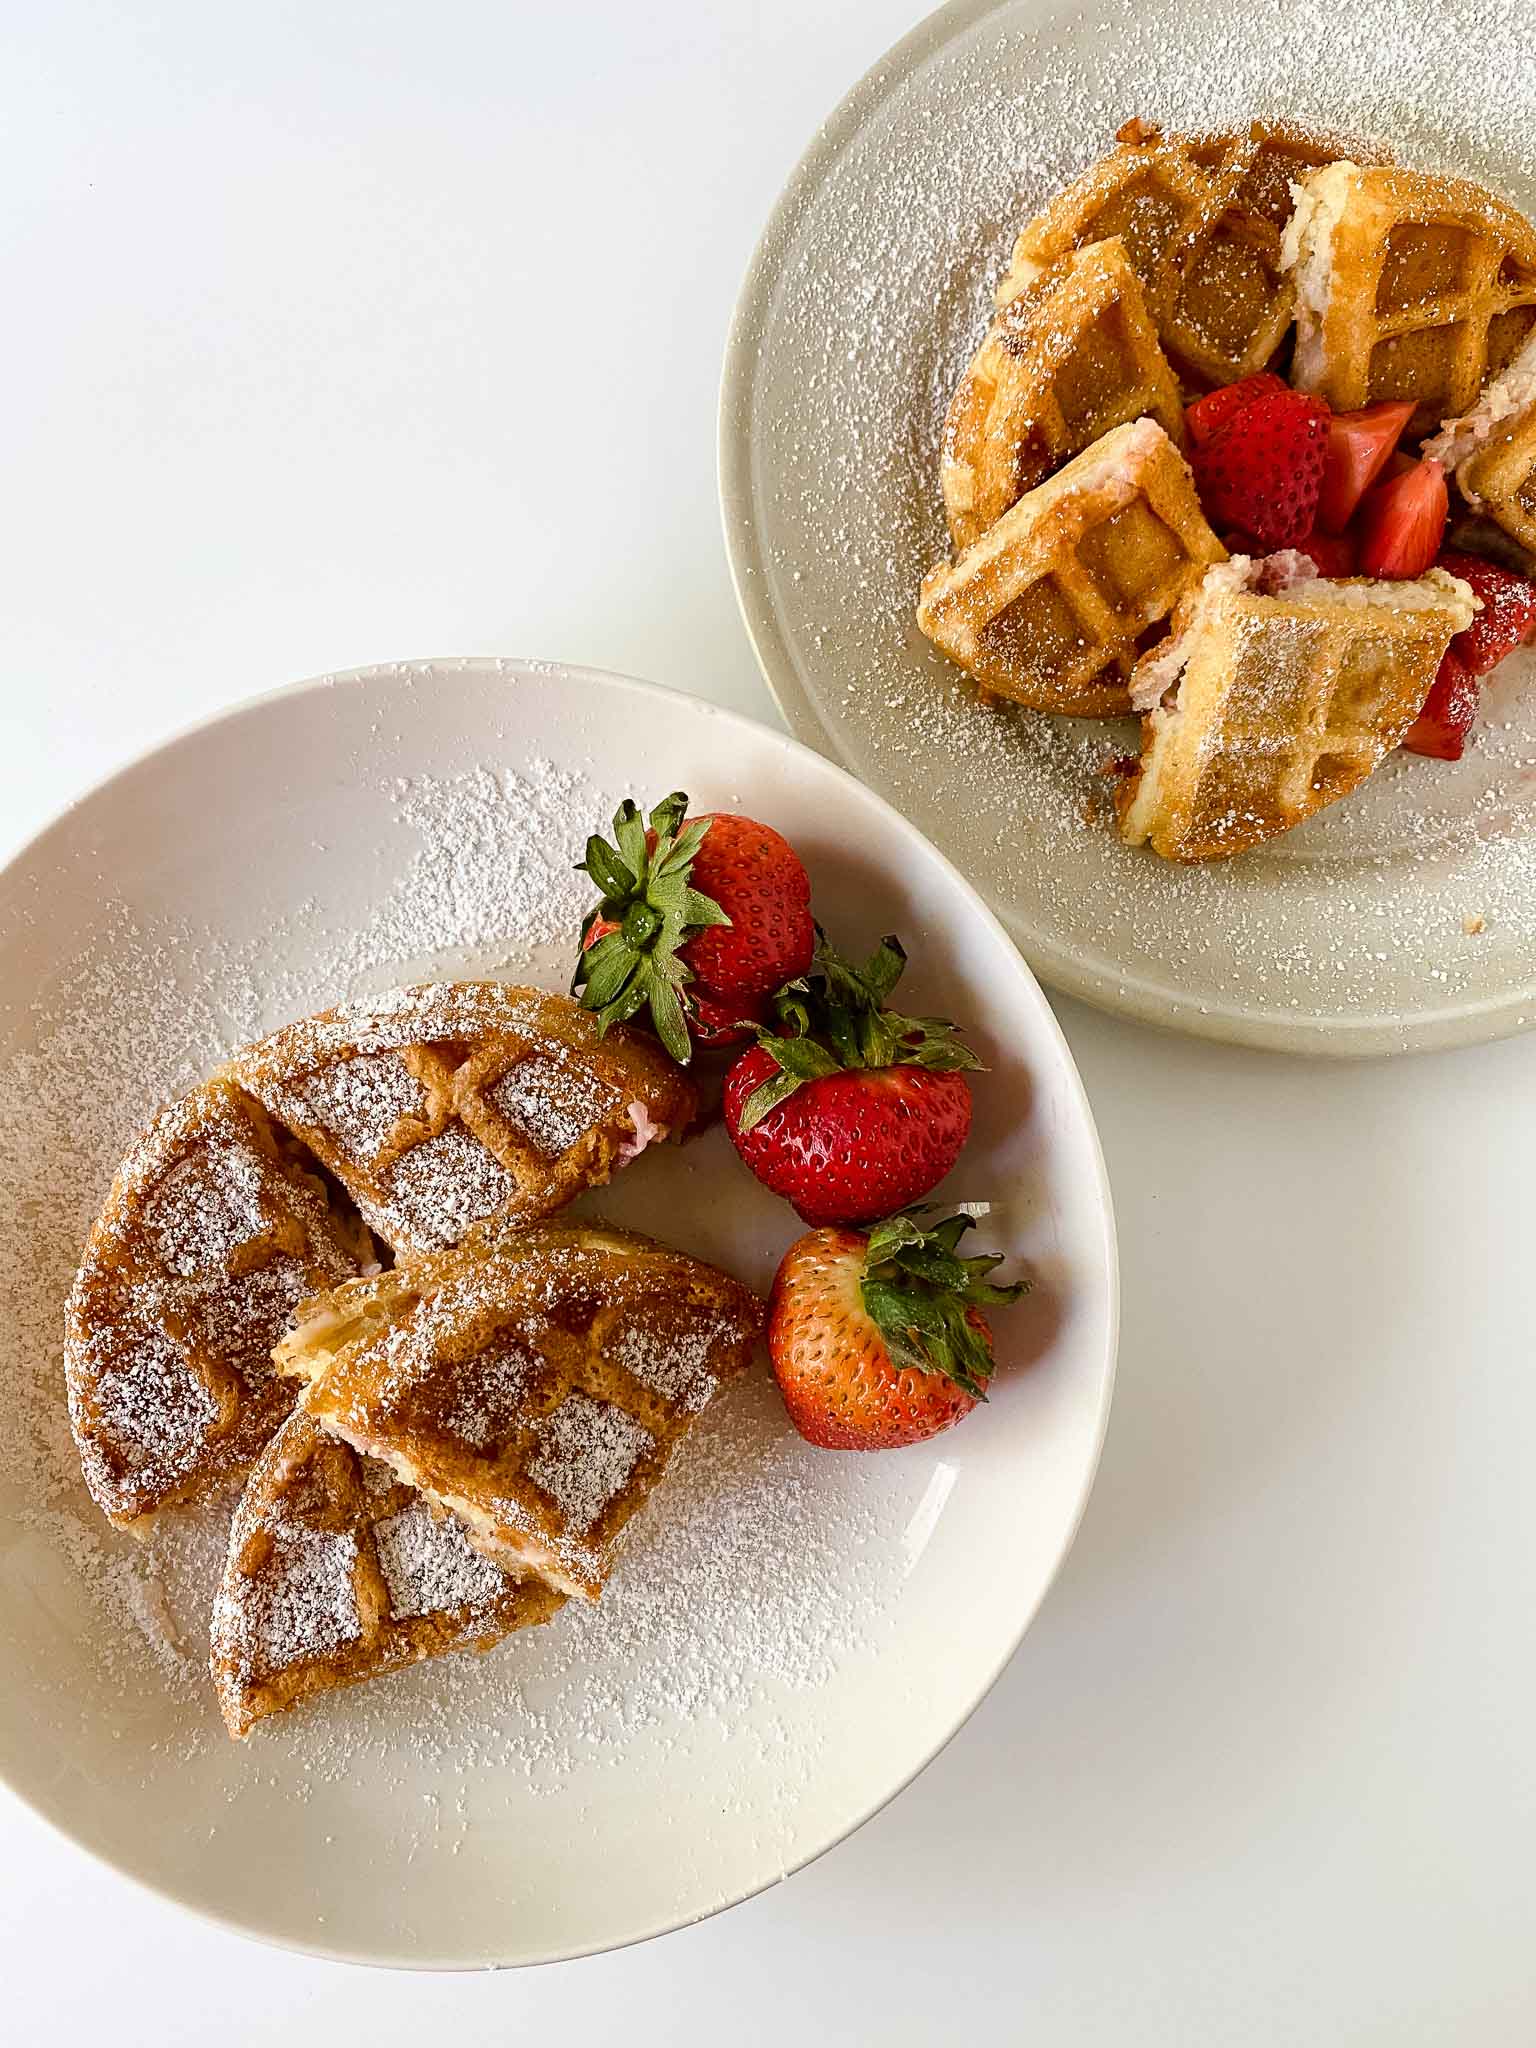
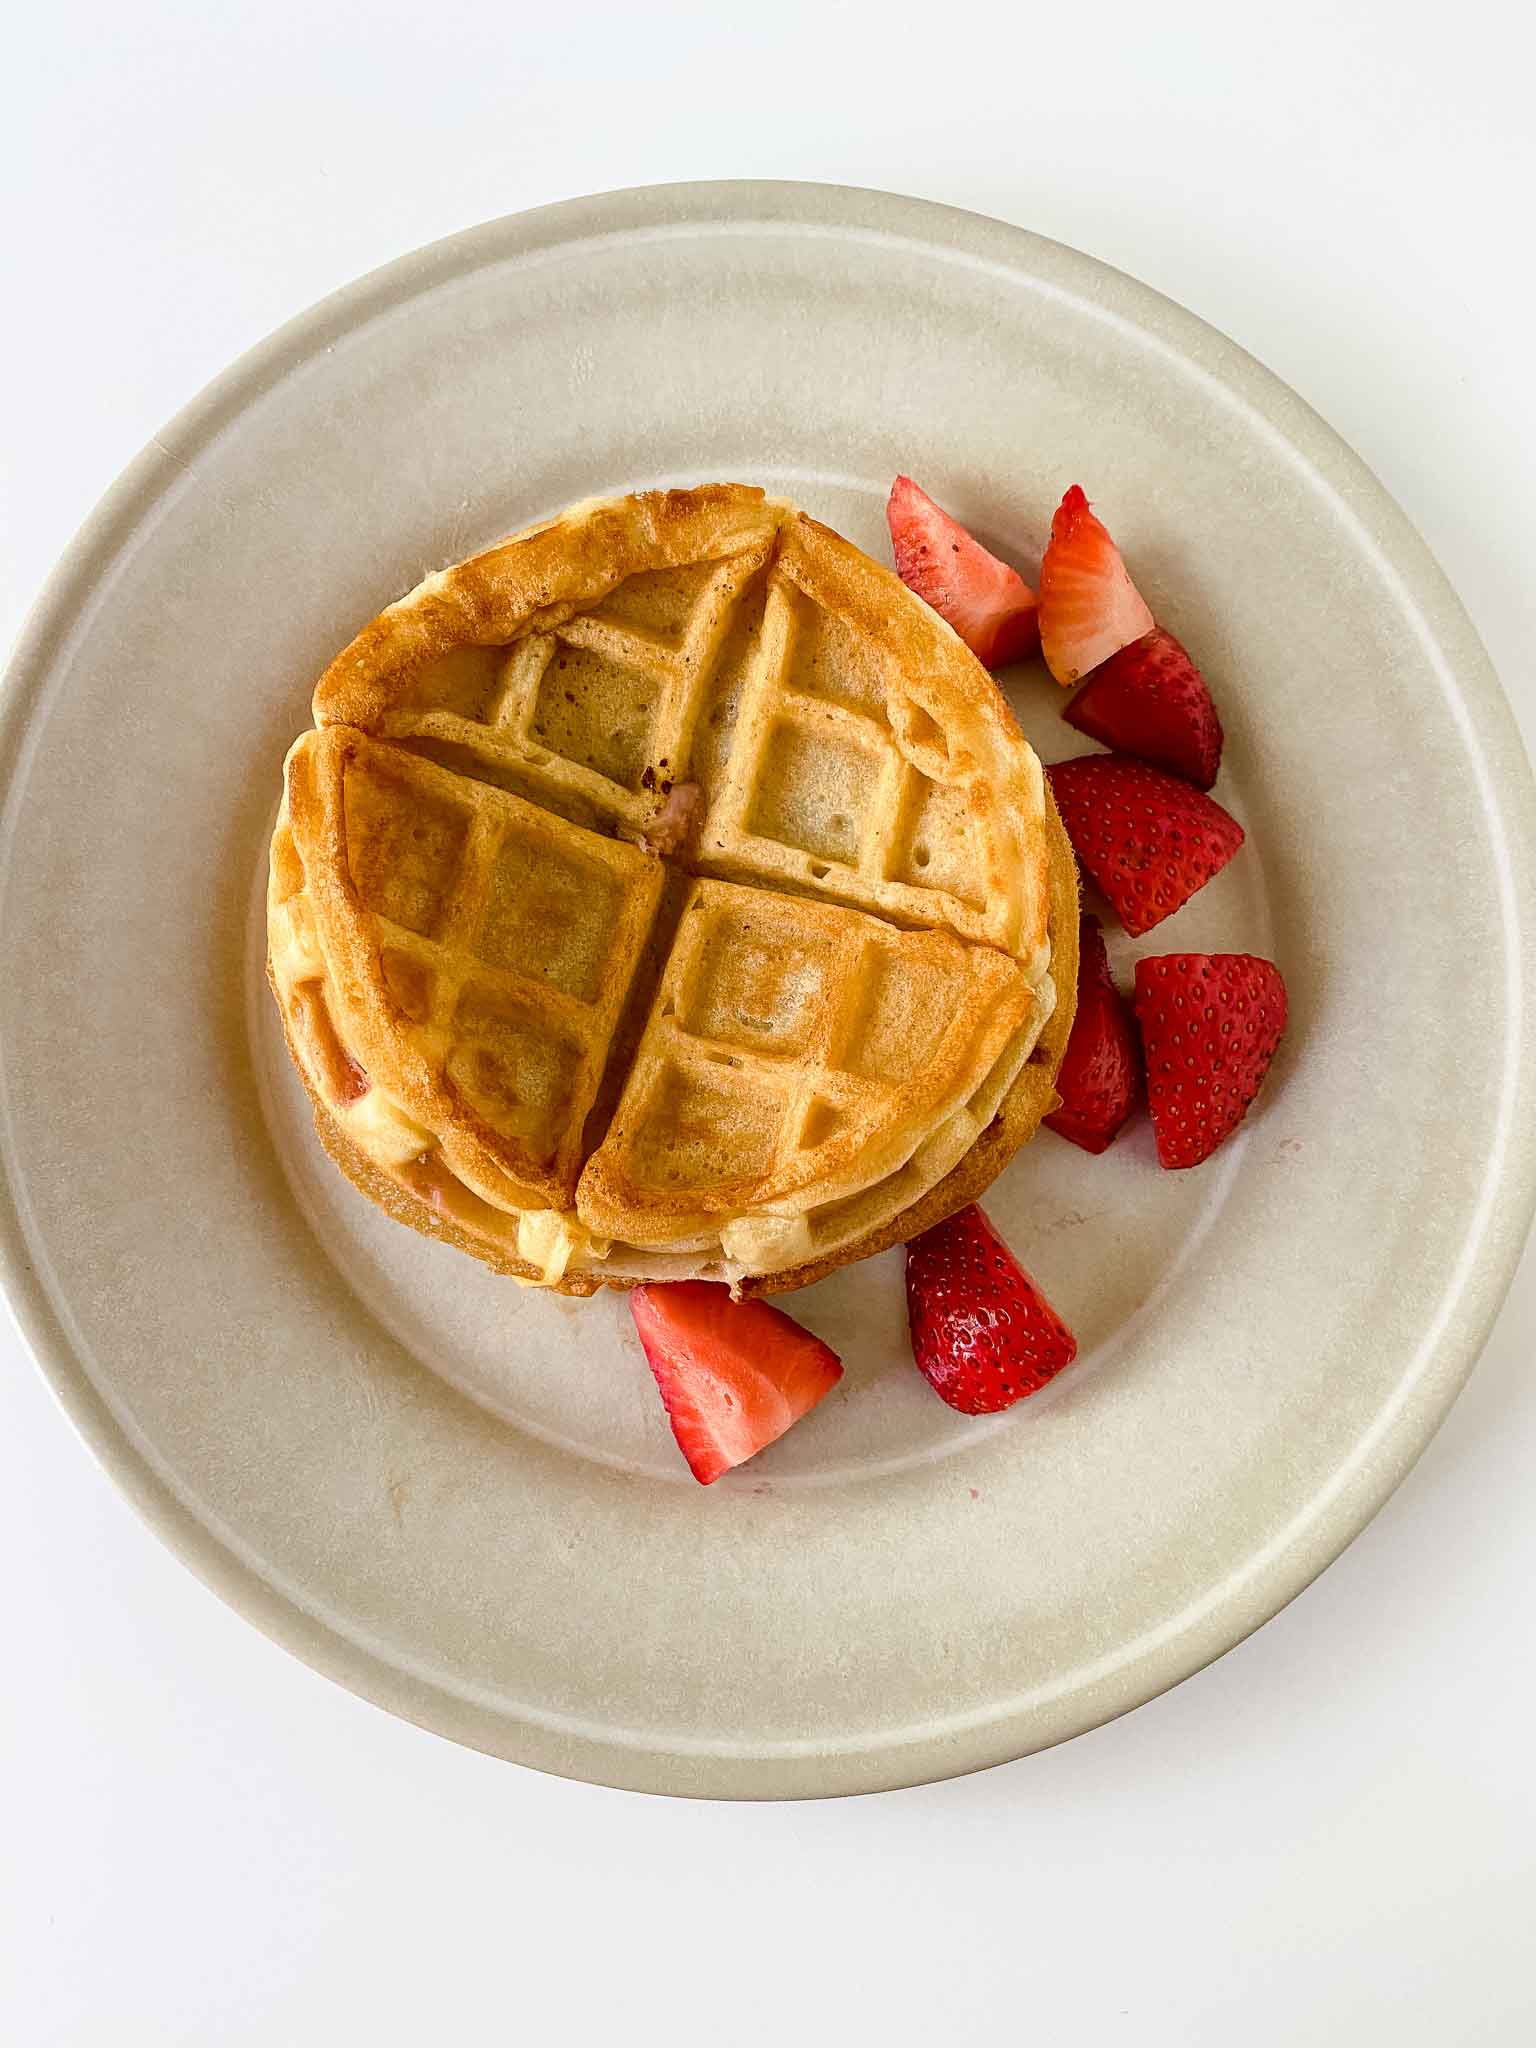
Serve
Top with fresh strawberry slices, a dusting of powdered sugar, and a drizzle of maple syrup. Add whipped cream if you're feeling it. A side of crispy bacon alongside balances the sweetness perfectly — trust me on this one.
Notes
Do not open nor remove the center tongs while baking.
Only add a small amount of the cheesecake filling too much will run out the side.
Nutrition Information
Yield
4Serving Size
1Amount Per Serving Calories 261Total Fat 12gSaturated Fat 6gTrans Fat 0gUnsaturated Fat 5gCholesterol 42mgSodium 185mgCarbohydrates 35gFiber 0gSugar 27gProtein 3g

Before you go, Grab Your Free Printable Recipe Kit!
Keep track of all your favorite recipes and ingredients with this free printable book!
Hi! I’m Nellie. I am an entrepreneur, a busy mama of 3 and a wife to my high school sweetheart. I have been sharing content for over 12 years about how to cook easy recipes, workout tips and free printables that make life a little bit easier. I have been featured in places like Yahoo, Buzzfeed, What To Expect, Mediavine, Niche Pursuits, HuffPost, BabyCenter, Mom 2.0, Mommy Nearest, Parade, Care.com, and more!
Get comfortable and be sure to come hang out with me on social. Don’t forget to grab your free fitness journal before you go!