
Valentine’s Day is such a fun day to celebrate with sweets! Check out these awesome and festive Valentine’s Day Hot Cocoa Bombs that you can make for anyone!


Valentine’s Day Sweets
When I think about Valentine’s Day I think about chocolate. I remember when I was a kid I used to get chocolate for myself all the time–the day after Valentine’s Day because hello–50-70% off!


My own personal favorite chocolate is anything with caramel BUT I’m partial to a plan chocolate as well. My husband will usually get be a typical round heart of chocolates but he has always made sure to get our kids their own too!
Sweets are such a fun way to celebrate Valentine’s Day so I’ve got a really fun sweet treat for you today!


Valentine’s Day Hot Cocoa Bombs
Hot Cocoa Bombs are all the rage this year because let’s face it, they are fun, yummy and a really cool way to add fun flavors to the traditional hot chocolate.

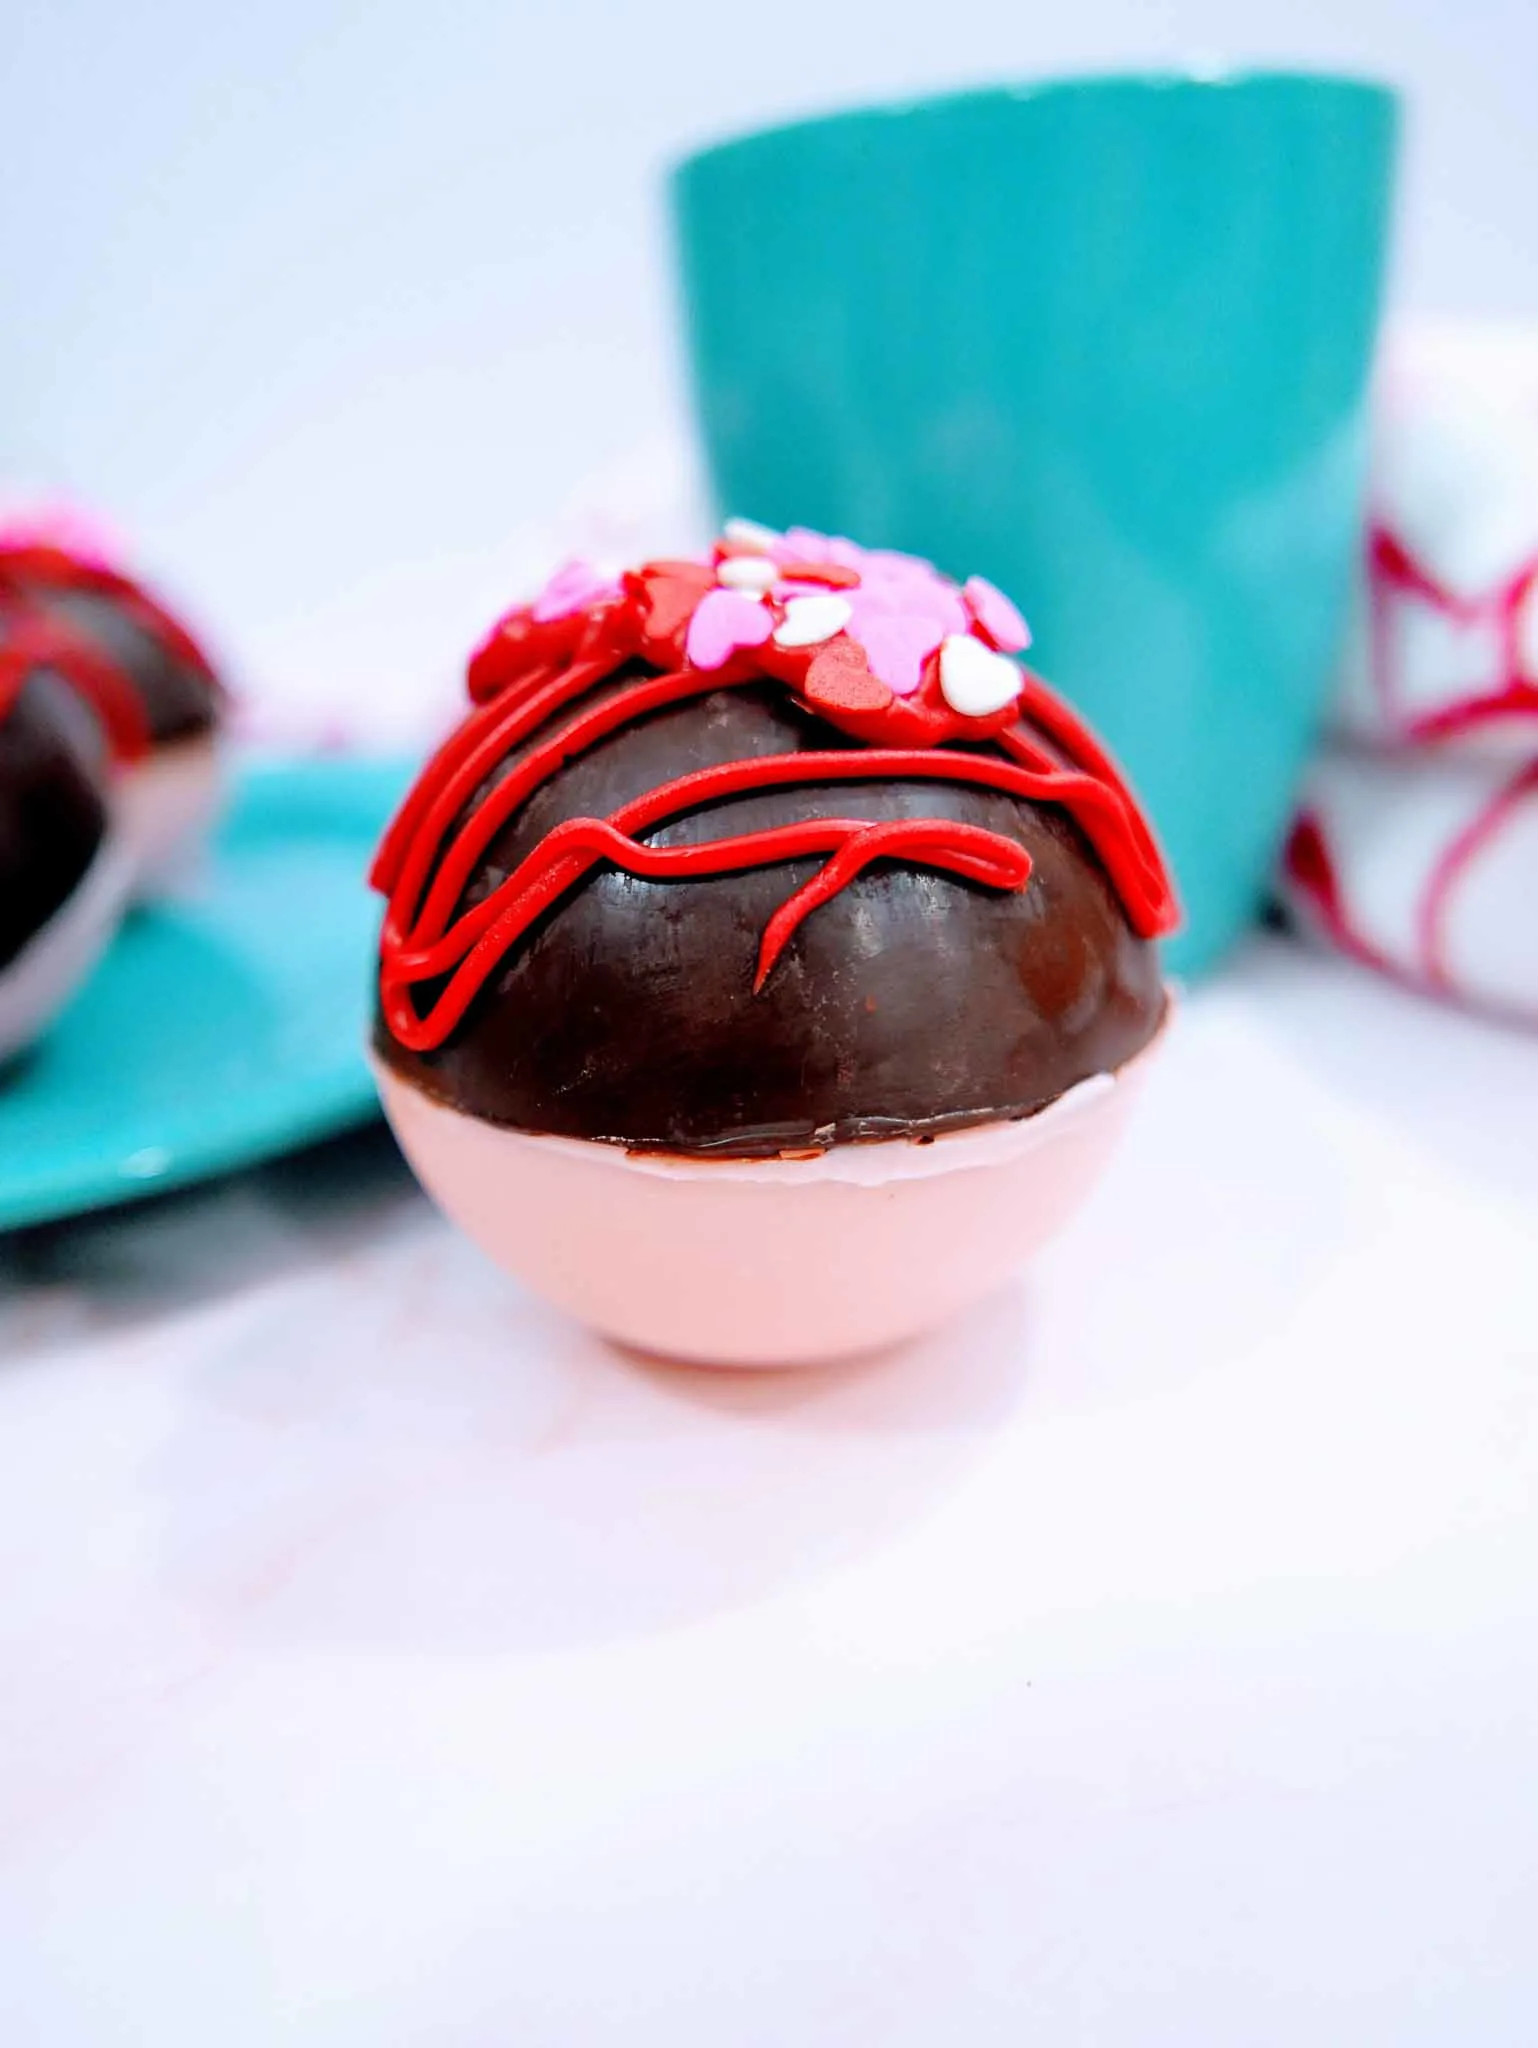
These themed hot cocoa bombs not only taste good but they are decorated with a really pretty heart using pink white and red sprinkles.
What ingredients do I need to make these fun treats?
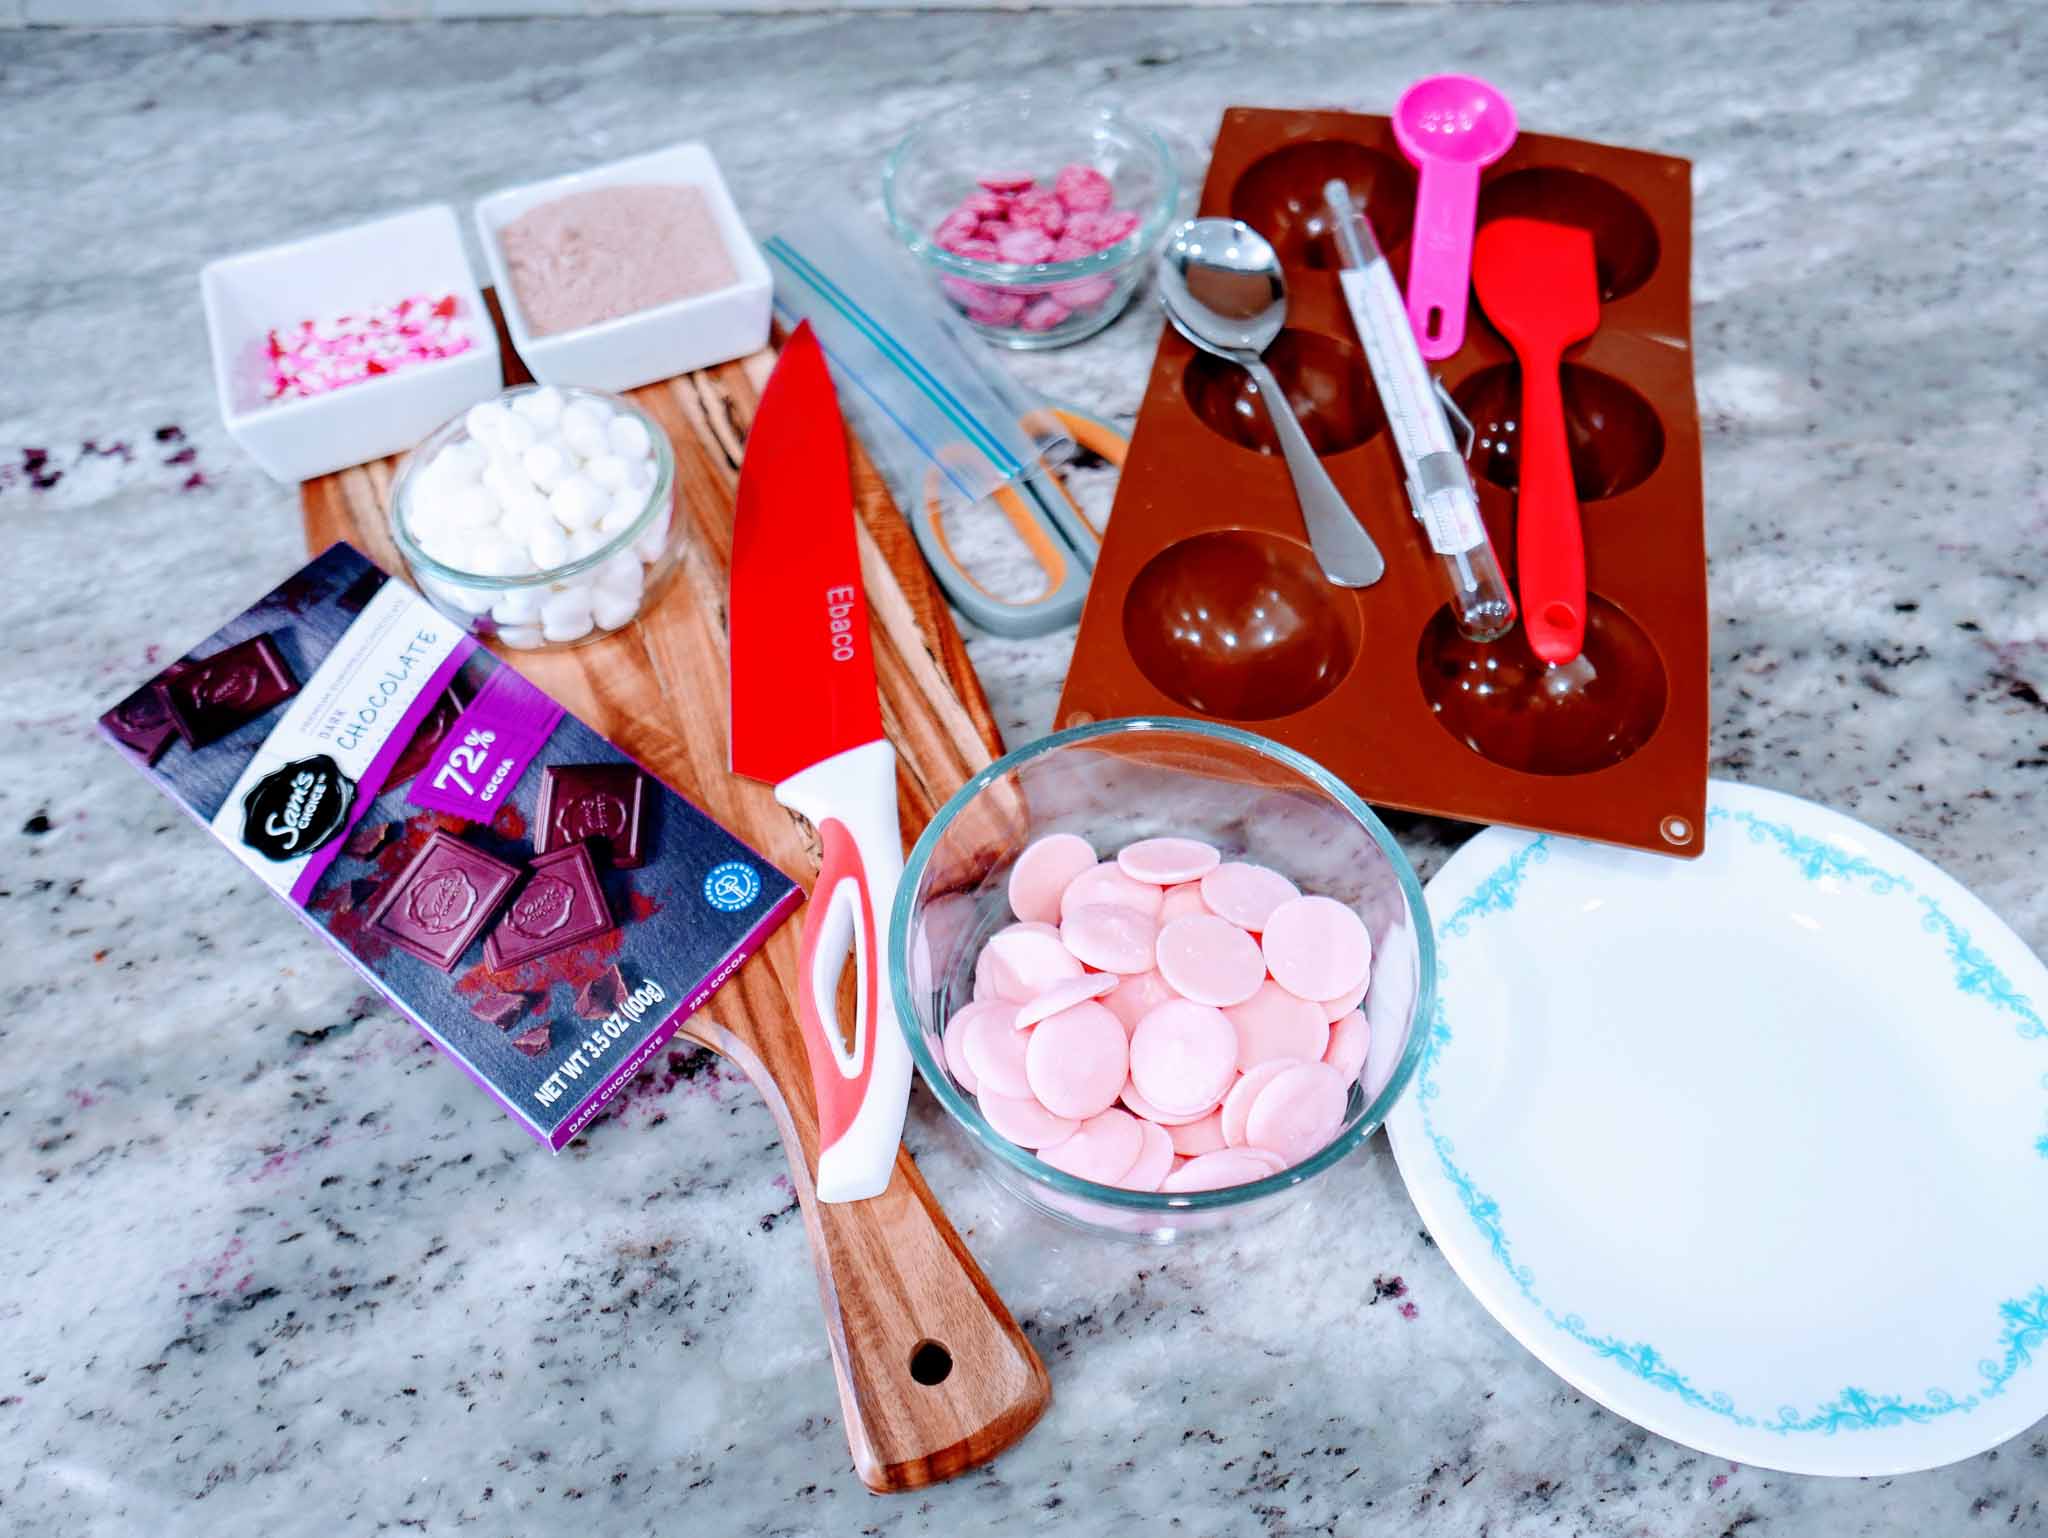
Light pink candy wafer melts, dark chocolate bar, red candy wafer melts, red, white, & pink sprinkle quins, mini marshmallows, candy thermometer, hot cocoa mix and this silicone half sphere mold (look for the large ones, that are at least 1.37”) These are the ones that are used during this tutorial.

When should I have these cocoa bombs?


Valentine’s Day is perfect, whether you are cozying up to a cheesy romantic move (my favorite TBH). Or even just having fun on the day with the family.
Enjoy!
These Valentine's Day Hot Cocoa Bombs are so fun to make and have with family! Made with festive red white and pink sprinkles, you can share these with anyone you love! Tips: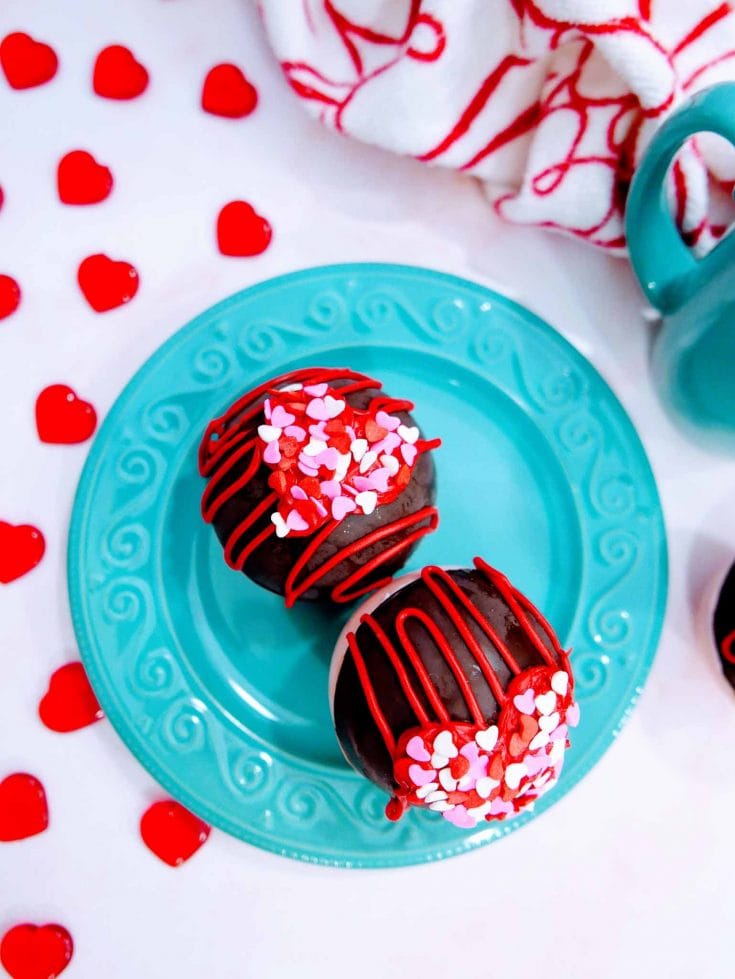

Valentine's Day Hot Cocoa Bombs
Ingredients
Instructions
minute at 50% power. Stir well, and continue heating in 30 second
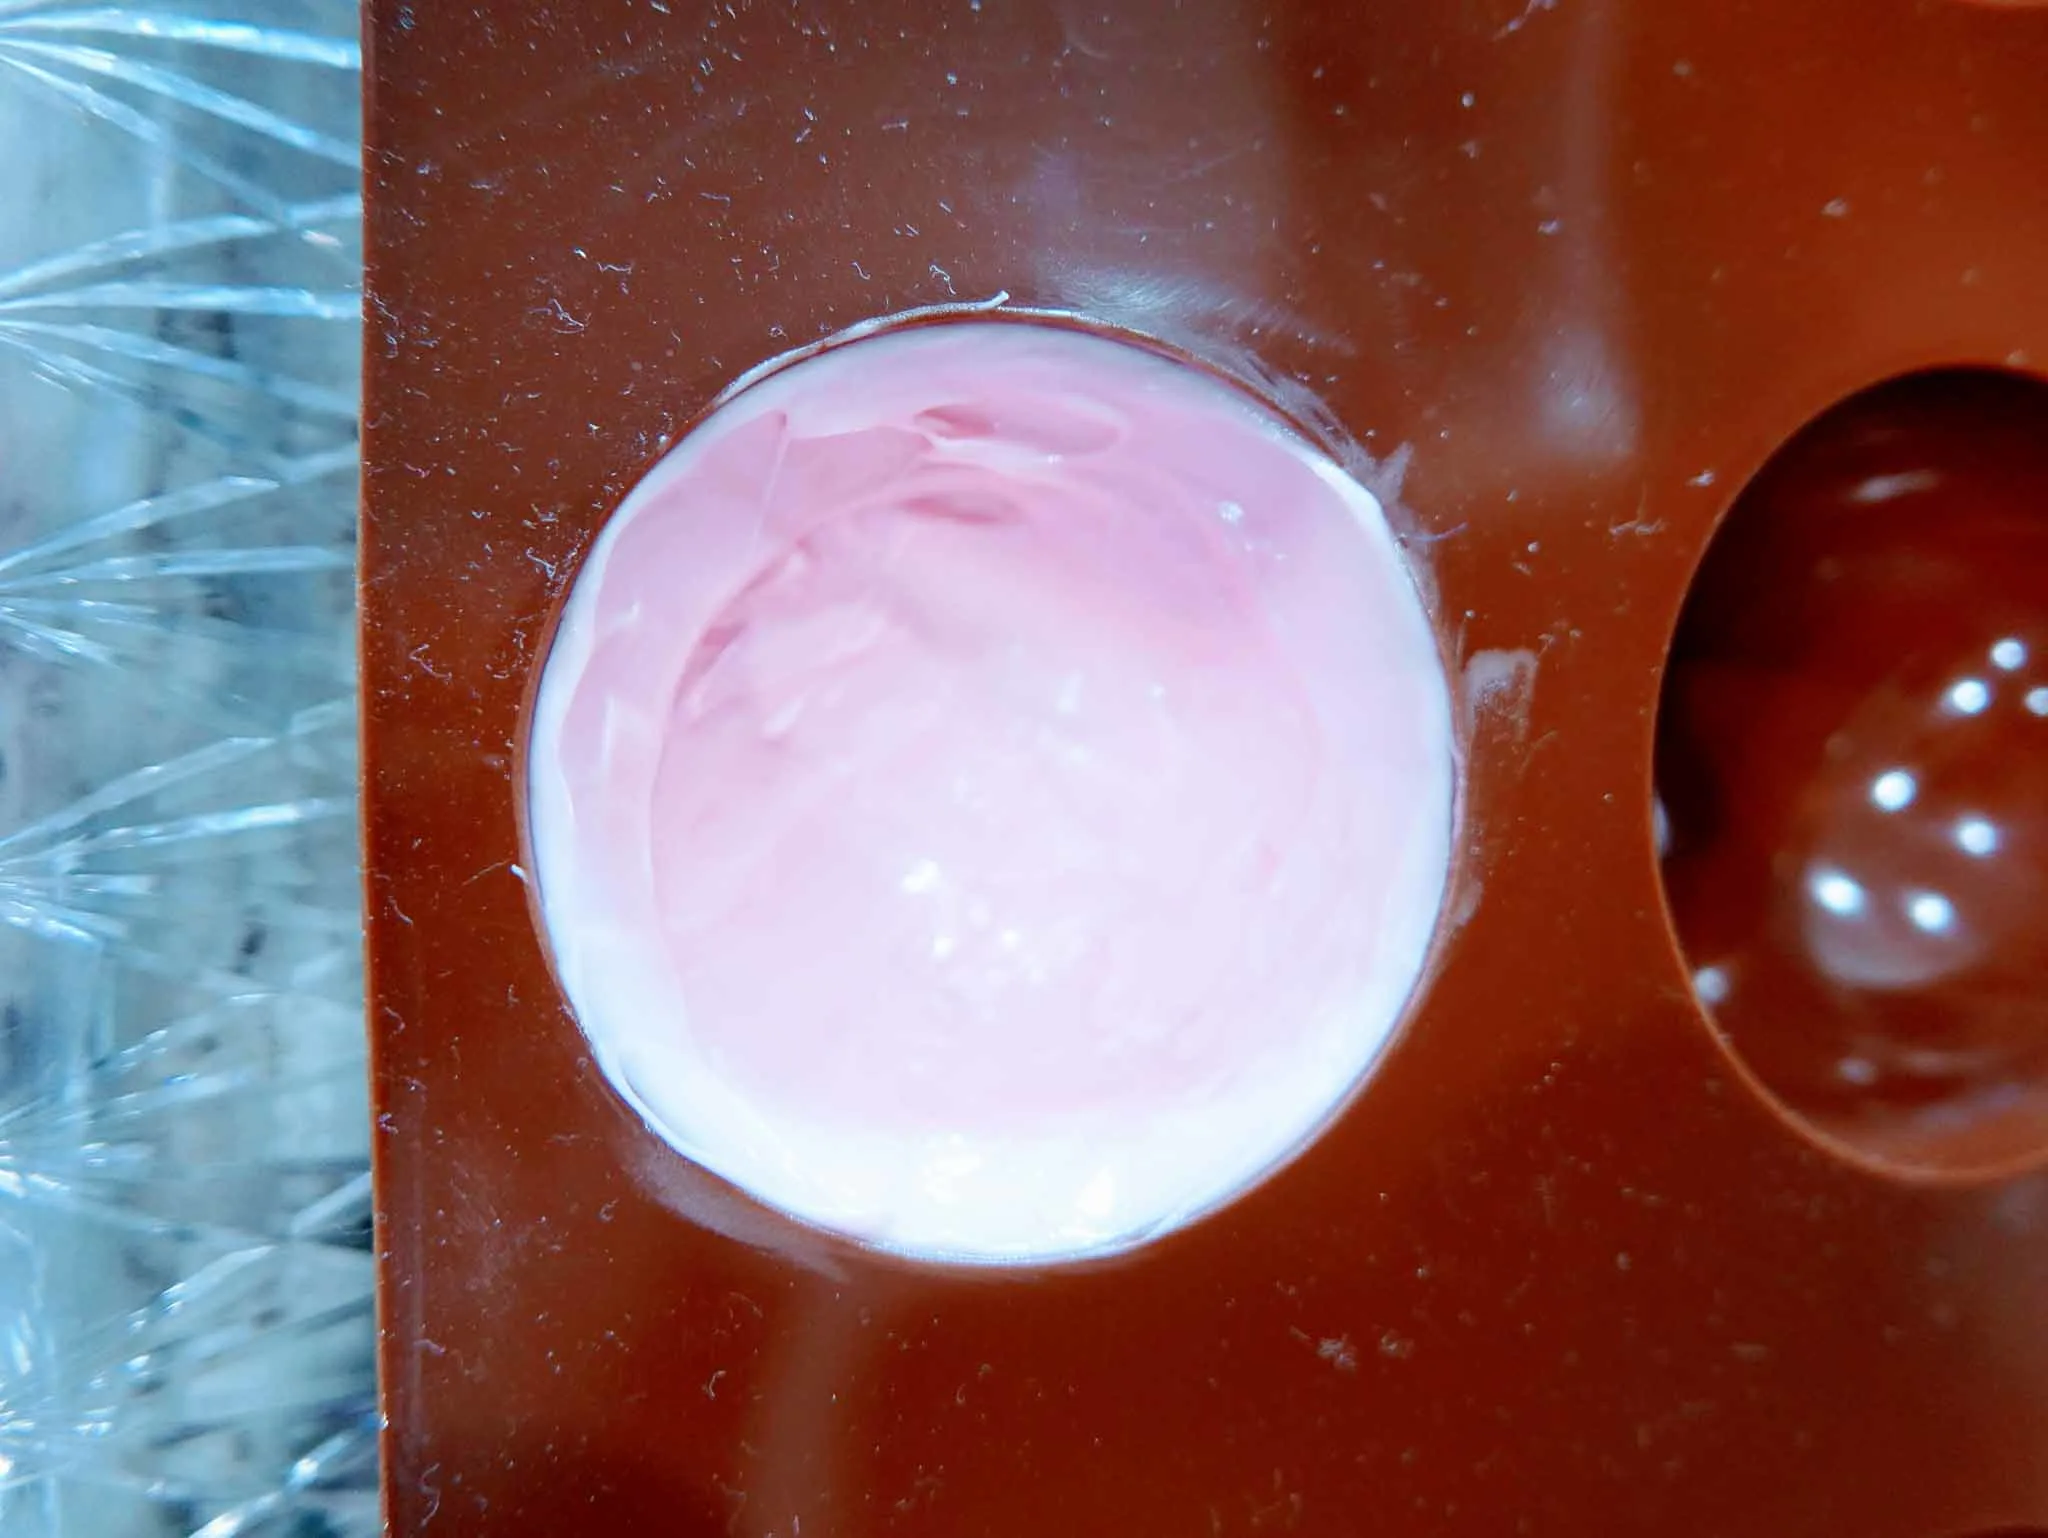
intervals until the wafers are fully melted and smooth/creamy. Place the silicone sphere mold on a flat serving tray or baking sheet, and spoon approximately a tbsp of the melted pink candy wafers into three molds.
the back of a spoon. Make sure to make the edges a little thicker, so that they don’t break when melding together. If the candy is pooled at the bottom, spread again to evenly coat all sides, or your sphere will be less circular, and more flat on the bottoms from the pooled candy. Let set while you temper the chocolate.
remaining three molds. Thoroughly coat the inside of the mold with a
small silicone spatula, or the back of a spoon. Make sure to make the
edges a little thicker, so that they don’t break when melding together.
this process again to make a second layer of dark chocolate, again paying special attention to the edges. The dark chocolate is much thinner than the candy melts, so it's crucial to do two layers, or your sphere will crack and break when removed. Once all molds are fully coated, pop in the refrigerator for 5-10 minutes for them to set.
mold away from the spheres on the sides first, and then lightly push
from the bottom to remove them. You can either place them on the
serving tray/cookie sheet, or I placed them on a piece of parchment
paper for the next steps. Try to handle them as little as possible to avoid fingerprints, or melting. (To reduce fingerprint smudges, wear food safe gloves)
seconds. Place a pink sphere open side down onto one plate. Twist it a
little to get the edges slightly melted, and then immediately flip back
over and fill with a heaping tbsp of hot cocoa mix, and about 5-6
marshmallows. Now place a chocolate sphere on the second plate and
twist, and once the edges are slightly melted, place it on top of the pink sphere. You can twist them slightly to help meld them together. If you have any cracks that didn’t seal, heat a spoon in hot water, dry
thoroughly, and use it to smooth around the seam.
Once smooth/creamy, drape the sandwich bag over your hand, and fill
with the melted wafers. Cut a very small tip of the bag with kitchen
shears, and pipe lines back and forth, and criss-cross onto the chocolate side of the sphere. Next pipe a heart shape, and fill in the heart.
Press the sprinkles lightly to ensure they are attached. Let set for 2-3
minutes.Notes
● While handling the spheres, wearing food safe gloves will help keep
them from melting, and also minimize your fingerprints on them.
● If you are having a hard time getting the two spheres to connect to each
other, you could pipe some extra melted wafers along the seam and dip
in sprinkles.
● To melt the sphere edges, you can either use heated plates, or a lightly
heated frying pan. I have used both, and both are equally effective.

If you like Hot Cocoa Bombs be sure to check out these Winter Themed Hot Chocolate Bombs and these Easy and Yummy Hot Chocolate Bombs Recipe!
Hi! I’m Nellie. I am an entrepreneur, a busy mama of 3 and a wife to my high school sweetheart. I have been sharing content for over 12 years about how to cook easy recipes, workout tips and free printables that make life a little bit easier. I have been featured in places like Yahoo, Buzzfeed, What To Expect, Mediavine, Niche Pursuits, HuffPost, BabyCenter, Mom 2.0, Mommy Nearest, Parade, Care.com, and more!
Get comfortable and be sure to come hang out with me on social. Don’t forget to grab your free fitness journal before you go!